HomeGroups: Home networking simplified
You know there is something wrong with the way Windows Networking works when people find it easer to just email the file to themselves — sending it thousands of kilometers around the world — than to just network it with a computer a few feet away!
In earlier versions of Windows it took quite a deal of effort and knowledge to figure out how to go about giving other people in a home network access to only the things you wanted to share, and keeping the others secure from prying eyes. With wireless networking it becomes incredibly easy for people to pry in without anyone finding out, especially if you were using an insecure password (usually the case).
With HomeGroups in Windows 7, Microsoft has adopted the “social model” of sharing content at home, which means:
- You keep your home secure from outsiders, however within the home everyone is trusted
- Rooms withing a home are usually unlocked, giving people free access to books, music, movies, etc. in any room
- We do keep some areas private, such as locked drawers or rooms
To adopt a similar model in home networking, Windows 7 introduces HomeGroups, where home network is locked from outsiders by the use of a strong password (1), all computers in the network are accessible easily and freely (2), each computer user can select what content they wish to share and what they wish to keep private (3).
While this was all possible before, with Windows 7 and HomeGroups it has been simplified to the extent that a computer novice can not only easily join a HomeGroup, but can easily create one as well.
Windows 7 walks you through creating and joining HomeGroups with a simple-to-use wizard, and it is a short walk indeed! In one step you can set up a HomeGroup for all other computers in your network to join, all you need to do is select all libraries and devices you wish to share in the first step of the HomeGroup creation wizard. The wizard will than take a couple of minutes to apply your settings, and generate a strong alphanumeric password for you to use to connect to that HomeGroup.
|
1
|
2
|
3
|
4
|
| If there are no HomeGroups present in your network, Windows 7 will offer to create one. | You can now select the Libraries and devices you want to share. | Wait while Windows does it’s thing. | And you’re done! The HomeGroup has been created. You should note this password as you will need to enter it for evey computer which joins the HomeGroup. |
Joining a HomeGroup is as simple. Any computer located in the same network as the one where a HomeGroup was created will see in their “Network and Sharing Center” that there are HomeGroups “Available to join”, and on visiting their HomeGroups location, they will be prompted to join the HomeGroup. On clicking on the “Join now” button you will be taken to a wizard which after a short number of steps will make you a part of your home network. Firstly, you will need to enter the password for the HomeGroup, this is the one which was generated while joining the HomeGroup. Next, you can choose the libraries and devices you wish to share on the HomeGroup. And it’s done! You are now part of the HomeGroup.
|
1
|
2
|
3
|
4
|
| Windows 7 detects if there are any HomeGroups created in your network and offers to join one if there is. | As in the HomeGroup creation procedure, you must select what all you wish to share from your computer. | Now you should enter the password that was generated on the host computer while creating the HomeGroup. And yes, capitalization matters! |
Congratulations! You have now joined the HomeGroup! |
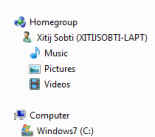
Accessing HomeGroups is also much simplified, as it is now easily accessible through the navigation pane in Explorer — which will list all the computers in the network, and will easily allow you to copy and view files from across the network.
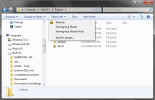
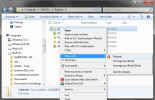
Controlling access to content is quite simple as well. The toolbar in explorer displays options which allow you to easily set access rights for any folder or library on your computer. You can set a folder / library private by setting it to be shared with “Nobody”, else you can set it as “HomeGroup (Read)” or “HomeGroup (Read/Write)” to share it with the home group as read-only and read-write respectively. You can also choose to share it with specific people using the “Specific people…” option.
This new feature is not without its thorns though. As a feature introduced in Windows 7, it is not available in any versions of Windows before it. So if you have Windows Vista, or Windows XP computers on your network, you cannot take advantage of HomeGroups.
Microsoft has also removed the facility to create HomeGroups from the Windows 7 Starter and Windows 7 Home Basic editions of Windows. This means that in a network where all computers are running Windows 7 Home Basic, you will be unable to use HomeGroups as no one will be able to create one! Such a scenario is highly likely in India, and is such an artificial limitation that it is almost silly. HomeGroups are specifically targeted towards home networks and yet, it is a feature which is watered down in the versions most likely to be found on home computers!


