Noctua NH-D9L Review Review : Noctua makes a cooler just the right size
So what do you say when a cooler comes very well packaged, has a wealth of accessories included, is easy to install, guarantees to provide for enough room to work around the CPU socket, performs well and is really as silent as advertised? Well, one thing is certain, it definitely fits the frame of how an ideal CPU cooler should be. But that’s where the fun while going for the NH-D9L ends as the price that Noctua asks for the cooler is a bit steep. But if you need a good performing D-type CPU air cooler that is also silent for your next small form-factor build, you should take a look at this one. If you don’t care about the twin-tower heatsink design, the other Noctua cooler i.e., the NH-U9S performs slightly better and is almost the same to this one in terms of the rest of the important parameters.
Not only is the segment getting popular, but it has also seen an increase in the variety of components available to quench the thirst for performance. All of this increase in demand for small form factor PC’s can be attested by the fact that small form factor components are quite big on performance these days. When you can build a powerful PC that’s almost half the size of regular ones and hide it anywhere, it surely becomes an interestingly viable option.
Over the course of time, we’ve tested plenty of coolers from both – the air and liquid cooling categories and coolers from Noctua have always stood out for their quality, performance and extreme silence. In fact, the Noctua NH-D15 is the best performing CPU air cooler that we’ve ever tested and it won our best performer award in the segment not too long ago. While the NH-D15 is a full-size air cooler with a huge heatsink, this time around, Noctua sent us their NH-D9L for review which belongs to their small form-factor range of CPU coolers. And so, according to Noctua, the NH-D9L is being marketed towards people building a silent small form-factor PC as it has a humble 95x95mm width and depth. So, let’s put Noctua’s new kid on the block to test and see how it fairs.
Unboxing and first look
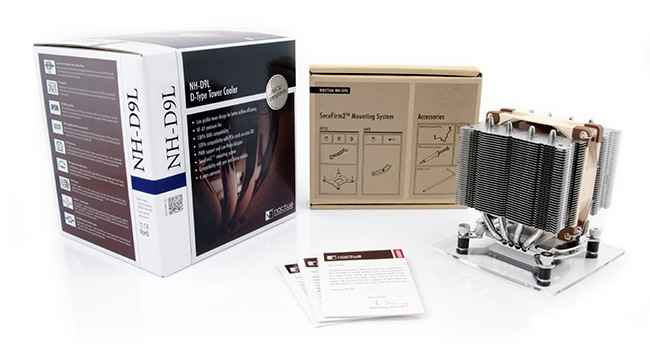
The NH-D9L comes packaged in a standard box which is reminiscent of Noctua’s usual cooler and fan packaging with their trademark cream and dark brown colours thrown into the mix. You’ll find all the main features of the cooler mentioned at the back along with a detailed specifications list.
We’ve always seen Noctua compartmentalising everything that they pack in a box for ease of use and with the NH-D9L, it wasn’t any different. Right after opening the box, you’ll find a smaller accessory box with illustrations of what’s inside. This accessory box for instance contains – the mounting backplate for Intel CPU’s along with screws, spacers and metal retention brackets all inside a packet labelled “Intel Set”. A similar packet is provided for mounting the cooler on AMD CPUs with a label saying “AMD Set”. It’s good to see that Noctua includes mounting hardware for every CPU socket currently available from Intel as well as AMD. Apart from that, they also include a tube of Noctua’s popular NT-H1 thermal paste. Then you have an extra set of fan mounting clips, a low-noise adapter and a Noctua case badge to sport on your computer cabinet. To make things easy, they bundle a screw driver with the accessories so that you don’t have to go hunting for the right one during installation.
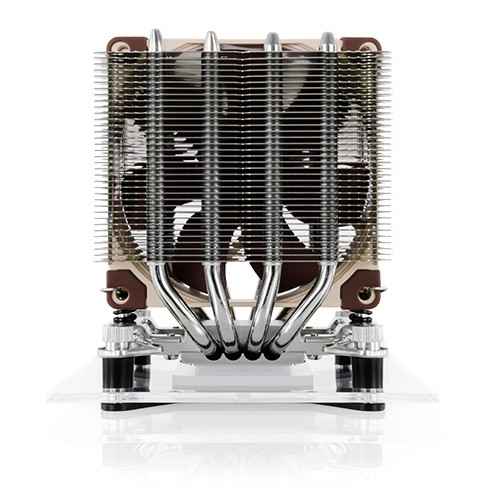
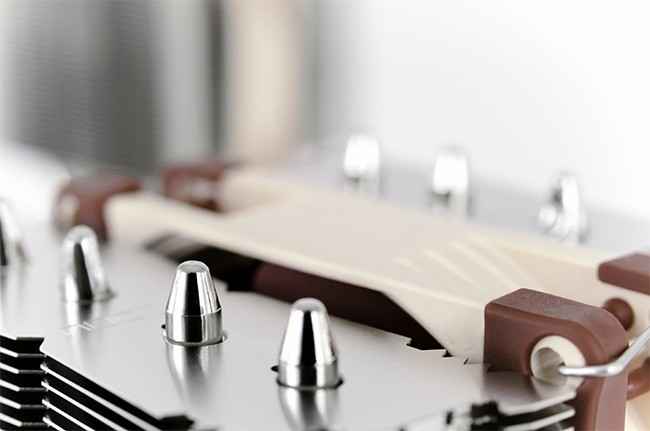
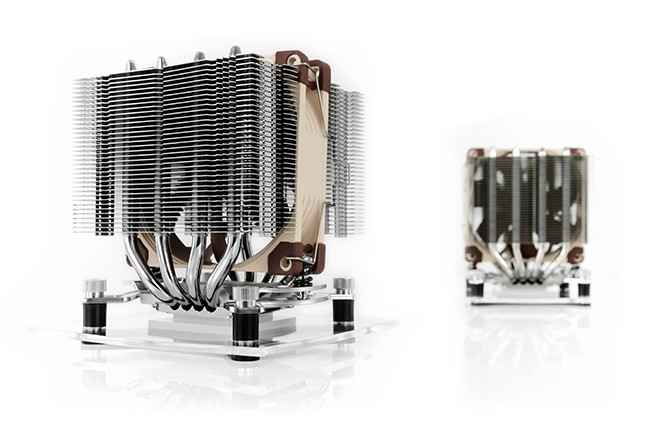
Moving on to the cooler itself, we must say that it comes very protectively packaged inside a cardboard box which is sandwiched between two thick pieces of cardboard. Opening it up we found that although the NH-D9L is a dual tower cooler, it’s really small as compared to other huge coolers available in the market. The heatsink comes pre-installed with the Noctua NF-A9 fan in the middle of the two towers. The NF-A9 fan that Noctua has used with this cooler can spin at a speed of up to 2000 RPM and you can lower this speed to about 1550 RPM if you use the bundled low-noise adapter. As for the heatpipes, there are four pipes that go through each tower making it essentially eight places for direct heat transfer and dissipation. The heatpipes go and get connected directly to the all copper, nickel-plated base which also has a mirror finish. This smooth mirror finish would help in making a perfect contact with the CPU in order to transfer heat more efficiently. In fact, the copper heatpipes are also nickel-plated and have that shiny metallic look to them which make the cooler look more appealing.
Installation or Mounting
We use a standard Intel LGA-1155 socket based setup for testing coolers and this is what we used to test the NH-D9L as well. For starters, the process of gathering all the required parts for cooler installation was extremely easy because of the labelling that Noctua uses for all the included accessories. Like most of the previous Noctua coolers that we tested, the NH-D9L also uses what they call their “SecuFirm 2” mounting system. This mounting technique has quite a lot in common with mounting techniques for other similar air coolers. It uses a backplate that needs to go in from the back of the motherboard, a set of four plastic spacers that need to be put on the extensions that come out from the front of the motherboard. Once you’ve attached the plastic spacers onto the extensions, you then need to install two mounting bars or front brackets and use four thumbscrews to lock these two brackets in place.
Depending on whether you want the NH-D9L to face the front of the case or the top, you can install the mounting bars accordingly. But no matter how you orient the cooler, you won’t run into trouble with RAM or PCI Express clearance. This is one of the major plus points of the NH-D9L D-type cooler. Noctua has designed it this way to make it much more easier for you to install other components around the CPU socket and avoid obstructions to other components. Moving ahead, you just need to use the included tube of Noctua’s NT-H1 thermal paste and apply the required amount on the CPU. In our case, we used the Arctic Silver 5 thermal paste as it’s a standard paste that we use for testing all CPU coolers. Now for mounting the heatsink itself, you need to start by removing the fan from the center of the heatsink and keeping it aside. The entire remaining process is straightforward as you just have to align the heatsink over the brackets, use the screws on the heatsink for attaching it to the mounting bars. and screw them on using the included screw driver. Once you’re done, you can go ahead and put the fan back at its place in the centre using its mounting clips and connect its power connector to the fan header on the motherboard. This would finish the installation process and we must say that it’s indeed simple to install, well not as simple as installing an Intel stock cooler but there are hardly any aftermarket coolers that are as simple to install anyway.
Testing and Performance Results
As we mentioned previously, we have a standard set of components that we use for testing the CPU coolers and they remain the same for testing air as well as liquid coolers. This makes easy for you to understand and gauge the performance difference between all the coolers that we test and then take a pick depending on your usage scenario. This also ensures a level playing field between all the coolers and prevents any cooler from getting an unfair advantage over the others. Also, we make use of a digital temperature monitor to keep the ambient room temperature in check in order to make for any corrections if there is any deviation from an ambient room temperature of 28°C.
Test Components
CPU: Intel Core i7 3770K;
Motherboard: ASRock Z77 Extreme 6;
RAM: Kingston HyperX 16GB (4GB x4 sticks) 1600MHz;
Storage: Intel X25-V 40GB SSD;
Power Supply: Antec VP650P;
Cabinet: Cooler Master HAF-XM;
Operating System: Windows 8
As for the testing software, we use Real Temp and HWMonitor to keep the idle and load CPU core temperatures in check and run Prime95 for stress testing the system and note down the readings. To take a note of the idle operating temperature, we first let the system run for at least 45 minutes to an hour in order to wait for the temperature to stabilize and then measure readings.
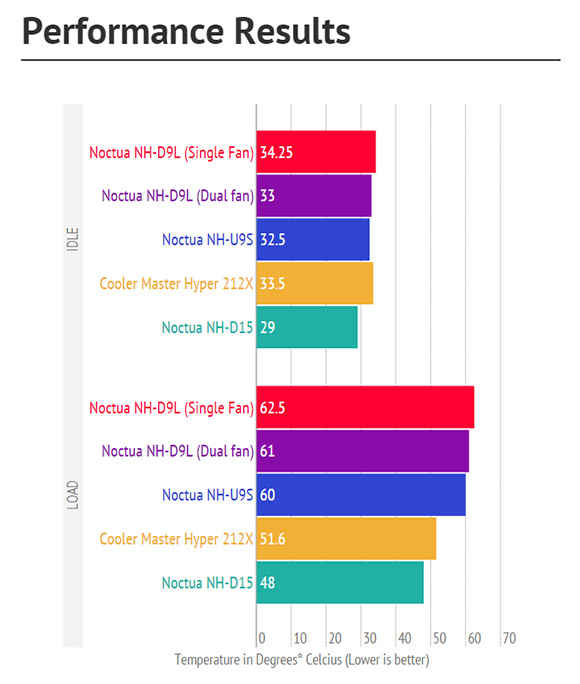
You must know that since the Noctua NH-D9L comes with only one fan, but supports installation of two fans, we also tested the cooler in a dual-fan based setup for posterity. So let’s take a look at how it fares against Noctua’s own NH-U9S which is a similar 92MM cooler. We’ve also shown results of two of our other favourite coolers (albeit full size ones) – the Cooler Master Hyper 212X and the Noctua NH-D15 so that you can see the difference between all of them.
Looking at the performance chart above, you can see that the Noctua NH-D9L manages to keep the Intel Core i7 3770K CPU at around 34°C in its default single fan configuration when the system is idle. Addition of another NF-A9 premium fan in a push-pull configuration lowers the idle temperature by 1.5~2°C. But the NH-D9L does well to maintain that temperature when the CPU is idle. As for the performance of the NH-D9L on full CPU load, we can see that Noctua’s own NH-U9S edges past it with a small margin of 2°C.
As for noise testing, we use a practical method to determine whether a cooler is noisy or silent. We do this by categorising the sound coming from a closed cabinet in three types: Silent, Dull Hum and Noisy. The categories are self explanatory because if we can’t hear a cooler at all from the outside of a closed cabinet, we give it a silent rating, if we hear a faint hum of the coolers fan(s) from the outside, it takes a small hit in points and if we perceive a cooler to be noisy, it of course takes a big hit in points in terms of noise testing performance.
Coming to the nitty gritty of noise performance, the Noctua NH-D9L was extremely silent under operation (at the fans full RPM) even at full load. Noctua’s NF-A9 premium fans are the one to be thanked for this as they provide almost virtually silent operation.
Conclusion
The current CPU cooler market is over saturated with a huge number of coolers available in plenty of different price segments but when it comes to coolers that are primed for small form-factor builds using Mini-ITX and Micro-ATX boards, there aren’t many good choices available. After all, a cooler for small builds has to have certain dimensions that make it not only fit a small PC case but also allow for enough room around it for other components. And trust us when we say this that we’ve experienced an insane number of CPU air coolers that didn’t provide for any sort of RAM and PCIe clearance. So much so that we had to sacrifice one or more RAM slots that are immediately adjacent to the CPU socket owing to the big-ass size of extravagant heatsinks. But the Noctua NH-D9L doesn’t give any of this unnecessary trouble.
Full Specifications
Socket compatibility: Intel LGA2011-0 & LGA2011-3 (Type Square ILM), LGA1156, LGA1155, LGA1150 & AMD AM2, AM2+, AM3, AM3+, FM1, FM2, FM2+ (backplate required);
Height (without fan): 110 mm;
Width (without fan): 95 mm;
Depth (without fan): 95 mm;
Height (with fan): 110 mm;
Width (with fan): 95 mm;
Depth (with fan): 95 mm;
Weight (without fan): 428 g;
Weight (with fan): 531 g;
Material: Copper (base and heat-pipes), aluminium (cooling fins), soldered joints & nickel plating;
Fan compatibility: 92x92x25 mm;
Bundled Contents: NF-A9 PWM premium fan;
Low-Noise Adaptor (L.N.A.);
NT-H1 high-grade thermal compound;
Mounting Kit;
Fan-clips for second NF-A9 fan;
Noctua Metal Case-Badge.
Fan specifications:
Model: Noctua NF-A9 PWM;
Bearing: SSO2;
Max. Rotational Speed (+/- 10%): 2000 RPM;
Max. Rotational Speed with L.N.A. (+/- 10%): 1550 RPM;
Min. Rotational Speed (PWM, +/-20%): 400 RPM;
Max. Airflow: 78,9 m³/h;
Max. Airflow with L.N.A.: 62,6 m³/h;
Max. Acoustical Noise: 22,8 dB(A);
Max. Acoustical Noise with L.N.A.: 16,3 dB(A);
Input Power: 1,2 W;
Voltage Range: 12 V;
MTBF: > 150.000 h
Warranty: 6 Years

