Cooler Master CK550 Review : Budget-friendly and durable
Cooler Master is targeting the entry-level mechanical keyboard market with the CK550. Currently flooded with rebranded or low-quality products, bigger brands haven’t really touched this segment. The CK550 is still priced slightly higher than the budget mechanical keyboards but it delivers build quality and the basic features you would expect on a mechanical keyboard. And the most important, it has two years of warranty. By using Gateron mechanical switches instead of Cherry MX, they have been able to keep the prices down. The keyboard is available in three switch variants including Red, Brown and Blue, similar to what Cherry offers. There are tiny nuances between them which will go unnoticed to the regular user. For now, the reputation of Gaterons has been quite reliable in the mechanical keyboard enthusiast community.
Apart from packing an impressive build quality at this price, Cooler Master is also offering hardware-based macro recording and lighting control. On top of that, you also get complete software support for the same functions through the Cooler Master Portal. At this price, the CK550 is a great choice for users who wish to buy a mechanical keyboard with a limited budget. It’s also an affordable option for local mechanical keyboard enthusiasts as a secondary keyboard who want to experience Gateron switches. The CK550 isn't the only keyboard in the CK series. At Computex 2018, we had also seen the CK530 which was the tenkeyless (TKL) version of the CK550. The CK530 is going to arrive soon in the local market.
Specifications
Keyboard size: Standard, Numpad included
Keyboard backlight: RGB LED
Switch type: Gateron Brown (50-million keystrokes)
Polling rate: 1,000 Hz (1 ms)
Interface: USB 2.0
Dimensions: Width – 44.1 cm, Depth – 132.5 cm, Height – 3.85 cm
Weight: 850 g
Cable length: 1.8 m
Features and accessories
It’s difficult to come across USB and audio pass-through ports in any keyboard other than premium ones in the 10k INR category. The CK550 wants to deliver all the essential features you’d need on a keyboard for your gaming and typing needs. So, they have chosen to not include any passthrough ports.
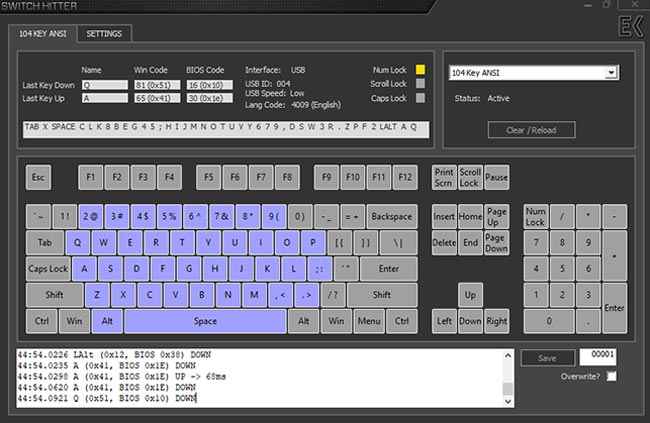
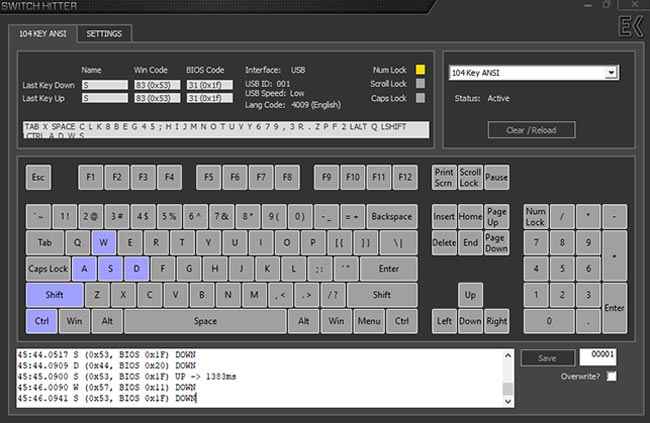
Full key rollover has been implemented on the keyboard. We verify this using Switch Hitter. This will comfortably handle all your gaming needs and it will be able to register every single keystroke even when pressed simultaneously. Most of the mechanical keyboards that we’ve tested at our labs come with full key rollover nowadays. It’s the same with this keyboard.
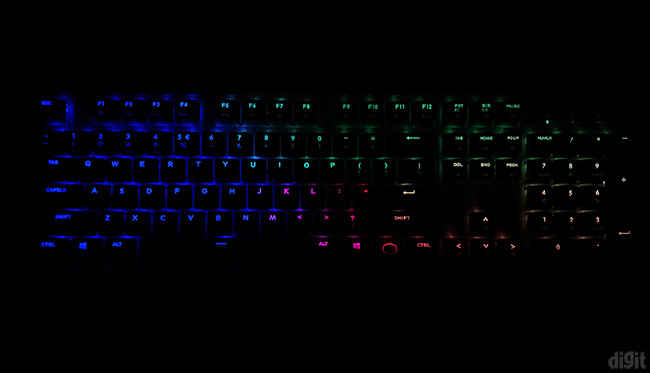
There aren’t any dedicated multimedia playback or volume control buttons. However, they can be controlled in combination with the Fn (Function) key. All the lighting modes can be changed with the Fn key. You can change the speed and direction of the lighting effects using the arrow keys with the Fn key. Without the software, the colours can also be changed right from the keyboard. Using the F2, F3 and F4 with the Fn key, you can play around with the levels of Red, Green and Blue to obtain and cycle through different colours. The keyboard doesn’t allow you to change the brightness level of the LEDs.
Most of the keyboards that brand themselves as “gaming” keyboards will always have a Windows lock functionality. This can be a lifesaver in certain games where you might have to press the left Ctrl and Alt keys repeatedly but accidentally press the Windows key. The CK550 does include this feature using the key combination of Fn + F9. When activated, the F9 key will light up Red when the Fn key is pressed. This will lock the Windows key. Cooler Master takes this a bit further. If you press the combination again, all the keys on the keyboard will be locked. To verify whether the second level has been activated, press the Fn key and you should see the F9 key light up in Green. Essentially, if you want to check which lock mode has been activated, press the Fn key and verify the light on the F9 key. To go back to the default state, press the combination again.
On-the-fly macro recording is difficult to spot on keyboards in this range. However, the CK550 has implemented it along with support for the same in the software. It’s useful only when the system you’re using doesn’t have the Cooler Master Portal installed. If you have it installed, we would recommend using the utility instead of beating your head with the key combinations. It’s a step-by-step process offering much better features rather than the onboard functionality. Cooler Master has already implemented reliable hardware-based macro recording earlier in their keyboards. The same has been continued yet again.
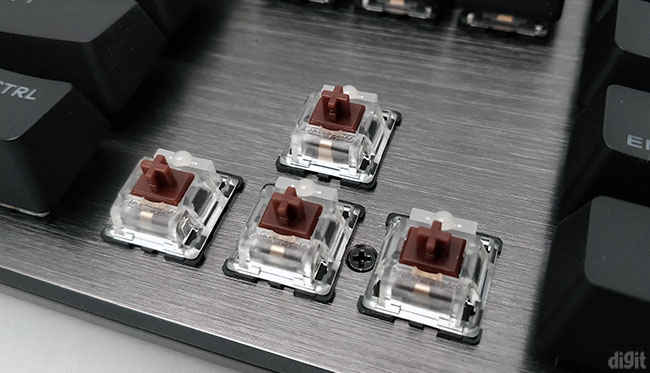
The CK550 uses Gateron mechanical switches instead of Cherry MX switches as seen on their MasterKeys lineup. It allows Cooler Master to keep the prices low in this series while still maintaining good build quality in the rest of the keyboard. This is the first time we got to experience Gateron switches and our review unit had the Gateron Browns. Apart from Cherry MX Browns, the only other MX-compatible and Brown equivalent switch we’ve tried is the Kailh Brown on the ASUS Cerberus Mech RGB. The Kailh Brown felt heavier than the Cherry MX Brown. However, there wasn’t much of a difference between the Gateron Brown and the Cherry MX Brown. On close inspection, we noticed a slightly higher bump compared to Cherry, essentially, a higher actuation point somewhere before 2mm. MX switches have an actuation point at 2mm.
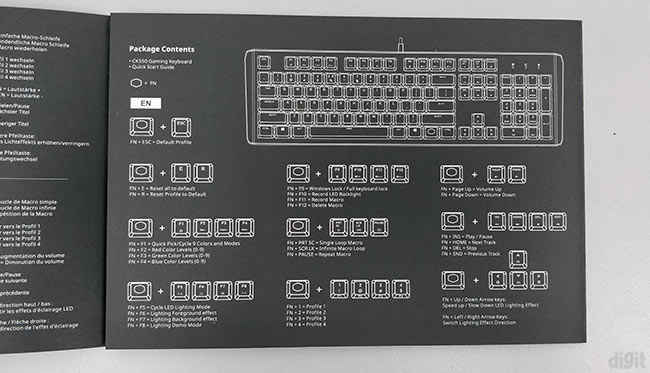
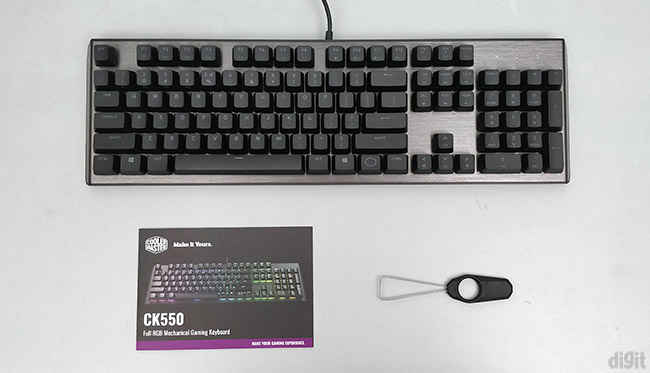
Apart from the instruction manual, the Cooler Master CK500 comes with a metal keycap puller inside the box. Since the keyboard supports a long list of onboard functions, there’s a lot of important information in the instruction manual. All the key combinations and related actions have been illustrated well for anyone to understand them.
Extra keycaps don’t really matter, especially at this price range and CK550 doesn’t include any. If you’re going to buy a mechanical keyboard, a keycap puller is a must. At some point, you’re going to clean your keyboard and having a keycap puller is convenient. It also prevents any damage to the mechanical switch stems while you’re removing the keycaps. The package doesn’t ship with a wrist rest which is convenient for some while typing. However, we do understand it would have been an added cost if it was included.
Build quality and design
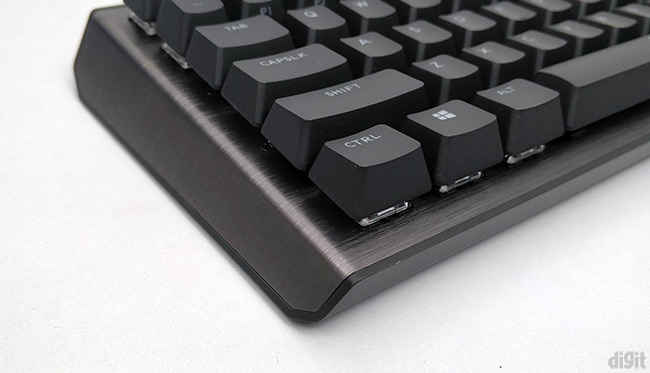
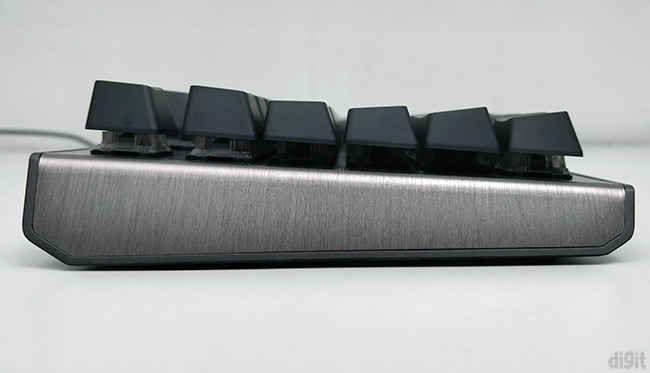
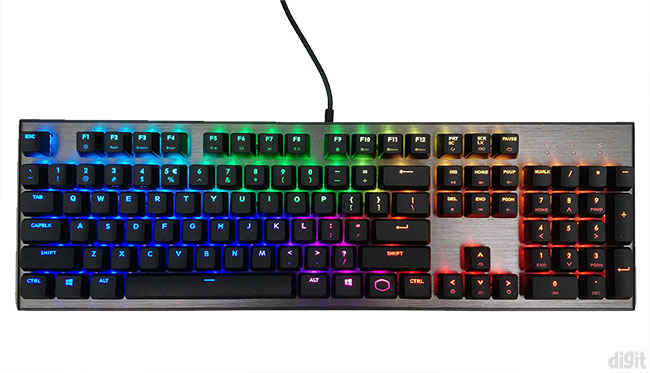
Cooler Master’s MasterKeys lineup had a minimalistic design approach continuing from their older Quick Fire lineup. With the CK series, they are changing the design completely. They are distancing themselves from the rectangular-boxed design to a more angled and sloped design on the chassis. Instead of using plastic majorly in the body, only the bottom part of the chassis uses plastic. The top has a brushed aluminium plate giving it a premium feel as seen on premium Corsair keyboards. This also makes the keyboard sturdy and removes any form of flex.
Two variants currently are available in the market under the CK series. The CK550 is available worldwide except for two countries – Australia and the US. In these two countries, a different variant, CK552, is available. From their product pages, the only noticeable differences are the colour variant and switch availability. The CK550 has a gunmetal black finish whereas the CK552 has a midnight black finish. Gateron Brown, Blue and Red switch variants are listed under the CK550 while the CK552 only lists Reds.
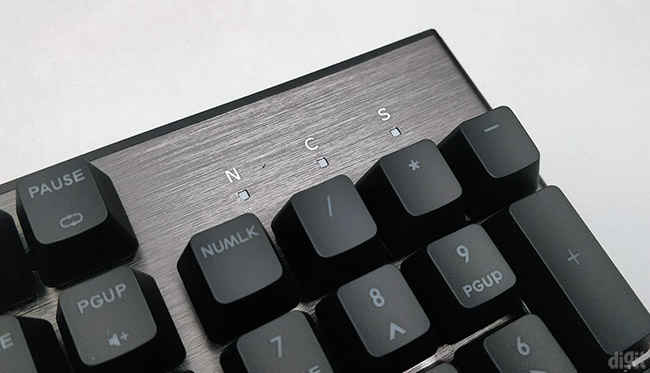
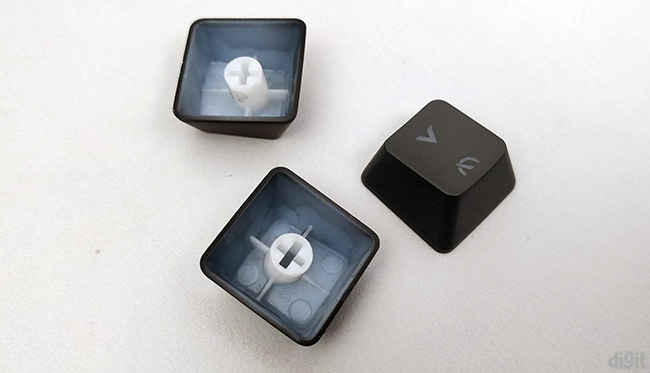
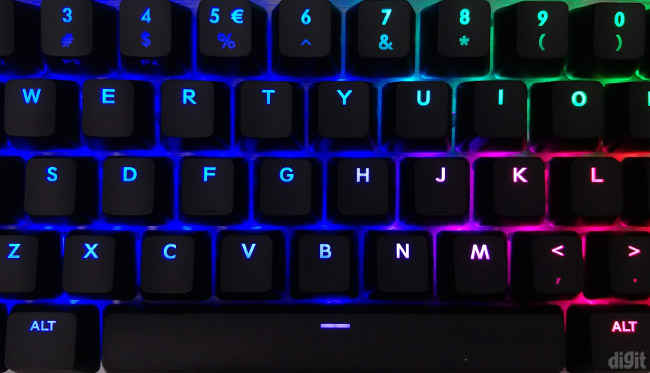
It has a floating key design, so the mechanical switches are exposed and sitting on the aluminium plate. When the keyboard is connected, the illumination looks brilliant as it spreads below the keycaps. Speaking of the keycaps, they are made of ABS plastic with the legends laser-etched on them. They fit quite well on the switches with a slight wobble but not to the extent that they feel loose. We generally test the fit of keycaps by flicking them to check whether they pop out easily. Nothing of that sort occurred on the keyboard. This is probably because of the dense stem on the keycap. ABS plastic keycaps are quite common on keyboards and if you want better durability, you can opt for third-party PBT keycaps later.
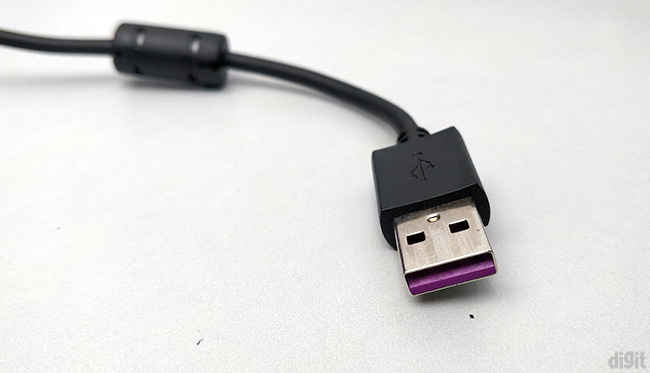
The CK550 uses a plastic-cover cable without any form of braiding. Although braiding offers protection, tightly braided cables sacrifice on flexibility. The cable on the CK550 is thin and quite flexible. It’s undetachable and has a ferrite bead near the connector. There’s no gold-plating on the USB connector.
As already mentioned, this is our first experience with Gateron switches. Without any equipment to determine the actuation force on these switches, we can’t measure the consistency of all the switches. Nor is it possible to actually go through a test process to determine their durability. They are rated to be on par with Cherry mechanical switches, claiming a durability of 50 million keystrokes. Only time will tell whether this claim holds true. However, they are quite smooth and don’t feel poorly made. From a subjective point of view, we didn’t notice any considerable difference in how all the keys felt while pressing them. They claim to have an actuation force of 45 cN which is the same as seen on Cherry MX Browns.
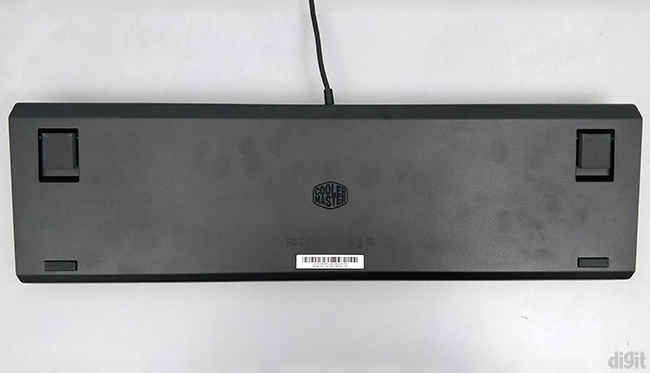
On the bottom, there’s a plain plastic panel with the Cooler Master logo at the center. This is the only location where they have added their full logo on the keyboard. They haven’t included any sort of branding on the top aluminium plate. Only the Fn has the minimal Cooler Master logo without the text.
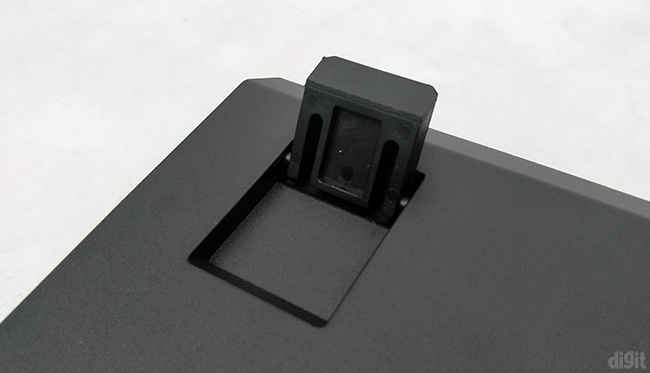
Rubber padding has been added to the extendable feet on the bottom. The entire bottom surface of the two extendable feet is lined with rubber. So, when the keyboard lies flat on a surface, they provide the necessary friction to prevent slipping along with the other two rubber pads at the top. This is a nice design approach that eliminates the use of extra rubber pads whenever the keyboard is placed flat.
Cooler Master Portal
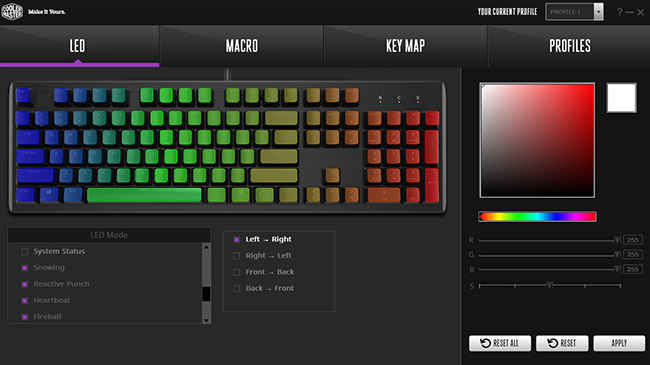
Previously, if you wanted to control the lighting on any Cooler Master keyboard or mouse, you would have to download the product-specific utility software. This has been changed and now all your Cooler Master products can be controlled using Cooler Master Portal. When your device is connected, you can install the necessary firmware updates and jump right into the keyboard controls. It’s divided into four tabs including LEDs, Macro, Key Map and Profiles.
Under LEDs, you can browse through all the various lighting effects supported by the software and the keyboard. Either you can cycle through them or individually change the lighting on every key using the Custom mode. There are more than 15 different lighting effects where some of them can be further customised in terms of directions and colours. However, if you wish to change the speed of the transition of the effects, then you will have to use the hardware controls on the keyboard. Another thing to keep in mind is that when the software is running, you won’t be able to use the hardware controls. Out of all the lighting effects, the most interesting we found was Multi-Zone and System Status. In Multi-Zone, you can select keys individually or zones and apply up to four lighting effects. There are two options under System Status including Equaliser and CPU loading. The Equaliser mode will simulate a visualiser on the keyboard and react according to the music playing. When CPU loading is selected, the CPU usage graph as seen in the Task Manager will be simulated on the keyboard. Once you’re satisfied with the desired effect, hit “Apply” and it will be saved and stored to the keyboard. We were disappointed to not find any control over the brightness of the backlighting. At times when you’re using the keyboard in the dark and find the lights a little too bright, there’s no way you can change the brightness levels. We believe this can be implemented later in the utility software and hope a future update includes this feature.
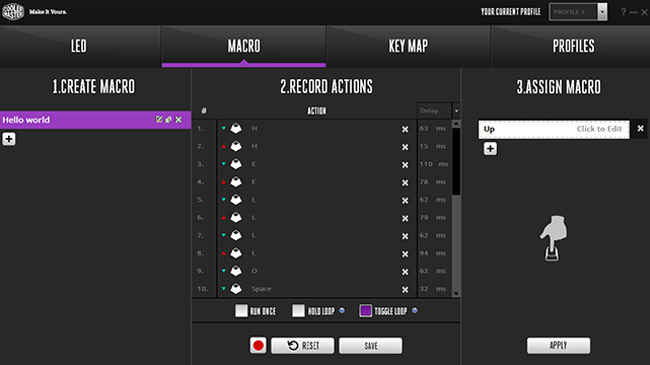
Recording macros on the CK550 is an easy process. It’s broken down into three steps beginning with naming your new macro. In the next step, you’ll be recording your keystrokes and/or mouse clicks, whatever is required. You have three options on how you want your macros to run. Either your macro will run once after you press the assigned key or it would keep on looping while the key is pressed or it could be a toggle where the loop keeps running until you press the key again. Having extra options is always welcome so that it can accommodate more games and playstyles. After you save your macro keystrokes, it’s time to assign that macro to a specific key. Hit Apply and you’re done.
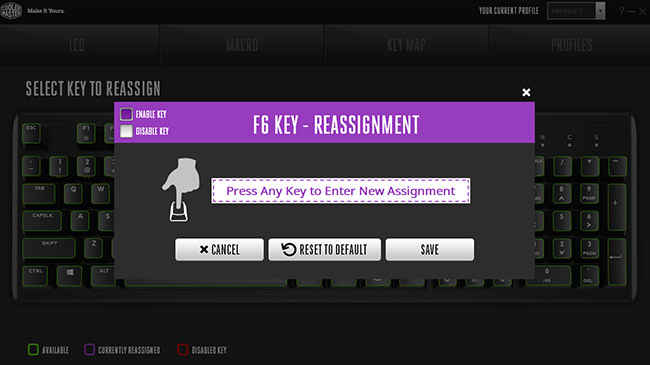
The third tab allows you to reassign keys with a different key function. You can also disable keys here. If you’ve already assigned macros to certain keys, then it will be highlighted here. This is where you can build your gaming profile by disabling more than just the Windows key if you wish.
Finally, the last tab is where you can view all your different profiles. You can save up to four profiles and switch between either from the software or right from the keyboard marked as P1, P2, P3 and P4. You can also export and import the profiles, in case you end up creating more than four profiles. Do note that when you’re customising the keyboard, you have to select the profile first and then continue saving them. Usually, we would prefer selecting the profile first and then continue making the necessary customisations. However, there’s a profile selection drop-down menu on the top right regardless of the tab you’re browsing. The last tab is where you will be exporting or importing your profiles or switching back to the default setting.
Overall, the Cooler Master Portal has a simple interface. All the lighting controls are available in a scrollable menu. Even recording macros was a walk in the park.
Gaming and typing performance
If you’re a fan of linear switches but with an inclination towards a tactile feel, then you will enjoy gaming on the Cooler Master CK550. For a real-world experience, we use the keyboards for review as our daily driver for at least a week in all sorts of use-cases that heavily revolves around gaming and typing. We played several games with the keyboard across different genres. FPS gamers will feel at home because of the partially linear nature of the switches. If you aren’t fond of it, then the CK550 comes in other variants of Red and Blue switches by Gateron. With full key rollover implemented in the keyboard, all our keystrokes were registered. This allowed us to simultaneously move around while hitting other functions like crouching or sprinting. Even when you press the WASD keys simultaneously, all of the keystrokes will be registered.
Hardware-based macro recording is a little limited, especially for MOBA games if you’re an experienced player. From the keyboard, you won’t be able to add mouse functions but you will be able to implement basic key binds. Advanced macro recording can be added using the Cooler Master Portal utility. This will take care of intermediate MOBA gamers whose life depends on macros. Do note, there aren’t any extra keys, so those macros have to been reassigned to existing keys.
At our labs, the choice of switch feel is almost balanced between linear and tactile switches. Popularly, tactile switches are preferred by typists because of the satisfying bump. On linear switches, you don’t get the tactile feedback when you’ve activated a keystroke. We didn’t have trouble typing on the CK550 and the longer keycaps like the Spacebar, Shift and Enter didn’t feel too wobbly nor did they have any annoying noise when pressed rapidly during a typing session.
Abhijit Dey
A Star Wars fan and sci-fi enthusiast. When I'm not playing games on my PC, I usually lurk around the Internet, mostly on Reddit. View Full Profile

