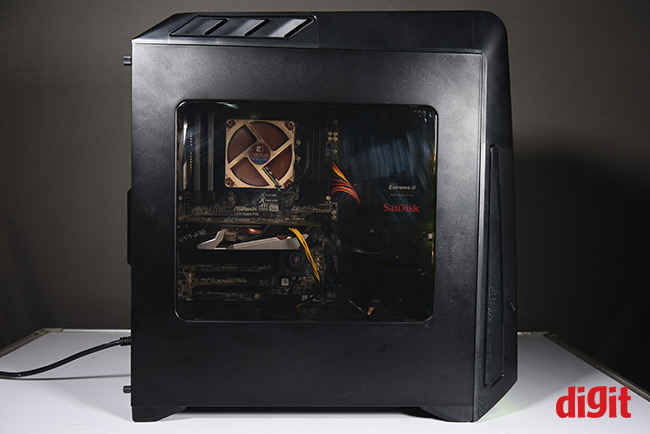
Antec GX1200 Review : Almost the best implementation of a fan/LED hub
The Antec GX1200 serves as a good gaming cabinet for mid-range users. The absence of support for 140mm fans might be a bummer for few enthusiasts but the cabinet does support up to 360mm radiators on the front panel and 240mm radiators on the top. Another limitation of the cabinet is the low number of drive bays which is restricted to two 3.5-inch HDDs trays and three 2.5-inch SSDs trays. Other than these shortcomings, the "magic box" or the fan and LED hub is the only feature that stands out in the cabinet, giving you control over fan speed and lighting modes. The dedicated button on the front IO panel lets you cycle through the seven colors on the two fans and light strip on the bottom. The GX1200 sells for around ₹7,400/- on online stores and if budget is an issue then you can definitely go with this cabinet in this price segment. If you’re an enthusiast and plan on building a powerful rig, we would recommend you to spend some more and get the Thermaltake Core V51 instead.
Specifications
Motherboard form factor: ATX, Micro-ATX, and Mini-ITX
PSU form factor: ATX standard (max. length of 225mm)
Front I/O: 2 x USB 3.0, Mic in and Audio Out, LED control
Drive options: 2 x 3.5-inch HDD, 3 x 2.5-inch SSD
Fan support: 3 x 120mm (front), 2 x 120mm (top), 1 x 120mm (rear), 1 x 120mm (PSU shroud)
Radiator support: 360mm (front), 240mm (top), 120mm (rear)
Test Rig
Motherboard: ASRock X79 Extreme9
CPU: Intel Core i7-4960X
GPU: Sapphire Radeon HD 7790
RAM: Corsair Dominator 2x8GB DDR3 (16GB)
HDD: WD Red 2TB
SSD: Sandisk Extreme II (240GB)
PSU: Antec HCP-1000 Platinum
CPU Cooler: Noctua NH-L9x65
Design
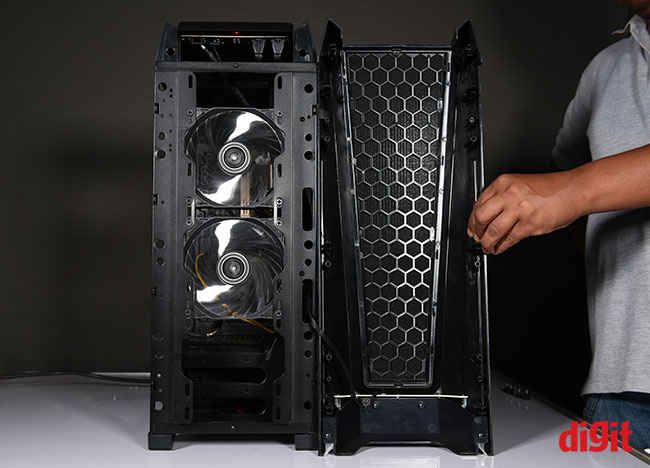
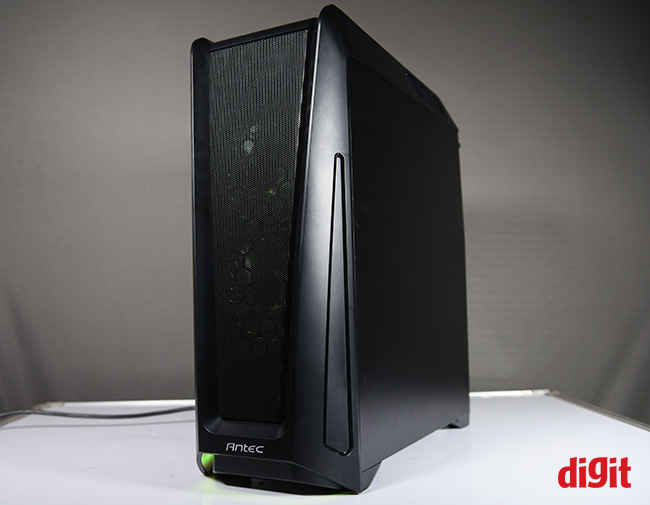
The GX1200 has a meshed top and front panel. This ensures an enormous potential to air circulation throughout the cabinet. It’s capable of supporting radiators of different sizes, making it suitable for upgrades in the future. The cabinet body is rigid and the side panels don’t flex too much. The front panel can be easily removed by pulling it off from the bottom after loosening the grooves on the inside. The same goes for the top panel. There aren’t any dust filters on any panel, you’ll only find one at the bottom of the cabinet, below the PSU. The front IO panel has two ports for audio and mic, LED mode control button, power button, and two USB 3.0 ports.
On the inside, the front panel has a thin layer of padding that can act as a dust filter to an extent. Both the panels can be removed to get access to the fan mounts. This way you can easily install the fans on the radiators even after you’ve installed the motherboard. The front panel supports radiators of up to 360mm in length and a maximum of three 120mm fans. The top panel can support a 240mm radiator whereas two 120mm fans can also be attached. There’s enough clearance between the top panel and the motherboard to comfortably attach a radiator on the top. The cabinet has no support for 140mm fans.
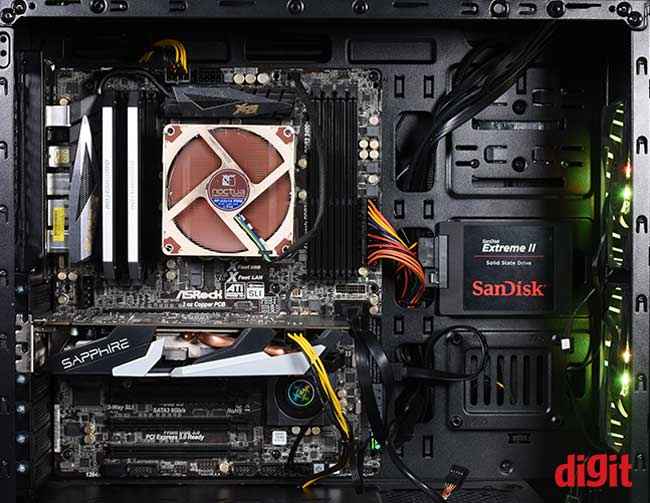
You can attach two SSDs on the motherboard side of the cabinet whereas there’s another mount on the back of the motherboard plate. The PSU shroud takes care of all the excess cable and also sports a 120mm fan mount on the top. Underneath the PSU shroud, you can insert two HDDs using a tool-less mount.
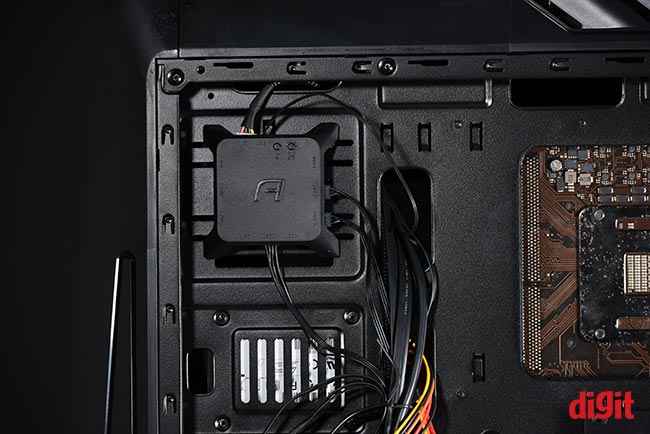
The highlighted feature of this cabinet is the fan and LED hub or “Magic Box” as they are calling it. You can attach a maximum of six fans and three LEDs. The hub also includes two buttons to toggle between three different fan speeds and cycle through the lighting modes of the LEDs attached. The LED cycle button does the same function as the button the front IO panel.
Assembly and cable management
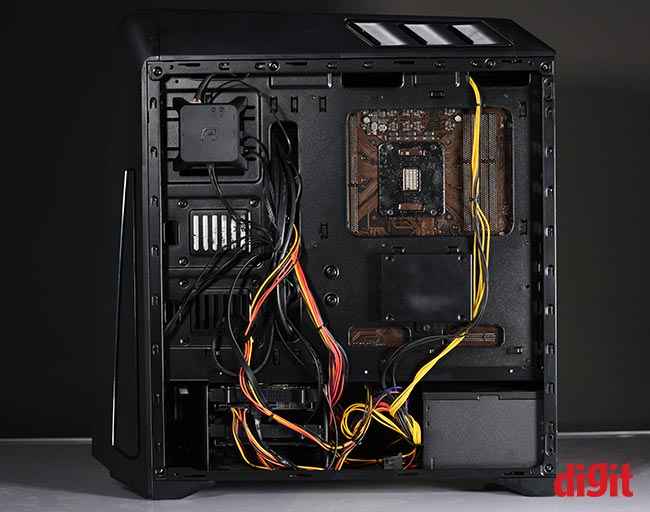
Assembling the components wasn’t much of a problem since we didn’t come across any glaring obstacles. The position of the fan hub is perfect since it doesn’t get in the way when you’re trying to route the cables through the cutouts. The only time we struggled was while connecting the SATA cables to the SSD installed on one of the two mounts on the inside. Since the cutout is too close to the SATA ports on the motherboard, the cables develop an unnecessary loop that has to be tied down. The cables coming from the PSU don’t need to pass through any cutout since the entire PSU shroud on the other side is open. This prevented the 24-pin motherboard power cable from forming a thick bundle at the middle. If you have just one SSD, it would be better to install it in the mount behind the motherboard plate only for easier cable management. The extra cables can be hidden under the PSU shroud and the small space between the shroud and the front panel.
Temperature performance
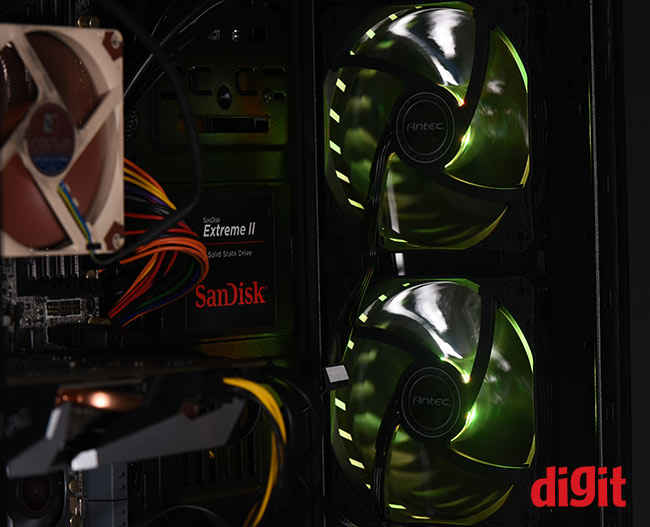
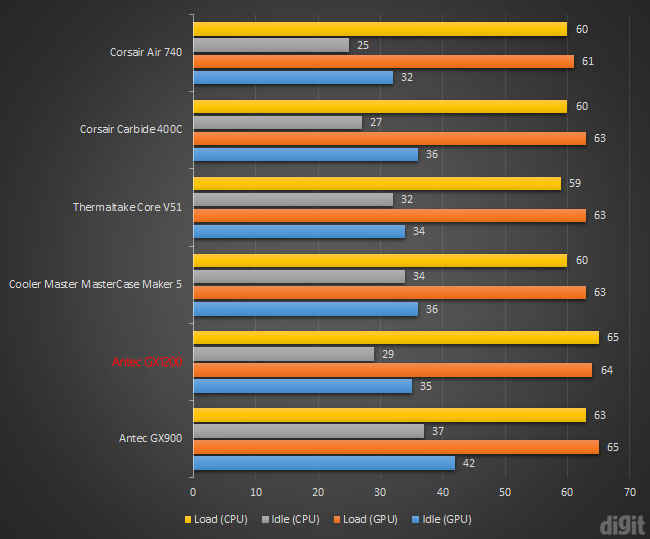
The GX1200 ships with two 120mm fans on the front panel. We test cabinets in their default factory setting with the included fans. Usually, three fans are included – two of them acting as intake whereas the third one acts as an exhaust. We’ve received cabinets earlier with just one intake at the front and just one fan in the rear as exhaust. In this case, the two fans only provide intake and the cabinet would have run a little cooler if there was an exhaust fan at the rear or on the top.
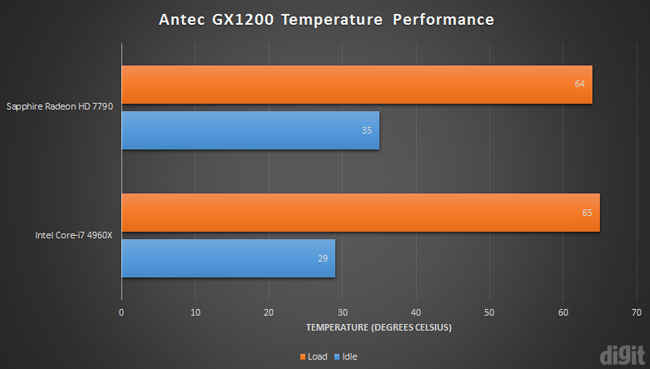
Our stress test starts off with keeping our test rig idle for 30 minutes with no background processes running. Next, we fire up Prime95 in the default setting for 15 minutes and note down the temperature through Speccy. The Intel Core i7-4960X lingered around the 65 degrees mark running on full load. Our GPU test includes FurMark’s 1080p preset benchmark with burn-in switched off. At the end of the benchmark, the Sapphire Radeon HD 7790 touched a maximum temperature of 64 degrees Celsius.
Final thoughts: Antec GX1200
The GX1200 serves as a good gaming cabinet for mid-range users. The absence of support for 140mm fans might be a bummer for few enthusiasts but the cabinet does support up to 360mm radiators on the front panel and 240mm radiators on the top. Another limitation of the cabinet is the low number of drive bays. You only have two trays for 3.5-inch HDDs and three trays for 2.5-inch SSDs. Users who already own several drives or plan on buying more storage drives might face problems in the future.
Other than these shortcomings, the magic box is the only feature that stands out in the cabinet. It’s great to have support for six fans since the motherboard usually leaves out one or two spare ports for cabinet fans. The fan hub also gives you control over the fan speeds, but in order to toggle between the fan speeds, you’ll need to open the side window panel every time. A dedicated button on the front IO panel would have been great, just like the light control button. The light control lets you cycle through the seven colors on the two fans and light strip on the bottom.
The Antec GX1200 sells for around ₹7,400/- on online stores. If you’re an enthusiast and plan on building a system, we would recommend you to spend some more and get the Core V51 instead. It has immense potential for air and liquid cooling support. If budget is an issue then you can definitely go with the GX1200 in this price segment.
Abhijit Dey
A Star Wars fan and sci-fi enthusiast. When I'm not playing games on my PC, I usually lurk around the Internet, mostly on Reddit. View Full Profile

