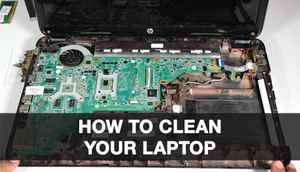
Are you fed up with the slow performance of your laptop? Is your laptop over heating so much that you’re unable to work? Do you want your laptop to work the way it used to when it was brand new? It’s time for you to do some laptop maintenance. Your laptop, after many months of use might be filled with dust and that dust clogs the ventilation resulting in your device overheating and showing a reduction in performance.
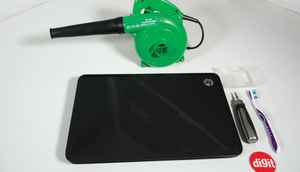
Requirements:
Brush - A soft strength and medium strength brush is apt for dusting components within your laptop.
Screwdriver set - Your laptop might use Torx, Philips or the regular (-) screws. Get the right set of screwdrivers.
Blower - Using a blower over a brush will help you save time and be reduces the chances of damage to SMT components.
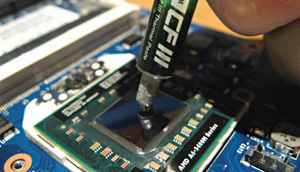
Thermal Paste - A new tube of thermal paste will be needed while reseating the processor, we had a Thermalright CF III lying around so it was used in the process.
Tissue Paper - You need to use the tissue paper to wipe off the old thermal paste on your heatsink.
Acetone - Using Acetone can help you wipe the thermal paste.
STEP 1:
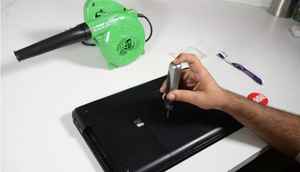
Here are all the basic requirements for the job. Which are already mentioned above, we have used an HP Laptop and the process may vary depending on the model of your laptop. Make sure you wear a static band while handling the internals to avoid static discharge.
STEP 2:
Start by referring to your laptop’s manual or watch disassembly videos for your laptop to get familiar with the process. Unscrew whichever screws are mentioned by the manual and then slide the plastic covering which will allow you to open your laptop.
STEP 3:
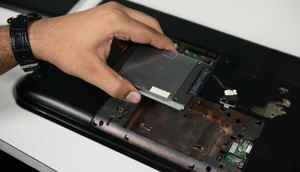
Remove the cable which is connecting your hard drive to your laptop as shown in the picture. Be careful and gentle with the wiring as it is very delicate in strength and try to pull the wire using the black plastic strip which is attached to the connector. It should pop out easily.
STEP 4:
When removing the hard drive make sure you are careful. Hard drives are prone to damage from physical shock and the same can be said for every other component. But when your precious data is at stake you know it’s best to be as careful as you can be.
STEP 5:
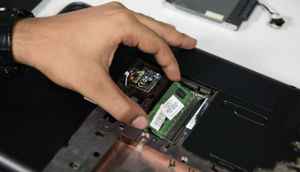
When you want to remove your RAM the easiest way is by unlocking the clips from both sides of the module and then when the RAM pops out from its position just remove it. Your laptop might have one or two modules situated one above the other. Remove both.
STEP 6:
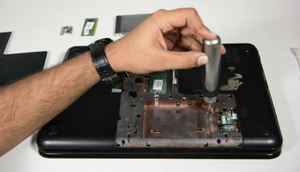
Unscrew your Wireless/Bluetooth Chip and gently remove it, make sure you remove the cables marked 1 and 2 carefully and remember which cable fits on which side. Remember to reconnect them during reassembly as these are the antennae for your Wi-Fi / Bluetooth.
STEP 7:
Remove all screws on board and make sure you remember the specific screws and where the exact one fits as you might end up putting the wrong screws and destroying the threads in the plastic screw slots of your laptop.
STEP 8:
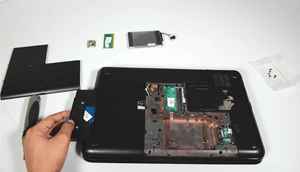
When all the screws are removed, take out the DVD drive which is attached to your laptop. In this case we have an extra hard disk attached to the laptop in the multibay slot. So just slide it gently and it should pop out.
STEP 9:
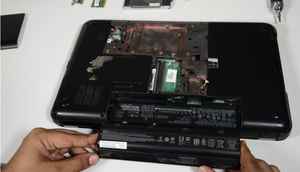
Once you’ve taken out the hard drives and plastic panels you might come across more screws. Remove these as well. Be careful and don’t remove screws that are not required for moving to the next step as you might cause damage.
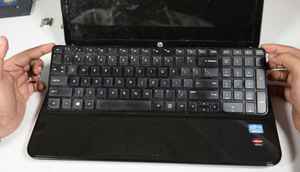
STEP 10:
Using any sharp plastic object like a guitar pick or plastic card and slide it in the slit between the keyboard and the chassis. The keyboard should pop out easily. You might have to slide the keyboard upwards or downwards.
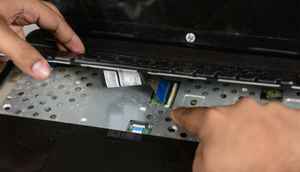
STEP 11:
Unplug your keyboard from the base. Handle the Flat Ribbon Cable (FRC) with caution, just refer to your laptop manual to find out the socket mechanism and then try to remove the FRC. Also, remove the FRC which is connected to your touchpad and power button.
STEP 12:
Remove all the screws on board and make sure the frame is not held by any of them because if you miss even one screw and try popping the chassic, the cumulative stress on the plastic frame might just rip it straight out. So that’s another thing to be careful about.
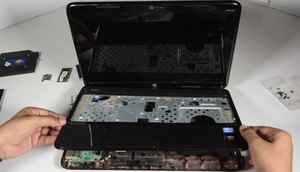
STEP 13:
Using the plastic card start removing the plastic casing of the laptop, this will help you unhook the sockets which are holding the frame and then make sure you are not damaging any plastic component of the casing as it will not fit properly if any of it gets broken.
STEP 14:
Once the casing is removed look for possible wires and FRC attached to the motherboard and remove them, you will possibly find one connecting your screen, connecting your USB 2.0 Hub and the charging point. Additionally, there might be other cables as well.
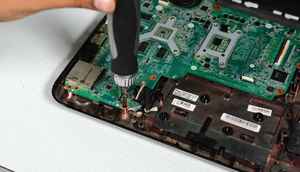
STEP 15:
Remove all the screws which is holding your motherboard to the frame and gently unscrew it. After all the screws are removed gently pull the motherboard and carefully slide it to the side which will help you remove the sockets from the plastic casing.
STEP 16:
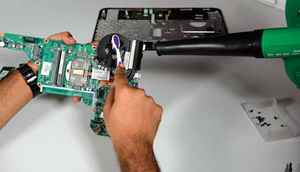
Holding the motherboard in your hands gently blow air on the fan and make sure you are holding the fan blades gently with your finger so as to not have it rotate violently. If the accumulated dust is a little thick or tough, switch to a medium brush and dust it off.
STEP 17:
Now disconnect the cooling fan and proceed to remove the copper heatsink. If you have a discrete GPU then the heatsink might be covering the GPU as well. Don’t bend the heatsink while removing it and see if it uses thermal pads of thermal paste.
STEP 18:
Clean the thermal paste on the heatsink with a tissue and use acetone if necessary. Apply a rice grain’s equivalent of thermal paste and then reseat the heatsink. Put the screws back alternately while maintaining equal pressure. Reassemble your laptop.