Fractal Design Define R6 Review : Silent and sturdy
The Fractal Design Define R6 tries to find a middle-ground between silent performance and cooling performance. In order to eliminate the noise, the front, top and motherboard side panel are lined with a dampening layer. However, don’t expect a completely silent case since the noise will anyway come out of the case from the tempered glass side panel. The front panel has a reversible door to give you access to the fan grill with a dust filter and the 5.25-inch ODD slot. On the top, you have a cover that can be easily removed with the push of a button on the rear of the case. The solid cover consists of a grill and dust filter as well that can be separated from the solid cover and attached back for ventilation on the top.
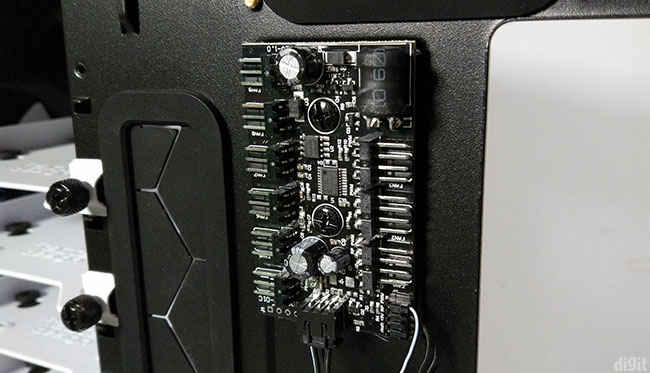
The Define R6 has massive support for fans and radiators throughout the case. To ensure you don’t fall short of going all out with nine fans across the case, Fractal Design has shipped a fan hub at the back. The Nexus+ Smart Hub lets you connect up to six case fans and three PWM devices or fans. Apart from an above average cooling performance, the Define R6 has an incredible build quality and delivers all the expected features at this price range. However, they miss out on including a USB Type-C connector on the front IO ports. With an amazing potential for future upgrades inside, this could definitely be a case you can consider for your high-end rig.
Packaging and accessories
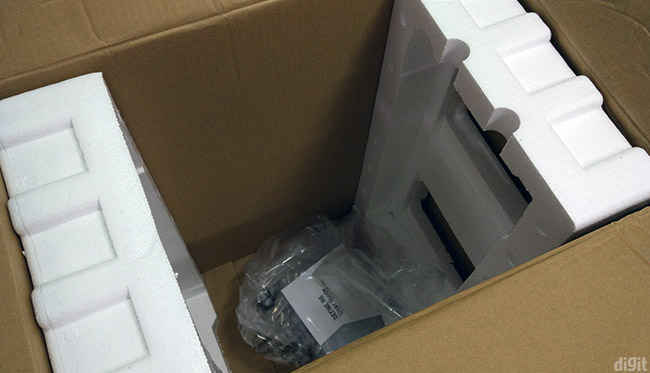
Packed inside some sturdy styrofoam, we didn’t notice any damage in our unit. This styrofoam is better than the one we saw with the Jonsbo C4 which was softer but did the job. Since tempered glass is included, we always expect sturdy packaging in these high-end cases.
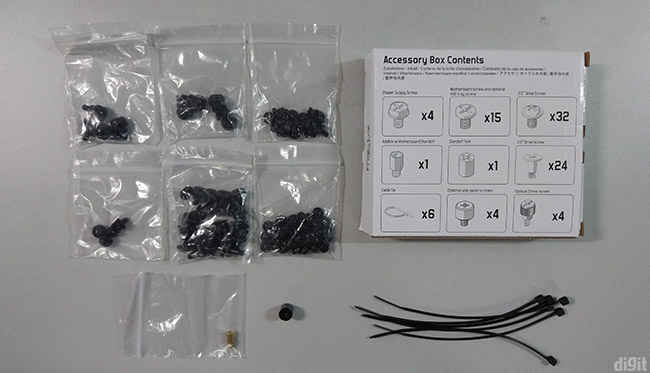
Apart from the manual, the case consists of a neatly labelled box of screws. Behind the box, all the screws are properly illustrated including the number of screws included. This is quite helpful if you’re always confused about which screw goes where.
Technical specifications
Motherboard form factor: Mini-ITX, Micro-ATX, ATX
Power supply standard: ATX standard (max. length of 300mm)
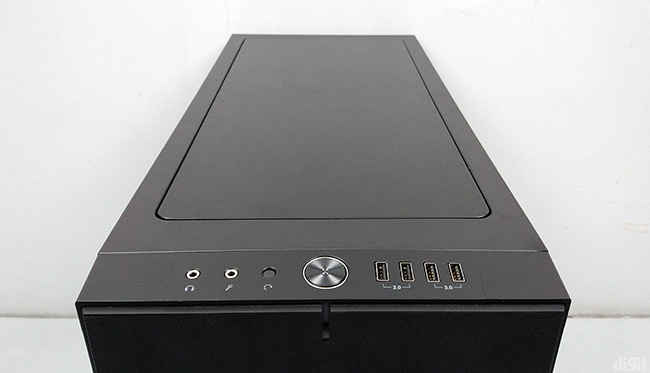
I/O ports: 2x USB 3.0, 2x USB 3.0, 1x microphone, 1x headphone
Drive bays: 6 x 3.5-inch HDD, 2 x 2.5-inch SSD
Cooling support: 3 x 120mm (front), 2 x 140mm (front), 3 x 120/140mm (top), 1 x 120/140mm (rear), 2 x 120/140mm (bottom)
Radiator support: Up to 280/360mm (front), up to 360/420mm (top), up to 120mm (rear), up to 240/280mm (bottom)
Clearances: CPU cooler – 185mm, Graphics card – 440mm
Dimensions (H x W x D): 465mm x 234mm x 536mm
Exteriors of the Fractal Design Define R6
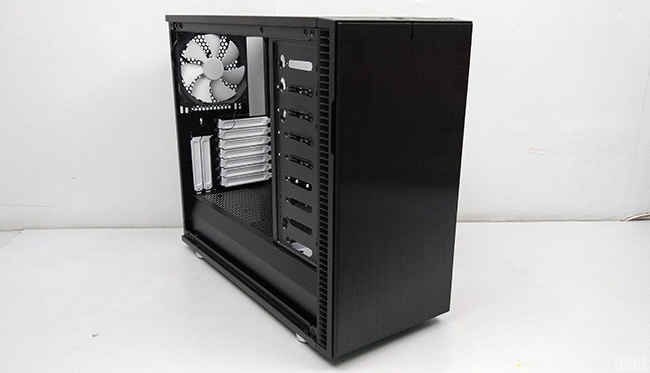
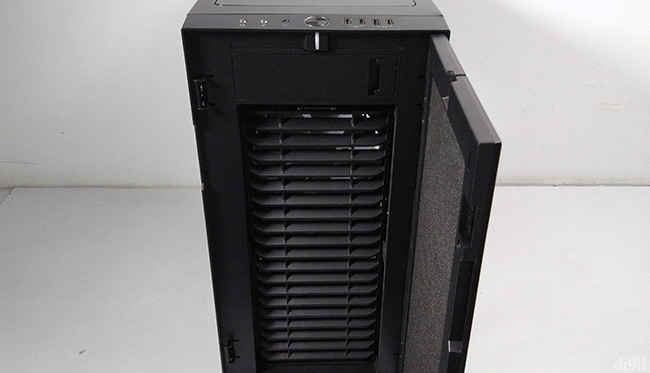
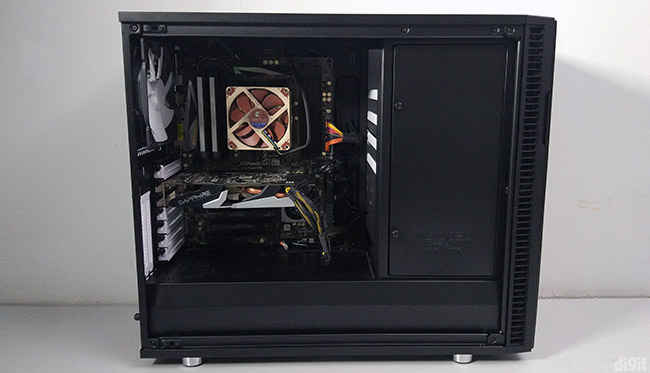
The Define R6 is available in both a tempered glass edition and an acrylic side-window panel variant. We reviewed the black tempered glass edition. The front panel has a hinged-design to swivel open. It has an anodised aluminium cover along with a dual-mounting system. This allows you to change the direction in which the door opens. Behind the door, you’ll find the dampening layer meant to cut out the noise. The plastic fan grill has a dust filter that can be easily removed. You can access the fans on the front panel after removing the fan grill. At the top of the front panel, there’s a slot for a 5.25-inch drive. Although most users might have moved on from using DVD drives, there are other modules such as HDMI pass-throughs or extra USB 3.0 ports that can be installed.
There have been several implementations of attaching the tempered glass side panels onto the case. The most annoying according to us has to be the four-point corner screws. They take up a lot of time to remove and it completely takes away the possibility of quickly accessing your components. Fractal Design took the conventional design approach of attaching the side panels and implemented it with a tempered glass panel. Essentially, imagine regular steel side panels but instead of steel, there’s tempered glass. The edges, however, are made of steel. Also, instead of relying on thumbscrews to tighten the panels, it uses two studs to clamp to the case. If the studs wear out anytime in the future, there’s provision to attach thumbscrews as well.
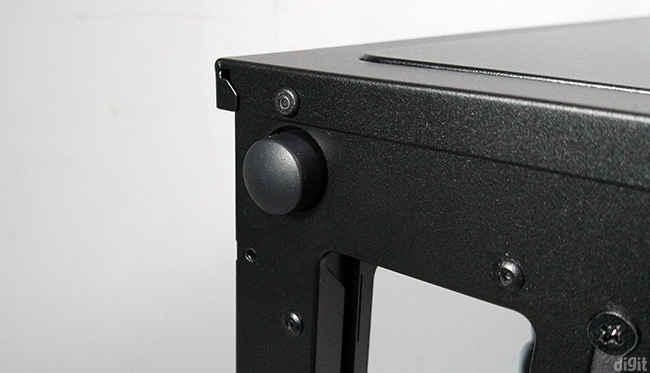
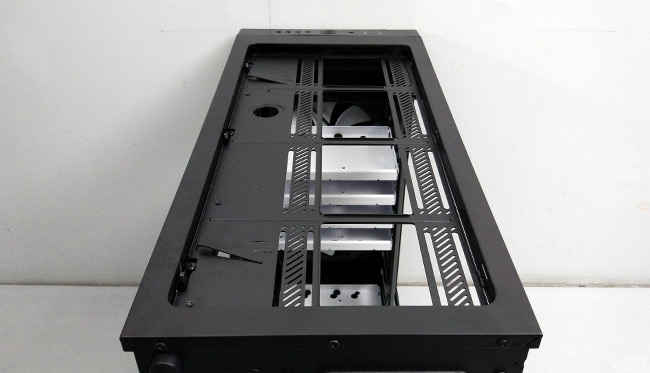
The top panel is another interesting component in the case. A button at the top of the rear panel releases the cover of the top panel. Usually, we’ve observed that top panels attached with clips to the case are a bad idea. They either tend to be flimsy or really difficult to remove, sometimes leading to the clips breaking off. Few manufacturers have tried a different approach to securing the top panel with thumbscrews. The button mechanism on the Define R6 is amazing. Pushing the button detaches the cover and you can take it off easily.
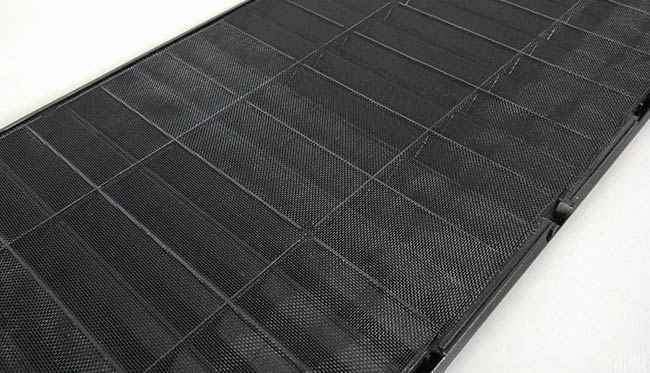
The cover contains a dust filter and the same high-density dampening material. These different layers can be removed based on your configuration. So, if you’re going to install fans or a radiator on the top panel, you can remove the solid layer which has the dampening material. This will leave the grill with the dust filter in the top panel. There’s incredible support for both fans and radiators on the top panel.
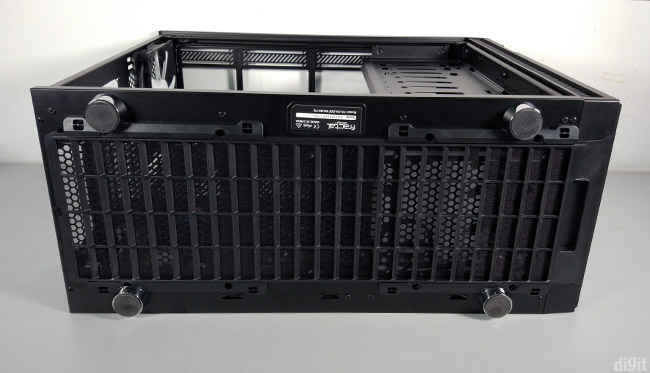
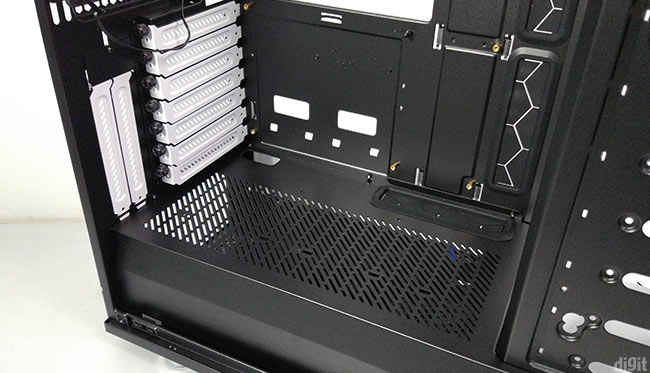
Vertical GPU mounting is becoming popular in high-end and enthusiast PC cases. The Define R6 also consists of two expansion slots for vertical GPUs. However, there’s no riser cable or adapter mount included. All of the expansion slots are attached using thumbscrews. On the bottom, you’ll find a removable dust filter. The single dust filter takes the entire bottom area of the case including the two fan mounts on the bottom of the case and the PSU.
Inside the Fractal Design Define R6
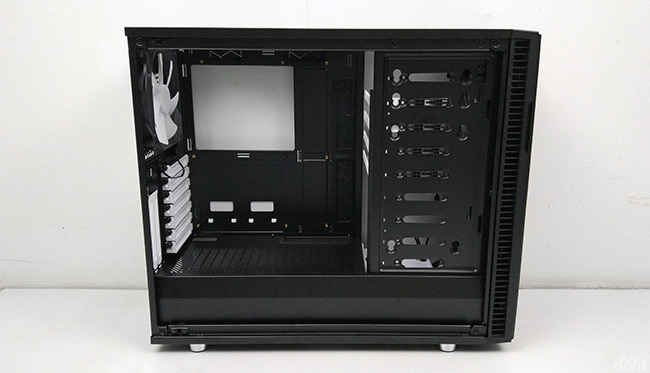
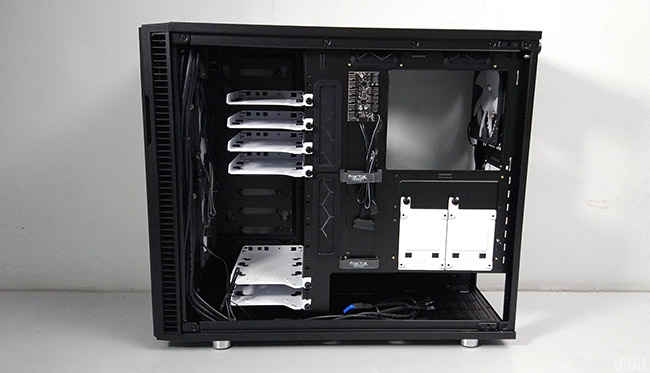
The interior of the Define R6 is a hybrid between legacy cases and modern ones. By legacy, we mean massive support for storage. Behind the front panel, you will find several mounting holes for the HDD trays that also support SSDs. They go all across the height of the case. Two drives can also be installed below the PSU shroud level. Fractal Design provides six metal trays and they can be installed anywhere out of the 11 mounting holes. If you aren’t installing more than two drives, you can remove the remaining trays. However, you can let them stay since they don’t really hinder with the airflow from the front intake fans.
The panel supporting the SSD trays can be completely removed if you don’t fancy installing HDDs. There are two SSD trays behind the motherboard plate. These trays can also be inserted over the PSU shroud.
As mentioned earlier, the drive cage can be removed completely at the expense of losing HDD support. With that out of the way, you can install fans at the bottom. You do need to take care of your PSU length. If you wish to utilise both the fan slots, then your PSU can’t be longer than 160mm. If you’re fine with installing a single fan on the bottom, near the front panel, then you can go up to a PSU length of 300mm. We would recommend you to avoid the fan slot near the PSU since you can use this area to store the extra cables. Otherwise, there are high chances that the cables might hinder with the fan.
There’s massive support for radiators in the case, especially on the top panel. You can install up to a 420mm radiator on the top while the front panel supports up to a 360mm radiator. In order to install the 420mm radiator, you will have to remove the drive cage since the top part blocks the screw points. This also means that you can’t install three 140mm fans on the top unless the drive cage is removed. There’s enough clearance on the top to accommodate a 30mm thick radiator.
When it comes to high end cases with massive support for cooling, we naturally expect a fan hub in them. Without a fan hub, you won’t be able to connect all your fans to the motherboard since there are limited fan headers on them. The Nexus+ Smart Hub allows you to connect six three-pin case fans and three four-pin PWM devices or fans. This hub is enough to connect all the case fans if you plan on populating all the slots.
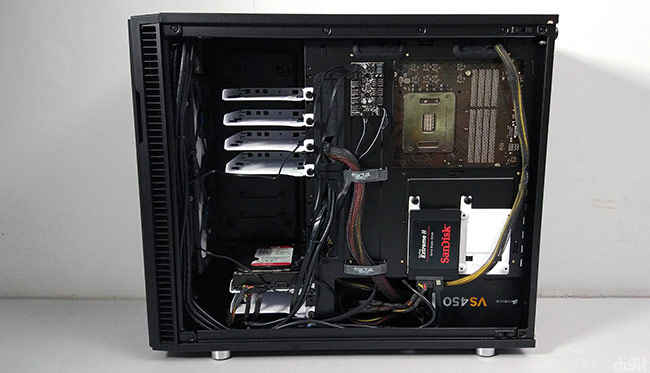
Assembling our test rig in the Define R6 was a simple process. The PSU area is completely open on the other side, so there’s nothing holding back the cables. You can comfortably route the CPU power cable from the top right corner with some slack remaining, allowing you to secure it to the tie-points. At the center, there are two velcro tie joints that can be used to secure the thick cables. By just spending a few extra minutes, we were able to achieve a clean setup. There was absolutely no problem in installing the components and the entire building experience was pleasing.
Testing methodology
The Fractal Design Define R6 is the third case going through our updated case testing methodology. We’d updated our methodology a couple of months back. You can read the complete testing methodology in the review of the Corsair Obsidian 500D. Since the Define R6 is marketed as a silent case, we have included acoustic performance testing this time. Our test rig is as follows:
CPU: Intel Core i7-4960X
Motherboard: ASRock X79 Extreme9
Graphics card: Sapphire Radeon HD 7790
CPU Cooler: Noctua NH-L9x65
RAM: Corsair Dominator 2x8GB DDR3 (16GB)
HDD: WD Red 2TB
SSD: SanDisk Extreme II (240GB)
Power supply: Corsair VS450
Thermal performance
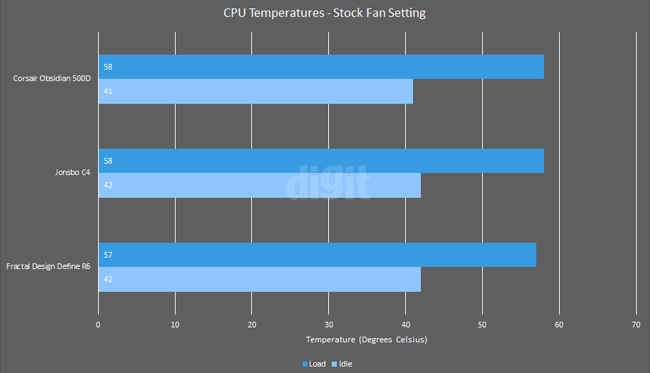
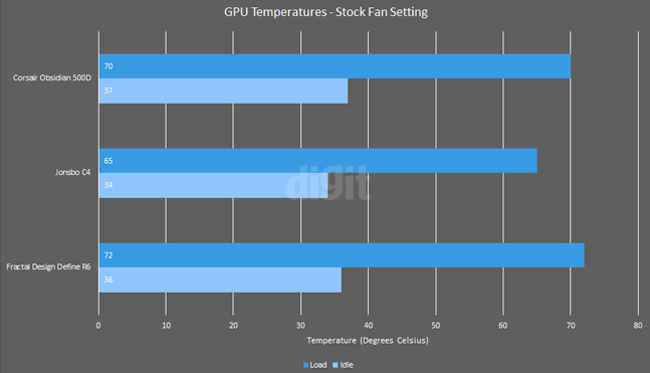
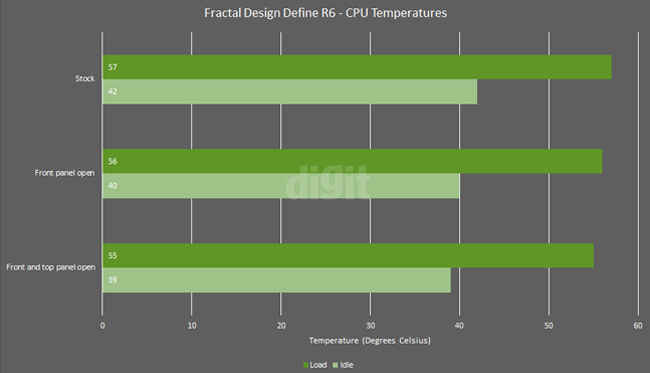
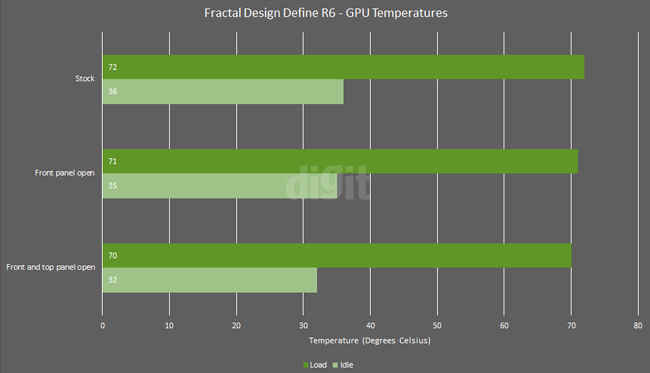
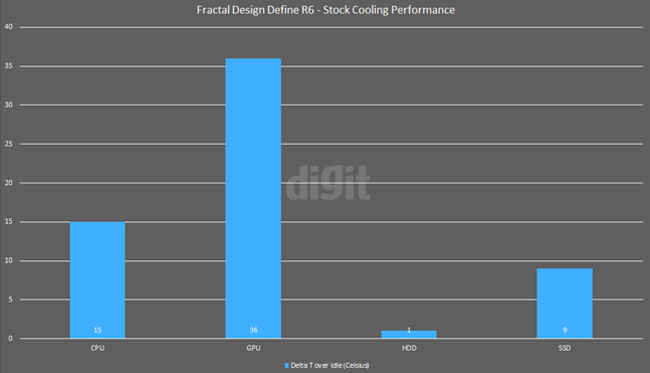
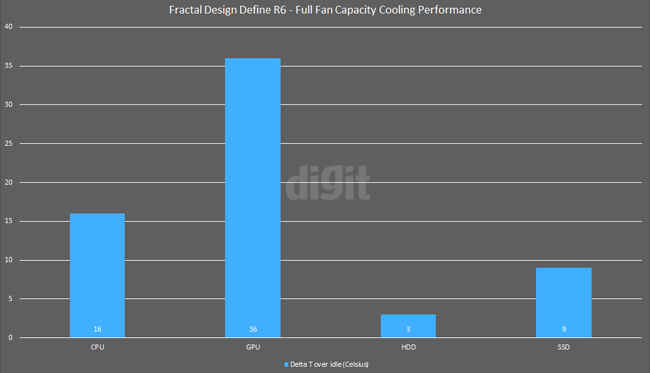
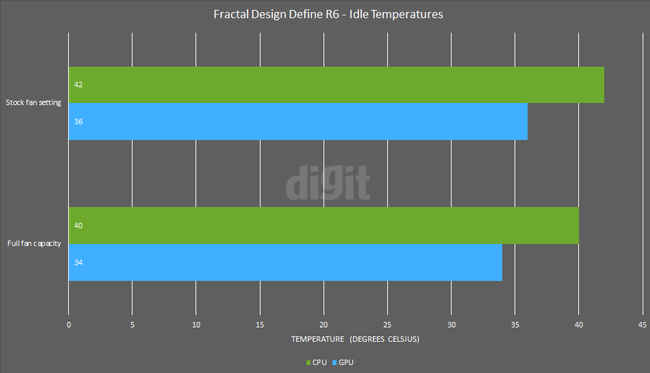
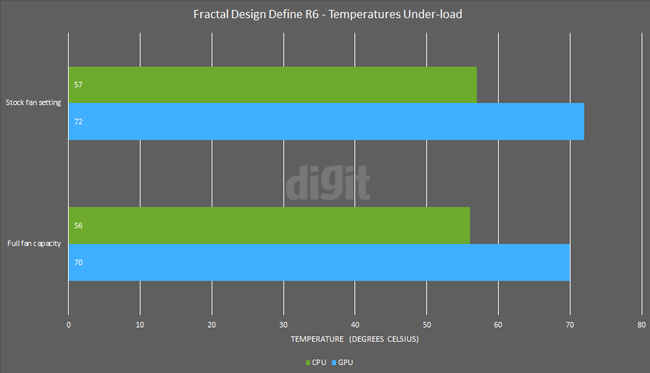
PC cases marketed as silent cases aren’t really meant to give you impressive cooling performance. Surprisingly, the Define R6 does a great job in keeping the components cool without any anomalous increase in temperatures. In the stock setting with two 140mm intake fans on the front and one 140mm exhaust fan on the rear, the case performs decently compared to our previous tests.
In the same fan setting, we also tested the case in different configurations of keeping the front and top panel open. This way, we got to check how much the panels affected the case’s cooling.
After testing the case with the installed fans, we wanted to observe whether installing more exhaust fans on the top would run the system cooler. We found that it didn’t really matter much and the best way to improve cooling from the stock configuration would be to install high airflow fans for exhaust. Since we didn’t notice any weird temperatures, we didn’t carry out a detailed rundown of different configurations like we did with the Jonsbo C4.
Acoustic performance
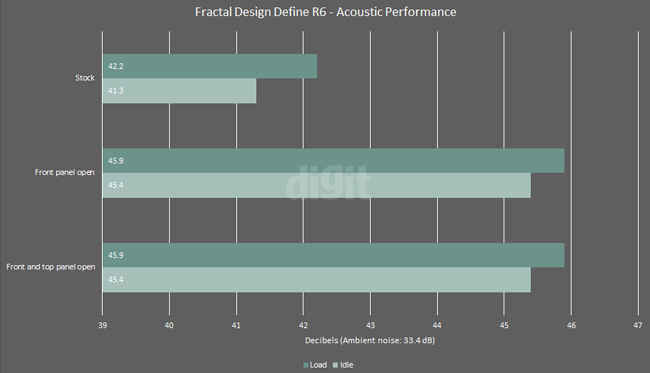
Touted as a silent case, the Define R6 does manage to dampen the noise from the fans to an extent. However, don’t expect the case to have extraordinary silent performance since the tempered glass panel takes it all away. Testing acoustic performance objectively requires highly sensitive instruments. For our testing, we used the Meco 970P digital sound level meter which will give you some idea about the noise levels. It has an accuracy of 1.5 dB and the noise levels were measured at a standard distance of 10 inches from the front panel. Objective testing also requires a completely quiet environment but our testing room had an ambient noise of 33.4 dB. We measured the noise levels of the case in different configurations under idle and load conditions.
Even though the front, top and other side panel have a dampening layer, the tempered glass side panel isn’t able to dampen the noise. To test this out, we placed the 970P at a distance of 10 inches away from the tempered glass side panel. The noise levels stayed the same whether the top and front panel were attached or not. Overall, with the other panels attached, you can expect a comparatively silent case than cases without such a layer.
Abhijit Dey
A Star Wars fan and sci-fi enthusiast. When I'm not playing games on my PC, I usually lurk around the Internet, mostly on Reddit. View Full Profile

