
HIGHLIGHTS
We'll show you how to use the camera of your iOS7 device to get great pictures and videos using some of the new features
The iPhone 5 series of smartphones come with an 8 megapixel camera in the back of the body and 1.2 megapixel camera in the front. Accompanied with face detection, auto image stabilization, LED flash The video recording happens in full HD (1080p) at 30 frames per second and an autofocus as well. Let’s take a quick look at the new features that iOS 7 brings to the set up.
Touching the app with the camera icon on it takes us directly to the view screen of the camera. The largest amount of real estate on the screen is devoted to the camera’s view with basic options carefully trimmed to the side which allows you a clear picture of your shot.
The top or left side of the screen gives you three options in portrait or landscape mode respectively. The options: Flash, HDR and Switch Camera are neatly lined to the edge. The flash option when touched slides across and allows you to choose between Auto, On and Off settings. If left undisturbed it slides back automatically to the earlier view. The HDR option simply activates or deactivates on touching. And the Switch Camera view changes camera view from front to back and vice versa at a single touch.
The bottom of the screen has four options you can slide across: Video, Photo, Square and Panorama. The default starting point is always Photo.
Photos/Stills
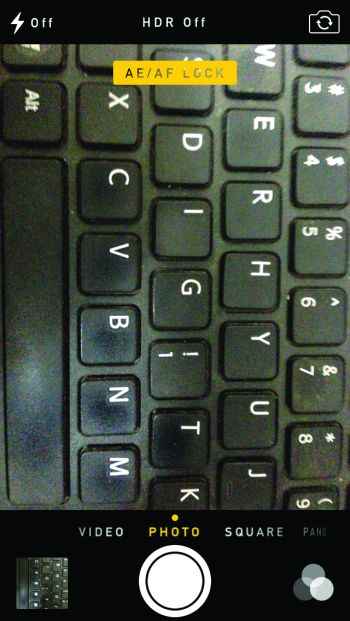
An excellent new feature in the iOS 7 is the focussing shortcut in the volume up button. Simply holding the button focuses the shot before taking it giving you a sharp image. Holding down the volume down button allows you to quickly take multiple shots in burst mode. If you want to have even more control over your focus and exposure together, touching a part of the image on the preview screen for a second or so locks that exposure setting in the camera; now you can move the camera around and it keeps the selected exposure and focus settings locked. You know it’s working when you see a small label appear on the screen that says AE/AF LOCK. Just touch it once to unlock the mode.
Now control focus and exposure much better
Square
Sliding the screen to the right takes you to the Square option. Included due to the fast and rapidly 1:1 ratio of photography made famous by Instagram, this feature makes your camera Instagram ready with a basic set of hipster filters to get you through most styles.
Live Filters
The Live Filters can be used with normal as well as square photographs. A bundle of nine stylish filters: Mono, Tonal, Noir, Fade, Normal, Chroma, Process, Transfer and Instant can be accessed by touching the Borromean sigil (three interesting circle) icon in the corner that presents none miniature live view screens of the image through different filters. You can select the filter of your choice and start clicking away.
Zoom
The digital zoom feature has also been revamped. Now you can pinch the screen to zoom not only on still images but also on on-going video recording.
Video
While taking a video you can not only zoom but also use the AE/AF LOCK that we discussed earlier using the same screen tap method. Another advantage in the new features is the ability to take still shots while the video is recording by touching the white button next to the red record button. You can start and stop recording by either pressing the red button or the volume control buttons on the side. Turning the flash on for video results in a reasonably bright LED spot light that helps illuminate most things close to the camera, especially good for faces.
Pano
Sliding further to the right this option dynamically allows you to generate a panoramic image by physically panning the camera across a landscape. The sensors in the camera guide you via on-screen guidelines to ensure you have a clean image. The camera stitches together the images from your pan and presents you with a gorgeous wide screen panorama that can even go beyond 180 degrees of vision.

Great new ways of capturing video
Change camera modes with a swipe
Camera app is included with four modes: Video, Photo, Square and Panorama. To navigate between them open the camera app and swipe left or right on the camera view.
Take photos with filter on
The camera app comes with filters that can be added ‘live’ on the lens while taking photographs. They’re 9 filters named, Mono, Tonal, Noir, Fade, None, Chrome, Process, Transfer and Instant. To add them open the camera app and tap the three circles located at the bottom right.
Take multiple photos in a tap
Called as ‘Burst mode’ it lets you take multiple photos with a single tap. Earlier in iOS 6 if you had to take multiple photos tapping the capture button for multiple times did the work. With the introduction of Burst mode in iOS 7 all you have to do is tap and hold the capture button until you’re done. Alternatively you can also press and hold the volume button to take photos in Burst mode.
Turn on camera grid lines
One feature missing from the camera app is the grid lines toggle. You can still have it by turning it on from Settings > Photos & Camera. However, it’s not as handy as it was in iOS 6.
Autofocus using volume up button on iPhone 5S
The volume buttons have always served as a shortcut key to take photos. Going beyond it, the volume-up button now lets you do autofocus with it. Like other phones if you hold the volume-up button for a second or more your camera sensor will autofocus on the image (making it a sharp image).
Zoom while video recording
Another significant feature that iOS missed all these years is the ability to zoom in and out while recording videos, iOS 7 adds this along with capability to take photographs alongside. Pinch the screen to zoom in or out while you’re taking a video.
Know the new interface
The photos app gets a retouch with complete makeover and new additions. The photo library is divided by date and location into Moments, Collections and Years. Moments further separates the photos by day and location; sorting each by the day it was taken. This sorting makes it easy to find a particular photo between hundreds of them.
Add/remove filters anytime
Filters are not just restricted to camera app alone. You can add filters to your existing photos or even remove them anytime. To do it go to Photos > Select a photo > Edit > Tap the three circles > Select a filter. To remove a filter follow the same procedure and select ‘None’ in filters.