HIGHLIGHTS
Who says software repositories have to be just that? Although primarily meant for coders, even normal folk can make use of some of Git's features

Git is usually what you call your good-for-nothing neighbour, but the programmers identify it as one of the best revision control system available. One of its central feature is the fact that it’s distributed, so each of the contributor has his/her copy of the repository. This may seem counter-productive but it is actually very beneficial, having everything in one place tends to increase bottlenecks and liabilities.
✅ Thank you for completing the survey!
Git is primarily used for maintaining a project’s source code. Anything that has multiple versions and needs collaboration can be maintained by Git. You can use it to maintain – your resume, your daily budget, your homework, your projects (the non-coding ones also), photos, presentations, documents and so on. Here are a few tips to get you started.
GUIs for Git
If you’re a Windows user and seeing a command-line makes your blood run cold, then you’re in for some good news. The first bit of good news is that Git is available for Windows (http://bit.ly/ytz2rY) and its not a cygwin port. The second bit of good news is there are a plethora of GUIs available for git such as TortoiseGIT, GitForce, git-cola and Git extensions. There are more GUIs available for Linux and Mac OS X, in case you’d like to work on those platforms.
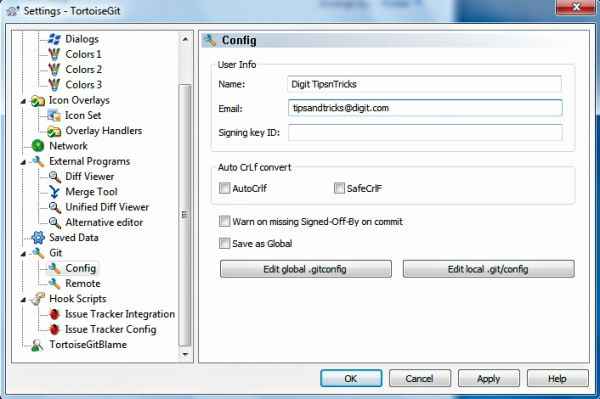
Configuring Git
Security in Git
Git shirks away from handling security by itself. It relies on the underlying operating system and communication protocols to handle access control to the repository. In most cases SSH and HTTPS do the trick. In case you’re maintaining a repository at your work and want to access the repository from home, you can do that using SSH. Most of the GUIs work on both protocols so you’re assured that your data will remain safe.
Sync two folders using Git
Make sure you are running msysgit and TortoiseGit before moving on. You’ll also need to configure Git before you can commit data. Simplest way to go about this is to right-click on you desktop and in the context menu that appears, select TortoiseGIT sub-menu and then select “Settings”. Select “Config” from the left-side pane in the dialog box that follows and enter your name and email address.
Say you’ve got two folders in two different places, one at work and the other at home. You can setup Git so that the contents of both the folders are synchronised. You start by navigating to the folder you want to sync and right-click in an empty area to get to the context menu. Inside the context menu select “Git Create repository here…”. Add all the files you want into this folder, you can even make sub-folders if you want. Once you’re done open the context-menu once again and select the “Add…” from the TortoiseGit submenu. In the dialog select the files that you want to add to the repo, now all the items in the directory are staged. Run commit by opening the context menu again and then selecting “Git commit -> master” in the dialog that follows select all the files that you staged. This repository is now updated and all changes are saved.

Stage your files before running commit on them

Git context menu
On the other side repeat the process from the beginning, but keep the folder empty. So that your data from the other end can be pushed here. To push the data from one end, open the context menu in the repo folder and select “Push…” from the TortoiseGit submenu. In the dialog that follows select remote, and click on the manage button to specify the remote connection. Specify the name (this should be meaning full something like Home or Office) for the connection and specify the URL for the remote machine.Before it starts copying it will ask you to login to the remote machine, enter your username and password (This will require you to setup an OpenSSH server at both the ends, you can get one for Windows called MobaSSH from here http://bit.ly/ykZyeJ). And thats all there s to it, all your files will be added to the remote location. When you make changes there the files can be pushed from that location to this repository. So that all your updates on that machine are reflected here.
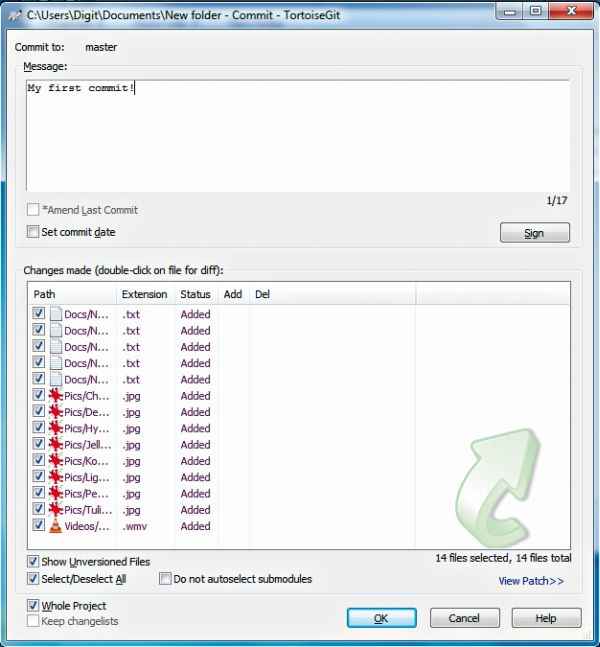
Running a commit on the repo
If you’re afraid of Google
Google Docs is awesome with its auto-save, versioning and concurrent editing. In case you don’t want to leave the cosy confines of your desktop office package (read MS Office) or you just don’t trust the search engine giant with your precious data, but still want versioning, document tracking then Git comes to your rescue. Have your colleagues pull the working directory to their local branches, and at the end of the day you can just merge all the branches back to the master to make all the documents reflect the latest changes. In case someone messes something up you can always track the changes made and find out which changes were made by whom, and you can revert to the pre-merge situation by resetting the branch to a particular commit. The advantages in working this way are many, you wield a firmer control on versioning and tracking document changes.

You can revert to a particular commit
There is a caveat here though, Git treats Word, Excel and PowerPoint files as binary files and running diff, to determine the changes will be difficult. You can force git to actually find the difference between two Word files by editing the .gitattributes file. To force git to find the difference between two Word files add the following line to .gitattributes
*.doc diff=word
You could even save your Word files as a Word XML file and be able to determine the changes without editing the configuration file. There are no such facilities for Excel and Powerpoint, but you can use a comparison tool like WinMerge (http://bit.ly/x3mW5y) with Office plugin (http://bit.ly/wDyRUT) to manually find the changes made in the file.

Configuring remote machine URL and name
Whodunnit?
All this talk about many people working on the same file (albeit on their own copies, the changes are merged to one branch) may make you wonder about how you can track the changes that the files undergo through their lifetime. It’s in fact extremely simple, select the file that you want to track, right click and select Blame from the TortoiseGit submenu. This will open a dialog,listing all the changes made in the last version and by whom. There is also a Git Revision List which will show when and by whom the changes were made.
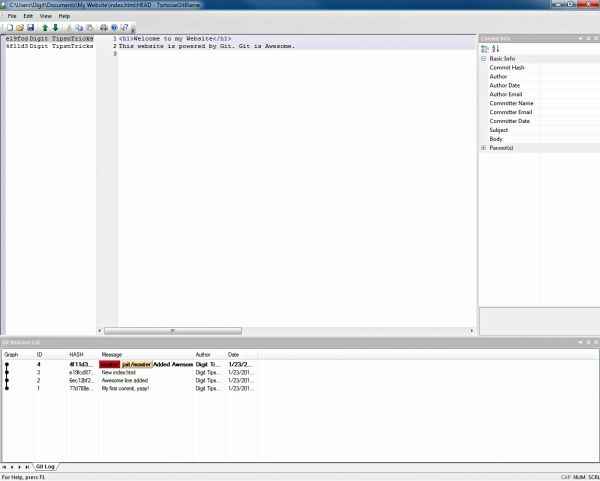
Lets play the blame game!
Going back in time
To go back to a previous commit, inside the repo folder right-click and select Show Log from the TortoiseGit menu. After that you can right click previous commits and reset the branch to that commit. This will make the content same as what it was during that particular commit.