There are plenty of out-of-the-box NAS solutions available, but not all of them are economical for a home/small office use. Here’s how you get around to building a full fledged NAS device and save a lot of money along the way.
NAS (Network Attached Storage) devices are gaining in popularity by the day given the versatility that these devices have to offer. Not only do they offer a communal storage which is pretty much the basic function of these devices but they can be modified using the numerous plugins available to suit a lot of use case scenarios. You could always buy a NAS device with a similar level of versatility which should set you back by quite a bit. Or you could repurpose an old computer as a NAS device. We’ll walk you through the entire process.
Benefits
While adding a new hard drive to your computer does take care of your space shortage issues it only lasts till someone else runs out of space. Another computer then needs to be upgraded. So instead of upgrading multiple devices one by one you could just build a NAS device and get a shared storage space which amounts to a much more efficient usage of space and funds. Not to mention that particular storage can be accessed anytime by anyone and is not dependent on any one user’s machine. Sharing a folder on your computer does get the job done and others can store data on your machine. However, when your machine is turned off or experiences connectivity issues then work might come to a standstill till your machine is fixed.
Adding additional storage space requires a fair bit of configuration too not to mention searching through all these files across multiple machines is quite inefficient. A NAS is safe from network issues affecting individual machines. All files are indexed by most file systems and thus searching for a certain file is faster and required no user action to manually index newer partitions/drives. Adding a new drive to a NAS device is also an effortless procedure as a lot of motherboards support hot-plugging on SATA ports. So you don’t even have to turn off the NAS device to add extra storage, just plug in your power and SATA cables and the device’s operating system does the rest.
You’d be surprised how economical it is to setup a NAS device, a lot of NAS operating systems are open source. Hardware requirements aren’t outlandish, an old PC can be easily repurposed to be a NAS device. Newer network infrastructure isn’t required unless your work is bandwidth exhaustive. And by virtue of being open source, any problems that you could face along the entire process has already been documented and steps to resolve them are available quite easily. And just like a good portable storage these things come with automatic backup facility to another drive or to the cloud. Finally, depending upon which file system you’ve chosen you even have data redundancy so in the event one of your hard drives fails the device will send you an alert well before the actual event occurs and all you have to do is swap the faulty drive with a new one. The data copying and restoring is done automatically by the device.
Software needed
There are umpteen operating systems available for NAS devices. Most of them are based on a Linux kernel. We’ve chosen FreeBSD based FreeNAS for this little tutorial. There is also U-NAS, unRAID, OpenFiler, Greyhole, NexentaStor etc and for the more adventurous sort – any linux distro on the planet. FreeNAS is pretty much the most popular distro out there for NAS and here’s why:
ZFS is a file system designed for enterprise storage solutions and is a bit heavy on resources but is something you just setup once and forget about it forever. It is faster than most file systems while ensuring data security all along. How it does that is by having read and write caches like every other system but it continually indexes each file and creates checksums which are stored away from the actual file. So in cases of passive data corruption which occurs randomly even when the file is not being accessed, the file system can detect and heal the corrupt data. Also you don’t need hardware RAID, infact it is recommended that you don’t set it up at all since ZFS has it’s own software RAID functionality called RAID-Z1 and RAID-Z2 which has overcome the drawbacks of RAID 5.
FreeBSD-based FreeNAS
It also features deduplication and compression! Deduplication is where the system first creates a checksum for a new file to be written and then checks if the file has been written before. When there is a previous copy found the new one is not written and just an entry for the file location is made. Which is why you shouldn’t backup the NAS data onto the same NAS device because the deduplication won’t allow a new copy to be written. However, deduplication being the memory intensive operation that it is requires a lot of memory (5GB RAM per TB of data!). So most people prefer to turn it off and then backup data onto the same NAS device till it can be moved elsewhere.
Hardware needed
The expenditure on the hardware comes down to what all features you wish to enable on your FreeNAS installation. Installing a 32-bit OS limits the capabilities severely since it can only address 4GB of RAM which means after keeping aside 1 GB for the OS there is 3GB of RAM left which can manage 3TB of storage space, in case you wish to use a 32-bit installation do stick to a UFS file system. Now we’ll look at the 64-bit installation. ZFS can be used properly on a 64-bit installation and requires a minimum of 8GB of RAM. ZFS makes use of all the RAM you throw at it so the more it gets the better is can perform. If you wish to enable deduplication on ZFS then you need to get 5GB of RAM per TB of storage space which amounts to an awful lot once you go beyond 5TB. Also you might have to spend a little extra on a newer motherboard which can handle a lot more RAM. As for speed – 1600MHz is fine.
The processor should be rated at 1.6 GHz minimum for normal operation, the more features you enable the more processing power the device needs, going all the way to 3.2 GHz at peak loads is normal for deduplication. Intel or AMD doesn’t matter since all the processor is doing is hashing files and nothing else.
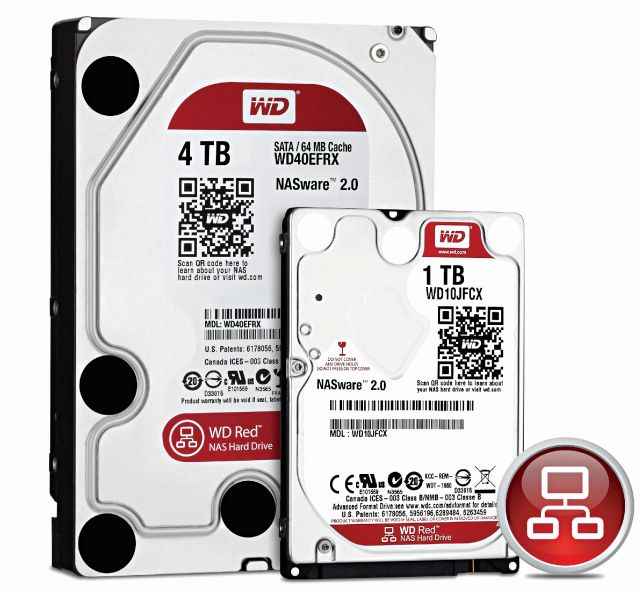
Hard drive manufacturers like Western Digital, Seagate, Toshiba have come up with hard drives specifically suited for NAS drives. The WD Red drive is one such device which is suited for a NAS implementation. It comes in multiple capacities ranging from 1TB to 4TB, the RPM is managed intelligently given it’s IntelliPower technology which ramps up RPM when data is to be accessed and reduces RPM while idling. Also it features 3D Active Balance technology which leads to reduced wobbling. This not only saves power but also reduces the overall temperature and vibration inside the NAS device – both being harmful to hard drives in particular.
The WD Red Drive
Better yet, these drives are tested and certified by all major third-party NAS manufacturers. So you can use them without any worry. They are better suited for 1-5 bay NAS implementations, in case you wish to add more drives than 5 you might want to consider enterprise solutions like WD Se and WD Re.
Set it up!
1. Download
Obtain whichever OS you want, we are using FreeNAS here. Get the ISO or the flash drive image. Use 7-zip to extract the .xz file. Then use Win32DiskImager to use the uncompressed .img file and create a bootable USB flash drive.
2. Install all hardware
Get your computer configuration together, ensure that there is enough RAM as per your storage needs. Plug in the Ethernet cable and ensure all the WD Red hard drives are connected and are mounted securely.
3. Install FreeNAS
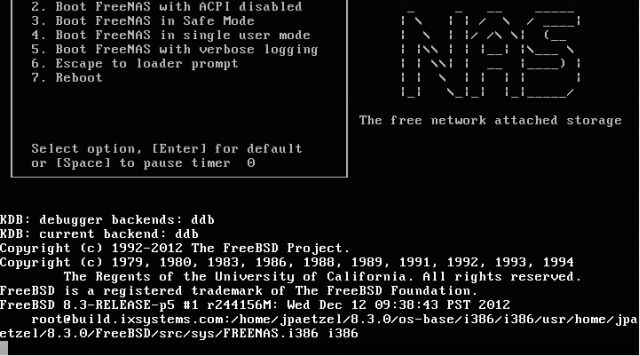
Boot up and change boot priority (usually by pressing F11) to boot from the flash drive. There will be a lot of random text flowing across the screen till you get to the ASCII art that spells out FreeNAS. Press 1 and then Enter to begin installation or FreeNAS will auto install, anyway.
4. Configure
Within a few minutes, FreeNAS will have installed and you’ll be shown a console screen with an IP address mentioned at the bottom. Note this address down and try to access the NAS device from another computer’s web browser. If you can access it then unplug your monitor and keyboard from the NAS device. You are done here.
5. Web interface
The default user id is “admin” and the password is “freenas”. From this web management console you can get everything done. You can create partitions, create backups, schedule regular disk image creations or by means of various plugins add more features. Change the default id and password for security reasons.
6. Plugins
There are a lot of plugins available which should enable you to use your NAS as a media server or a web server. Install Plex to enable a media server GUI tool on the web interface or you could install Lamp and get a fully functional web server for your hosting needs.
Conclusion
That’s all there is to it! It’s not a big tutorial because there simply isn’t enough steps involved, so get cracking and build your own NAS device for cheap!
Mithun Mohandas is an Indian technology journalist with 10 years of experience covering consumer technology. He is currently employed at Digit in the capacity of a Managing Editor. Mithun has a background in Computer Engineering and was an active member of the IEEE during his college days. He has a penchant for digging deep into unravelling what makes a device tick. If there's a transistor in it, Mithun's probably going to rip it apart till he finds it.
At Digit, he covers processors, graphics cards, storage media, displays and networking devices aside from anything developer related. As an avid PC gamer, he prefers RTS and FPS titles, and can be quite competitive in a race to the finish line. He only gets consoles for the exclusives. He can be seen playing Valorant, World of Tanks, HITMAN and the occasional Age of Empires or being the voice behind hundreds of Digit videos. View Full Profile