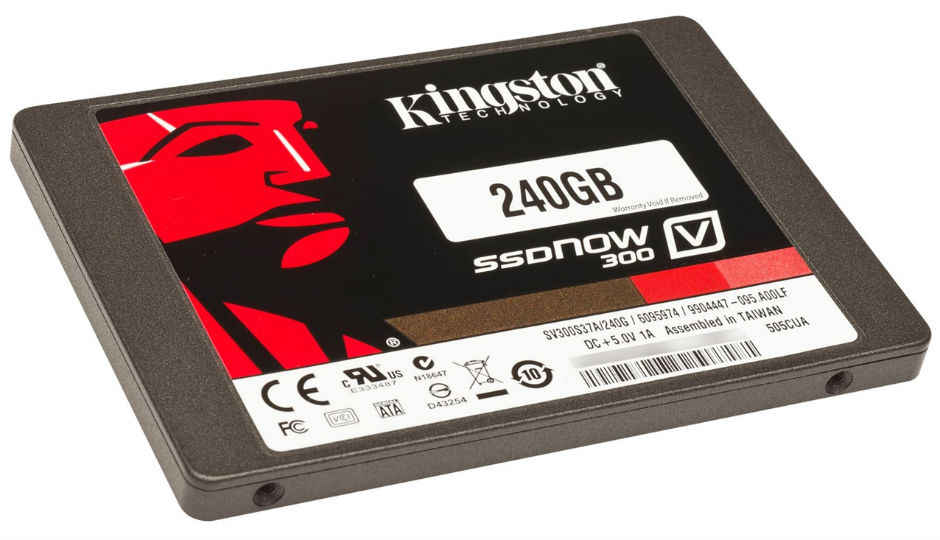
Promotional Feature: SSDs are all the rage in storage space now and so it becomes important for us to show you how to install an SSD in your desktop or laptop PC. Let’s get on with it.
Picked up a brand spanking new SSD? or thinking about getting one to improve the performance of your PC or laptop? Well, you’ll need to know how to go about installing or mounting it once you have it with you and we’re here to show you the right way to do it. Installing an SSD is extremely easy and any layman who doesn’t even have a single clue about component installation can also do it. You just need to follow a few simple steps and you’ll be done in no time. So, let’s start with installing a Solid State Drive inside a desktop computer.
How to install a SSD inside a desktop PC?:
SSDs or Solid State Drives have a great deal of positive impact on the performance of a computer. SSDs if used as a boot drive can speed up the start-up process by quite a big margin and they’re also very efficient when it comes to performance in game load times or even data transfer rates. Since the prices of SSDs have been falling considerably these days, it’s a great time to get your wallets out and invest into a SSD. And while you’re at it, be sure to check out the incredible line-up of SSDs from Kingston. You’ll surely find something just right for your PC. Once you’ve picked out a SSD for your PC you can easily install it regardless of its SATA version because installation for SATA 2 and SATA 3 drives is identical.
If you want to install the SSD as a boot drive, while preserving the exact same data and file structure of the currently installed HDD, you’ll need to use a drive cloning utility to do it. You can download and install freely available cloning utilities on your PC to clone the drives but if you’re buying a Kingston SSD, you’re covered as Kingston SSDs come with a free cloning utility that you can use to clone your drives. In order to make the upgrade process easier, you can also buy an easy to use Kingston SSD conversion kit.
Step 1: First, start by taking a backup of everything to some other drive. It’s always better to take a backup before proceeding because this ensures you’ll have your data safely with you in case something goes wrong. If the size of your data on your boot drive partition is much more than the overall capacity of the SSD, you’ll need to remove data excluding the windows data files. Keep removing all the files until the size of your data on the boot partition is enough for the SSD.
Step 2:
You’ll need a SATA-to-USB adapter to connect your new SSD to the computer for cloning purposes or else you can use the Kingston SSD Conversion kit to so. Once you have connected the SSD to the computer, you’ll just need to run the data cloning utility by following extremely easy steps shown on the screen.
Image: SSD Conversion kit
Step 3:
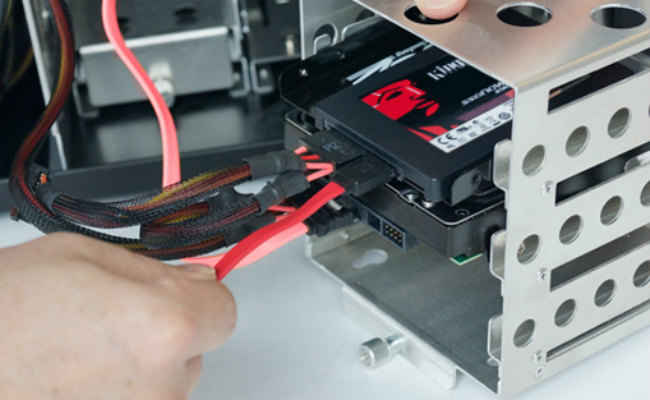
When Step 2 is finally done, shut down your computer, disconnect the SSD from the SATA-to-USB adapter and remove the power cord of your PC. Next, you’ll need to open the desktop’s side-panel and access the drive bay inside. Locate the existing Hard Disk Drive, disconnect its cables and remove the drive from the PC. Desktop HDDs usually belong to the 3.5 inch form factor, SSDs on the other hand follow a standard 2.5 inch form factor. This is why, in order to install the SSD inside the PC, you’ll need to use a 3.5” to 2.5” bracket. This bracket usually comes bundled with a new SSD but if you don’t have it then you can always purchase one from the market. If your computer case is not very old, it’s highly possible that the case itself might have provisions for installing an SSD directly without the requirement of a bracket. If that’s the case then it becomes much more easier. Now mount the drive in the drive cage using the mounting bracket or case drive tray and connect the same SATA power and data cables that were being used by the HDD that you removed (If the HDD was connected to a SATA 2 port but you have SATA 3 support on your motherboard and the new SSD also supports SATA 3, then you should definitely switch the SATA data cable to the SATA 3 port on the motherboard).
Step 4:
Now secure the case side panel in its place by putting it back. Re-connect the PC power cord and power it on. And you’re done installing an SSD inside your PC. You can still use your old HDD as a secondary storage drive by connecting to another SATA port on your PC. If you’re building a new PC, you can directly install the OS on it too.
How to install a SSD inside a laptop?:
SSDs are great for laptops not only because they can improve the performance of your laptop by multiple folds but also get rid of mechanical HDDs that use moving parts. This is beneficial because you no longer have to worry much about the storage drive when it comes to portability as a few big shocks to your laptop will not cause the SSD to stop working which can’t necessarily be said for mechanical HDDs. Installing a SSD inside your laptop is just as easy as installing a SSD inside a desktop. You just have to follow a few simple steps:
Step 1:
Start with steps 1 and 2 of SSD installation on your desktop PC that we saw above as the process is almost identical.
Step 2:
Once you’re done migrating your data from the HDD to the new SSD, power down your laptop, remove the laptop battery and also disconnect the laptop charger.
Step 3:
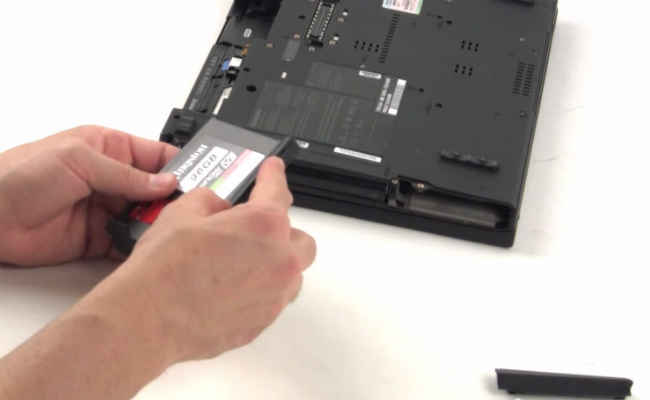
Now, you’ll need to figure out the location of the storage drive area in your laptop. To do this, you can simply refer to your laptops user manual and find the drive compartment. Next, open the drive compartment by unscrewing or removing the drive cover clasps whichever way applies to your laptop. Open the drive bay, take out the existing drive and detach mounting brackets from the drive if it uses any of them.
Step 4:
Attach mounting brackets to the SSD if your laptop uses mounting brackets and align the drive depending on the position of the SATA ports required for your laptop. Once that’s done, you can slide the SSD in place and secure it with screws or clasps as required by your laptop.
Step 5:
Re-connect the battery and laptop charger and power-on your laptop. After you’re done with the steps above, you would finish installing an SSD inside your laptop. Wasn’t that easy?
Note: Some laptops require drives that are a maximum of 7mm in thickness and so you need to make sure that the SSD you purchase is of that size. To make things easier, insist on buying a Kingston SSD as the entire current line-up of SSDs from Kingston are 7mm thick.
This was how you can install a SSD in your desktop or laptop PC. Watch this space for more articles on SSDs.


