
HIGHLIGHTS
Perhaps the world's most popular blogging CMS, Wordpress can be a very powerful tool in the hands of experts. Here's how to get started with some advanced features for Wordpress
We take a close look at WordPress, the blogging world’s most trusted publishing tool and try to unlock some of its hidden mysteries to help you blog better and smarter. Please note that all the WordPress plug-ins mentioned here can be found in the plug-ins directory at http://www.wordpress.org
Automatically backup to Dropbox
When you start blogging regularly and accumulate a fair number of posts and followers, it’s advisable to take regular backups of your blogging software and post database to help you on a rainy day. Usually, if your blog is hosted your blog is hosted on a reputed web host, they always schedule regular backups; but getting a copy of your site’s latest backup from the web host can be a cumbersome and time-consuming process. This has an adverse effect on traffic and followers.
To avoid this doomsday scenario, it’s good practice to take manual backups of your blog from time to time. And what better way than to automate the task? This is where Dropbox comes in, if you didn’t already know, it is a leading cloud storage and file sharing service.
Go to WordPress.org and search for the “WordPress Backup To Dropbox” plug-in. Download and install the plug-in in your WordPress installation directory.
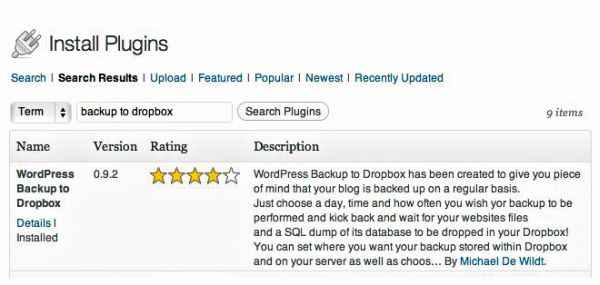
WordPress to Dropbox is a good off-site backup solution
After installation, check under Settings > Backup to Dropbox to setup the backup process. At one stage, the plug-in asks to authorise itself with Dropbox. In a new window that pops up you must authenticate this plug-in to access your Dropbox account (you need to have a registered Dropbox account at this stage). After you grant access, the plug-in continues to set up your WordPress installation’s backup. The plug-in uses OAuth, so don’t worry, your Dropbox login details are safe.
Just choose a day, time and the frequency of backup to be performed, and that’s it. The plug-in ensures your web site’s files and an SQL dump of its database is backed up to Dropbox on the specified time and date. You can set where you want your backup stored within Dropbox and on your server as well as choose what files or directories, if any, you wish to exclude from the backup. For more details, checkout the web site: http://wpb2d.com
Get WordPress.com features for your custom blog
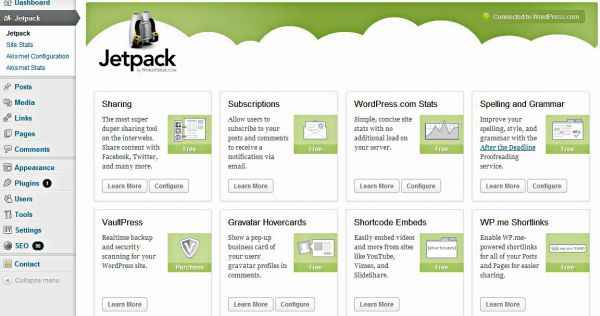
If you’ve ever opened a WordPress.com account, you know of the kind of professional, pre-loaded settings and services it comes with compared to the vanilla WordPress.org CMS installed on your blog. For this, you need to download and install Jetpack by WordPress.com from the plug-in directory. And trust us, you’ll be glad you installed this particular plug-in.
So what does Jetpack come with? A whole lot of features that would otherwise require a multitude of plug-ins from the WordPress.org directory. And some of Jetpack’s features are exclusive and, difficult to find elsewhere. Here’s what it does.
Jetpack gives you the ability to mark up your posts with the markup language- perfect for complex mathematical equations and other über-geekery, which you otherwise can’t implement within your blog posts. It gives you the added options of extra sidebar widgets for Twitter and RSS links. Jetpack even takes away the hassle of broadcasting your blog’s content to the outside world, implementing a one-click approach to submitting your latest posts to search engines and other services in real-time.
This plug-in also comes with the most basic features- social sharing buttons next to every post and page- to advanced features like real-time stats and analytics of visitors stopping by your web site. Embedding videos from YouTube, Vimeo and others sites you can get a unique short URL for each and every blog post through Jetpack’s range of tweaks for your blog. Do give it a try: http://jetpack.me.
.jpg)
Jetpack is one powerful plug-in which comes with extra plug-ins
Effectively protect your blog from spam attacks
If there’s one thing that isn’t in short supply on the web then it’s most definitely spam hitting countless web servers, every single second. This bombardment is almost endless. With such overwhelming odds against you, how do you protect your WordPress blog from becoming cannon fodder to the legions of spammers out there?

Akismet is the big, bad spam fighter for blogs
Enter Akismet. It claims to be the most powerful solution for combatting spam on all web sites and blogs that are powered by WordPress’ software. And it does live up to its word. All you have to do to get it up and running is download and install the Akismet plug-in from the WordPress.org directory and activate the plug-in by either purchasing a unique API key or by creating a WordPress.com blog and getting the key from its Akismet settings page.
Delete duplicate posts on blog
Having duplicate posts on your up and coming blog can be quite embarrassing and a huge blow to its growing reputation. Of course, in the haste of populating your blog (especially, with multiple authors), the chances of duplicate posts sneaking into the mix are considerably higher. In this scenario, wouldn’t it be nice to have a constant safeguard which prevents duplicate posts from occurring in the first place?
.jpg)
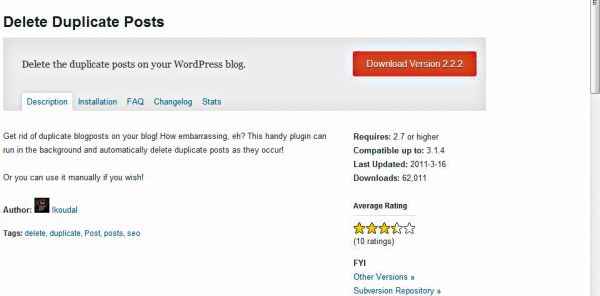
It’s embarrassing to have duplicate posts on any web site
Check out the Delete
Duplicate Posts plug-in at in WordPress.org’s plug-in directory. Download, install and activate it. Once done, go to your blog’s Tools menu and configure the Delete Duplicate Posts plug-in. It can actively kill duplicate posts as and when they’re created on the blog, or you can find and delete them manually.
Protect against brute force attacks
One of the most basic points of securing your web site is to hide all traces of its CMS from the outside world – it means, no proclamations in footers, custom login URLs, etc. In the case of a WordPress blog, its footer gives away the CMS’ description for everyone to see. This makes life easier for hackers who are trying to get behind your web site’s security wall.
In such cases, Login LockDown is a nifty little security plug-in for WordPress blogs. Login LockDown records the IP address and timestamp of every failed login attempt. If more than a certain number of attempts are detected within a short period of time from the same IP range, then the login function is disabled for all requests from that range. This helps to prevent brute force password discovery.
Currently the plug-in defaults to a one-hour lock out of an IP block after three failed login attempts within five minutes. This can be modified via the Options panel. Administrators can release locked out IP ranges manually from the panel. Unfortunately, active development of this plug-in is stalled for the moment and you can only use this with slightly older WordPress installations up to version 2.8.6.
Insert Google ads without messing with your blog’s code:
After starting a blog for fun, it’s nice to be able to monetise with Google’s AdSense ad networking program. You don’t have to do a thing; just submit your blog for Google’s approval. Once you’re invited for the AdSense program, all you need is your unique identification number to get things started.
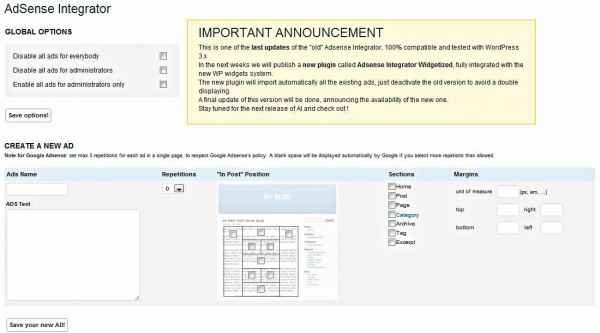
With the AdSense Integrator plug-in, you can do away with the headache of editing and messing up your blog’s code to insert Google AdSense ads. All you need to do is copy-paste the AdSense code into a text field inside the plug-in and select an area where you want the advert to appear- top of the blog, right-side bar, left bar, bottom, etc. Just give it a try, you’ll love it. http://www.myWordPressplug-in.com/adsense-integrator
Migrate from WordPress.com to a WordPress.org blog:
WordPress.com is a free third-party blog hosting service, where customizing your blog’s look and feel (after a certain point) requires paid purchases. For example, if you want to use a custom domain name (www.yourblog.com) instead of WordPress.com’s standard www.yourblog.WordPress.com address, you’ll have to purchase the feature from WordPress.com. Same goes for additional themes, CSS edits, etc.
With a self-hosted WordPress.org blog, you get greater control over each and every aspect of your blog. Obviously, this also means you have the added responsibility of looking after your web site (something that WordPress.com does for blogs on your behalf) on a regular basis.
.jpg)
Enabling Ad-sense on your blog
1) Before starting the migration process, get yourself a good online web host and register a custom domain name. Check that your new online web host provides a minimum of PHP 4.3, MySQL 4.0 and the mod_rewrite Apache module.
2) Upload the latest installation of WordPress.org on to your web host- follow WordPress’s “Famous 5-Minute Installa” (http://bit.ly/zZB29Z)- and leave the default extracted and installed files untouched.
3) The next step is to go to the Tools section of your WordPress.com blog and click on Export. On the resulting screen you’re asked to tick radio buttons on the fields you’d like to export from your current WordPress.com blog – stuff like categories, posts, pages, etc. Make sure you click on all radio buttons to ensure everything from your WordPress.com blog is copied over to your recently created WordPress.org blog. Download the resulting WXR or WordPress eXtended RSS file on to your computer.
4) The last step in this process is to head over to the control panel of your WordPress.org blog and click on the Tools menu item. Hit on import and upload the WXR file you downloaded from your WordPress.com blog. Depending on the size of this file and your connection speed, the time taken to upload it on to your new blog may vary. If all goes well, you’re done migrating your blog from one place to another.
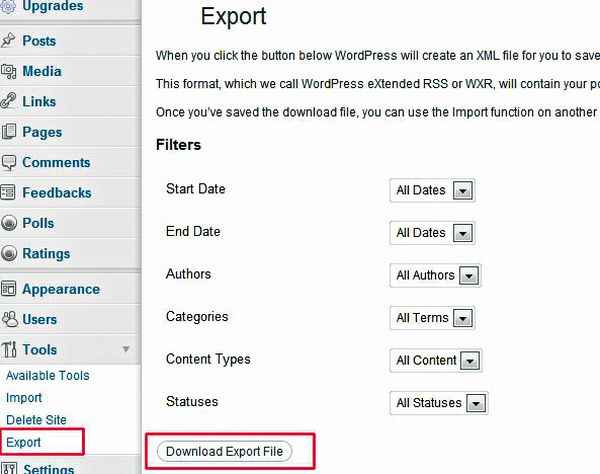
Exporting your blog
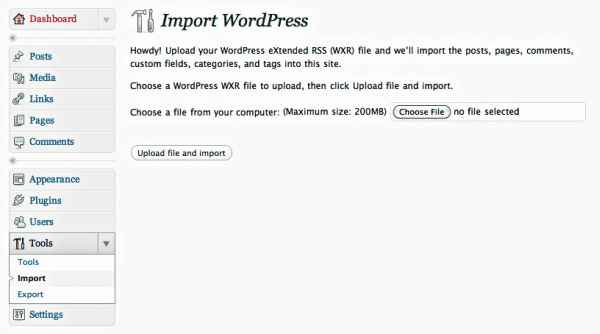
Importing into WordPress.org
Burn your site feeds on Feedburner
When we say burn, we don’t mean it literally, of course. But yeah, one of the few things you should do immediately after setting up a spiffy new blog is to submit it at Feedburner, a Google service that only helps manage your web feeds – nothing else – and it does so better than any other software or web tool we know of. And yes, all for free, of course, as we’ve come to expect from Google.
This is how you go about submitting your blog’s feed to Feedburner. First of all, you need to have a Feedburner account. Since Google bought Feedburner back in 2007, you can login in with your most-used Gmail account credentials is allowed (unless you want to create a separate Google login just for your blog’s feed management service).
After log into Feedburner, choose what type of blog software you use – is it a self-hosted WordPress blog? A WordPress.com blog? Or a Blogger web site? Clicking on the relevant radio button leads to the next step.
Here you enter your blog feed’s URL into one of the two fields. If you don’t know where your blog’s RSS feed is located, don’t worry. Just enter your blog’s URL and Feedburner will auto-detect the RSS feed’s location. The final step is to choose a unique feeds.feedburner.com/your-feed URL to locate your feed online.
That’s it. Once that is done, you can now track your RSS feed subscription data through Feedburner. Not only this, you can also easily offer email subscription for your feed through a feedburner plug-in installed in your WordPress blog. Feedburner also offers in-depth analytics and AdSense integration. The whole thing looks more professional than WordPress’ own feed engine.
Highlight keywords in search results
How many times have you performed a keyword search in a blog’s search field only to see a long list of matching posts to sift through without any visual clues? Not many, we’re sure. So when you run a blog with a lot of posts and a sizable fan following, do a favour on visitors coming to your blog and searching for specific posts or words across your blog.
The least you can do is highlight the search keyword in the search result page for readers to easily find what they’re looking for. Here’s how:
1) Open your WordPress installation’s search.php file and search for the following code:
<?php the_title(); ?>
2) Replace it with:
<?php echo $title; ?>
3) And finally paste the following chunk of code before the title code we just replaced above:
<?php $title = get_the_title(); $keys= explode(“ “,$s); $title = preg_replace(‘/(‘.implode(‘|’, $keys) .’)/iu’, ‘<strong class=”search-excerpt”>�</strong>’, $title); ?>
The last step is to tweak your blog’s CSS file search-excerpt and add styling for the search highlight keyword.
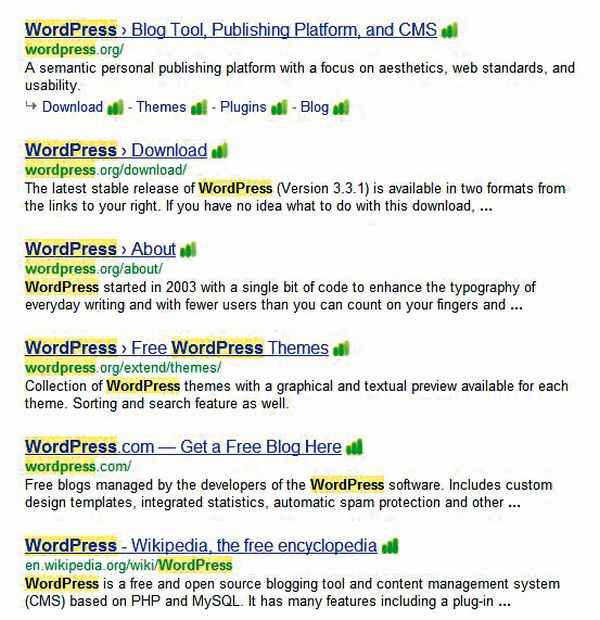
Notice the highlighted words