
One of the hottest prototyping tools – Pixate is really simple to work with.
Pixate is what you’d call an app prototyping tool and they are a dime a dozen. For the uninitiated, prototyping is how you generate mockups or prototypes of applications without the need to know programming languages such as Objective C or Java. So every other person can easily bring their ideas to life and learn more about UX at the same time. Instead of having to hire a consultant from the get go, you can work out a good amount of the mechanics and create a prototype that’s just short of being truly native to a platform. What’s even better is that Pixate Studio is free and the company has been acquired by Google as part of their effort to develop new design and prototyping tools. This could very well mean that you might find Pixate becoming part of Android Studio.
There are plenty of prototyping tools but there’s always been a tradeoff between speed and quality. Pixate is quick and allows you to create prototypes rapidly without any tradeoff, as it will be apparent soon enough. Let’s get you started on some basic actions that can be performed using this nifty tool.
User Interface
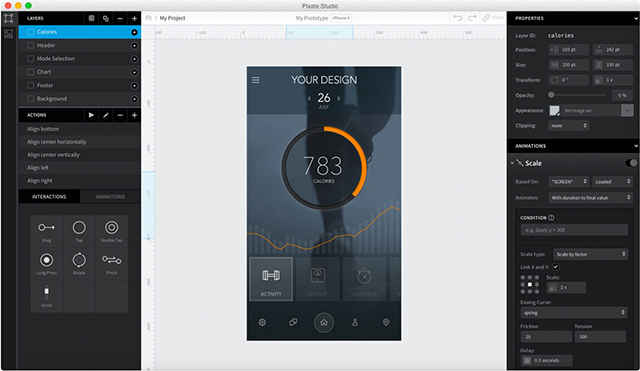
If you’ve ever used an IDE before, you’ll quickly feel at home when you run Pixate for the first time. Take a look at the image below. This is the first thing you’ll see when you fire up Pixate. On the very left of the window are two tabs, of which the first tab opens up the ‘layers’ panel that you see here and the second tab opens up the ‘assets’ panel. Assets are basically images of all the UI elements in different stages. For example, if you were to drag a menu bar around and wanted the bar to go out of focus then you’d create two images, one with the menu bar looking crisp and the other with the menu bar all faded out. You’d then transition between these two assets based on a trigger event. In this case, the dragging action would be the trigger.
The ‘layers’ panel is where you organise all the different layers of your interface. Almost everyone has used some sort of image editing software or apps such as Photoshop, Gimp, Pixlr etc., so the concept is quite clear.
Right beneath the ‘layers’ panel lies the ‘actions’ panel from where you can pick different animations to be applied to transitions. On the top right lies the properties pane that allows you to modify layer parameters like size, position, opacity etc. And right below the ‘properties’ panel lies the ‘animations’ panel, where you can define the animations for the selected layer. The centre houses the workspace where all the magic happens.
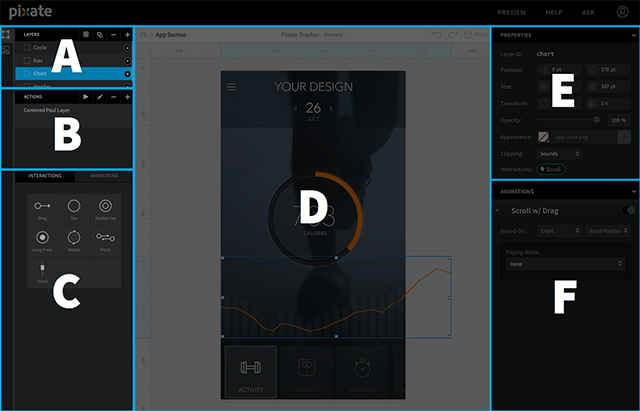
A fairly simple and easy to navigate UI
A few pointers
Before you begin, you need to list out all the features you want from your app and generate assets for the device that you’ll be working on. Resolution and pixel density should be kept in mind while generating these assets. Both Android and iOS have guidelines for designing apps which need to be followed to the letter. The Apple App Store is a lot more stringent when it comes to QC and it wouldn’t be a surprise if your app were to be rejected for flouting guidelines.
Get the app
Prototyping on Pixate happens in real time with all your changes being updated onto the app as soon as they’re made, so you can reduce the time spent on prototyping your app. Simply download the app from the Play Store or the App Store and sync it with your PC / Mac.
Pixate available on Play Store as well as App Store!
Begin prototyping
Start off by importing all your assets into the assets panel. Always make an image which would be representative of how your final app looks like and use that as a base layer to figure out where to place all the individual elements of the UI.
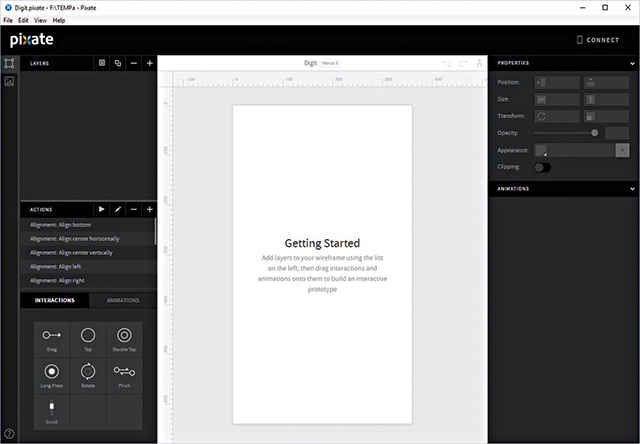
Begin your project
Adding animations
Let’s start off by dragging an image (let’s call it Button.jpg) onto the screen and giving it the properties of a button. Tap sets into motion an animation. So you can simply drag the ‘tap’ interaction from the interaction menu and drop it onto the image within the workspace, or drop it onto the specific layer in the layer panel.
There should now appear a new property in the panel that indicates that a Tap action has been added to the layer. Now you need to drag and drop another image (let’s call this one Screen.jpg) onto the workspace. Reorder the layers so that the Button.jpg layer is on top of the Screen.jpg layer. Now it’s time to animate Screen.jpg when you tap on Button.jpg. Simply, drag and drop any animation onto the Screen.jpg layer. We’ve gone ahead with Rotate.
Now in the animation panel, you should see the very first drop down menu that says “Based On”. This is where you link the animation to the Button. Select Button.jpg in the first drop down and then select the action that triggers the animation. In this case, you only have the “Tap” interaction available. Now you have multiple parameters to define how the Screen.jpg layer rotates. Select a pivot point from the nine point menu and insert appropriate values for each axis. We went with 45 degrees in all of the axes. Below, you can see how the action plays out.
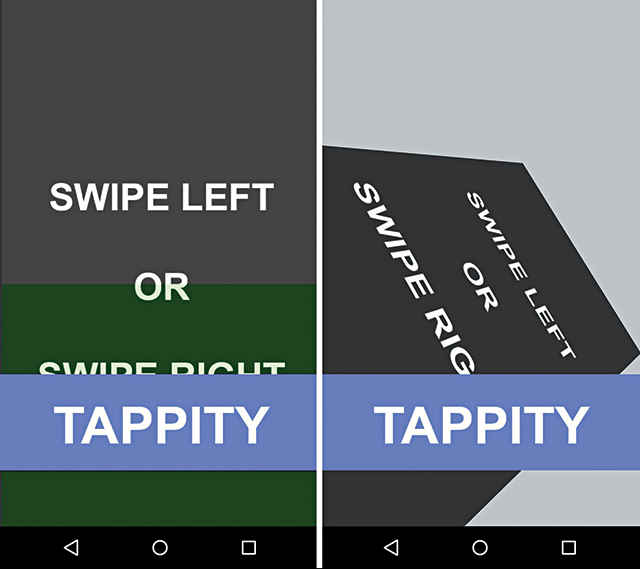
Tap to rotate in action
Moving between screens
Once you’ve gotten a hold of how animations work, you need to figure out how to switch between different screens. This is achieved by reordering and is ideally done simultaneously with an animation. When an animation on a layer has run its course, it still remains in its initial position. So all actions are still captured by the top most layer. In order for a newer layer to perform any action, the user should be able to interact with it directly and this is why you’d want to reorder the layers such that the new layer comes to the very top.
Reordering is just as simple as adding animations. Drag and drop the reorder animation onto whichever layer you wish to move and select the “Based On” parameter. Then select where the layer has to be moved to. You can choose to send it all the way to the back or bring it to the front. And if you prefer a more specific position, you can slot the layer behind/in-front-of element on the workspace.
Re-order and Re-arrange easily!
Grouping
And now for something slightly complicated. Grouping layers allows you to work out some interesting effects. Here’s how you can achieve parallax scrolling using grouping. Start off by creating two different layers with one layer being slightly smaller than the other. Drag the smaller layer onto the larger layer to nest it. You now have a parent layer and a child layer. And now, like we’d done earlier, you need to add a “Drag” interaction to the parent layer and pick ‘Vertical’ from the properties menu for drag limiter.
For parallax scrolling, you need to have one layer moving at a slightly greater pace than the other.
In this case, the child layer will be made to move at a faster pace so that it comes into view and exits fairly quickly. So you need to add a move animation to the child layer and link its animation to that of the parent. Select the parent layer under “Based on” and for the trigger, select “Drag Position”. Under animates, select “Continuously with rate”. Now, the child layer will move in unison with the parent layer, so to change the pace, modify the “Rate” to 1.5 and you’ll see the child layer zooming past the parent layer. If you want the child layer to not pop out of the confines of the parent layer, then simply select the parent layer and modify the “Clipping” property to ‘bounds’. The child should now be visible only when within the bounds of the parent layer.
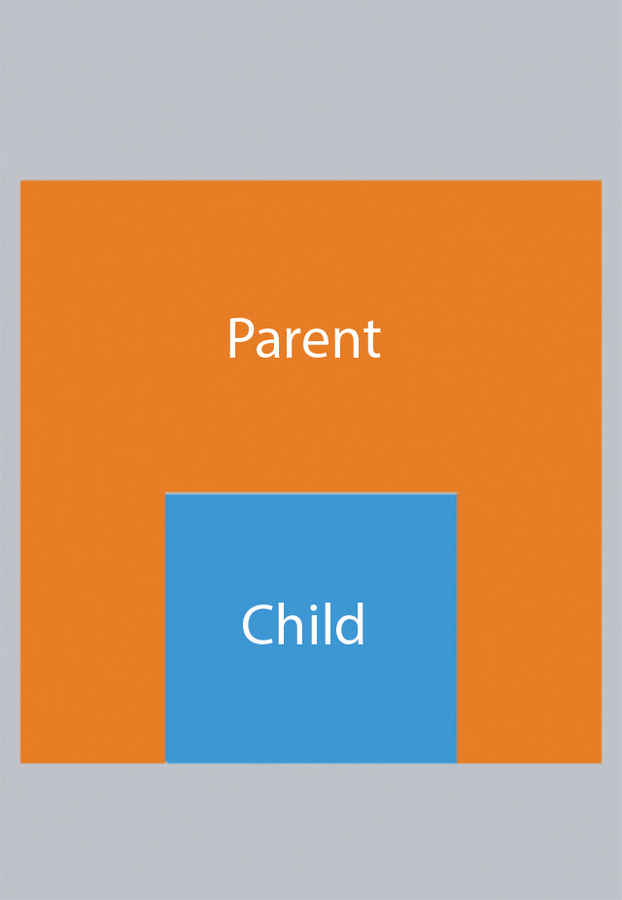
Get Parallax scrolling effect using grouping
Go crazy!
These were just some basic examples for you to get started with Pixate. You can find more of these simple tutorials over at Pixate’s official tutorial page and if you’re in the mood for something a little more complex then you might want to check out this video to figrure out how to build a Twitter prototype and this video to add 'Force Touch' to your Pixate project.
Mithun Mohandas
Mithun Mohandas is an Indian technology journalist with 10 years of experience covering consumer technology. He is currently employed at Digit in the capacity of a Managing Editor. Mithun has a background in Computer Engineering and was an active member of the IEEE during his college days. He has a penchant for digging deep into unravelling what makes a device tick. If there's a transistor in it, Mithun's probably going to rip it apart till he finds it. At Digit, he covers processors, graphics cards, storage media, displays and networking devices aside from anything developer related. As an avid PC gamer, he prefers RTS and FPS titles, and can be quite competitive in a race to the finish line. He only gets consoles for the exclusives. He can be seen playing Valorant, World of Tanks, HITMAN and the occasional Age of Empires or being the voice behind hundreds of Digit videos. View Full Profile


