
HIGHLIGHTS
WordPress ensures you have a fully functional website for your business up and running from scratch in no time at all. Here's how:
Every business needs a place on the web, and the quicker you can get a functional web site up, the better. There are a number of great open source content management systems (CMSs) to help you start and run a web site, but you’ll need time to figure them out – and while you do, your site’s visitors must bear with the “under construction” sign on your home page. WordPress, meanwhile, stands out as one that’s extremely flexible, easy to set up, and easy to customise.
Need to know
Before you run off to start creating a WordPress-based site, there are a few things you need to remember. First, WordPress is best for a site that is regularly updated, so it’s perfect if a business blog or newsfeed is part of your plan, but overkill if all you want is a few static pages.
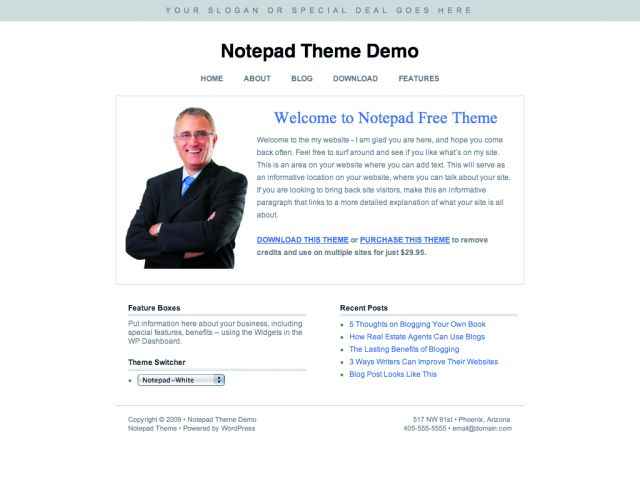
Secondly, WordPress still is, at its core, a blogging engine. The default WordPress installation looks like a blog, so don’t plan on using that for your website. The good news is that there are a number of WordPress themes tailored for all sorts small businesses, and if you have some skills with CSS layouts (which aren’t hard to obtain), you can design a theme of your own in a day or two.
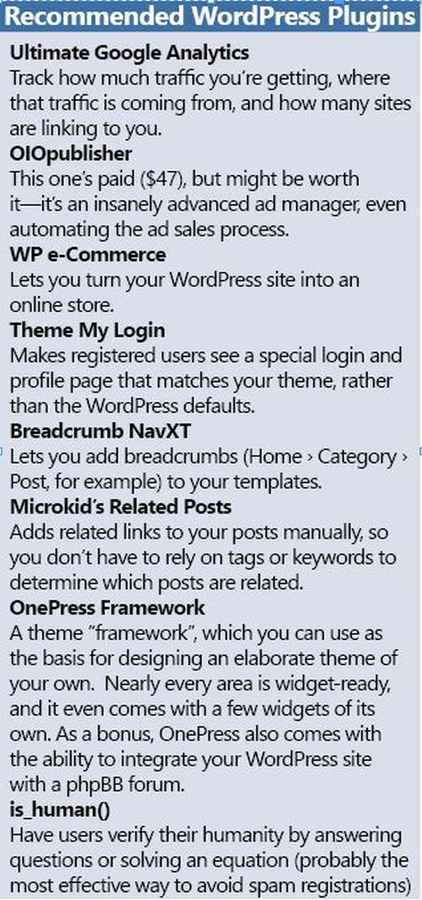
Thirdly, while WordPress’s core features are impressive on their own, they aren’t tailored for businesses. It doesn’t have any ad management features, for instance, nor does it have any site statistics built in. Again, this is easily remedied—WordPress has a huge database of plugins that’ll add these functions to your site, and installing them is embarrassingly easy.
Finally, before you begin setting up WordPress, you’ll need to have some information handy:
• A MySQL username and password for your site (you can get this from your site’s host)
• The ability to access your site’s files via FTP
• The latest version of WordPress, from wordpress.org/download.
You can customise WordPress to work for any kind of site
Setting it up
Several hosting providers provide you with cPanel or an equivalent – a simple control panel for you to administer your website – which will let you install WordPress without needing any configuration. Even if you don’t have this feature, installing WordPress is simple enough.
Before beginning, create a new database in MySQL – this will hold all the content and information for your site. Unzip the WordPress archive that you downloaded, and you’ll see all the files you need inside a folder called wordpress. Rename wp-config-sample.php to wp-config.php. Open the file in any text editor, and enter your database name, username and password under “MySQL Settings”.
Now use an FTP client to upload the contents of the wordpress folder to your site (if you upload the folder itself, you’d have to access the site by going to www.yoursite.com/wordpress). Once the upload is complete, visit your site to begin installing WordPress. All you have to do now is enter a name for the site and your email address, and WordPress will give you an admin password so you can begin using your site.
Once you’ve got your administrator password, you can log into your site’s Dashboard, which gives you a quick overview of what’s happening on the site.
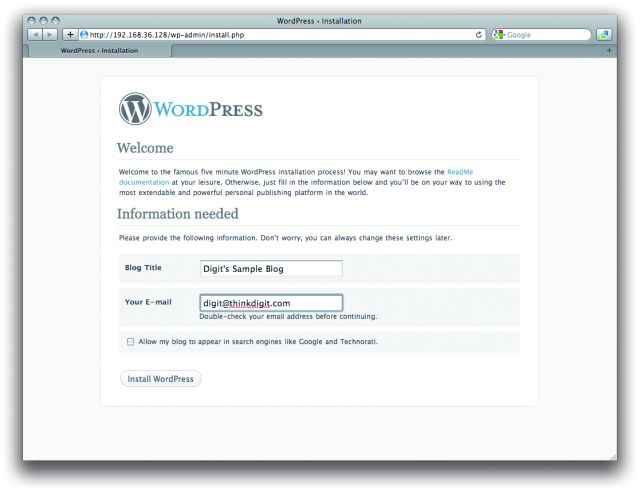
Installing WordPress is a no-brainer
How the content works
When talking about content in WordPress, we use four terms – posts, pages, categories, and tags.
Posts are the most basic units of your site: every time you add new content to the site, you do it as a post. To add a new post, go to Posts > Add New in your dashboard. You can also add excerpts to posts, which are summaries of the posts’ content. On your site’s main page, posts appear newest first.
Pages are similar to posts, but are for static content – an “About Us” page, for example. They fall outside the normal structure of your site, and unlike posts, don’t follow the newest-first order. You also can’t put them in categories.
Categories are self-explanatory. WordPress lets you put posts in as many categories as you need, and can even put uncategorised posts in a default category you can select. To create and manage your categories, go to Posts > Categories in your dashboard. To change the default category for posts, go to Settings > Writing and change the Default Post Category.
And finally, you can add tags to posts, which are key terms that describe the posts. Search engines pick up these terms when they’re crawling sites, so if you’re starting a company blog, tagging your posts is always a good idea.
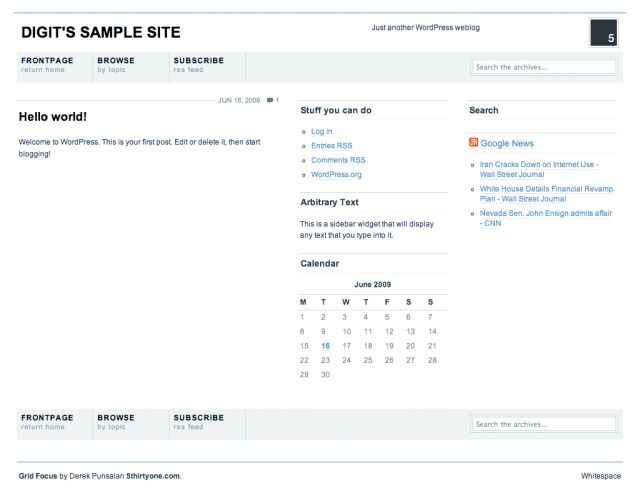
Without customising your theme, however, your content is still going to look like a blog.
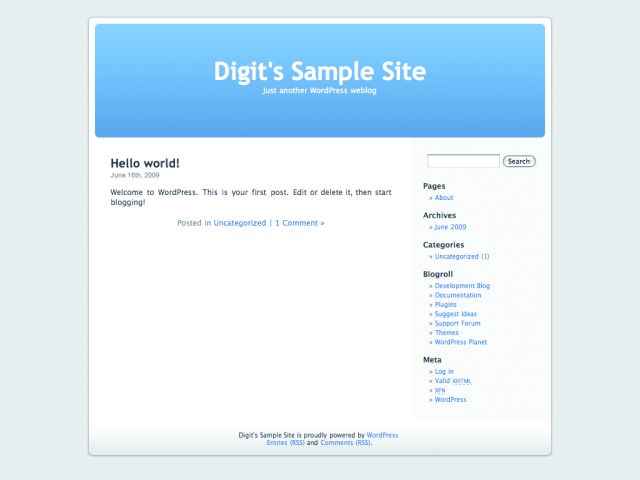
Default WordPress site, with a single sample post
Customising the site
As of this writing, the WordPress theme directory has 832 free themes, and counting. You can even get your hands on a premium theme for anywhere between $5 (Rs 250) and $100 (Rs 5,000).
Once you’ve found a theme you like, download and extract it to your hard disk, upload the theme folder to wp-content/themes/ on your site, and go to Appearance in the dashboard to activate the theme. Most WordPress themes will give you one or more sidebars (which may or may not be on the sides), to which you can add widgets, such as a calendar, a list of categories, and so on. To add widgets to your sidebars, go to Appearance > Widgets, and drag the widgets you want into the sidebars you want them in.

The Advertising Manager plugin lets you put an ad widget in your sidebar
And when your site looks like it should, you can add plugins to make it work like it should. Installing a new plugin is as easy as the theme—download and extract it, upload the folder to wp-content/plugins/, and go to Plugins in the dashboard. To enable the plugin you just uploaded, click on the Activate link against it.
If the pre-made themes don’t meet your needs, you can exploit the almighty WordPress Loop to create one of your own.
Getting Started With A Theme
There aren’t enough pages for us to get into the nitty-gritties of theme design, but you need two files to get started: a style.css, that will contain all the CSS styles for your theme, and index.php, which will be the template that all your pages are based on. At the heart of it all is this bit of code, called the WordPress Loop:
<?php if ( have_posts() ) : while ( have_posts() ) : the_post(); ?>
<!–this is where you display content–>
<?php endwhile;?>
This code gets your posts from the database, ten at a time, ready for you to display as you want it. For example, let’s say you have a three-column layout, and the HTML looks something like this:
<div id=”column-1”></div>
<div id=”column-2”></div>
<div id=”column-3”></div>
Let’s say that you want posts from the News category in column 1, the titles of all your posts in column 2, and a sidebar that you can stick widgets into in column 3.
First, the news. Here, we’ll use the query_posts() function, which lets you change the way that WordPress fetches posts from the database.
<!–start a loop in column-1 for news–>
<div id=”column-1”>
<?php
query_posts(‘category_name=News’); //restrict only to the News category
//start the loop
if ( have_posts() ) : while ( have_posts() ) : the_post();
?>
<h1><?php the_title();?></h1>
<div class=”excerpt”><?php the_excerpt();?></div>
<a href=”<?php the_permalink();?>”>Read More..</a>
<?php endwhile;?>
</div>
As you can see, WordPress gives you functions that are quite self-explanatory: use the_title() to display the title, the_excerpt() to display the post’s excerpt (or the_content() to show all the content), and so on.
Column 2 is much the same:
<!–start a loop in column-2 for post titles–>
<div id=”column-2”>
<?php
//start the loop
if ( have_posts() ) : while ( have_posts() ) : the_post();
?>
<h3><a href=”<?php the_permalink();?>”><?php the_title();?></h3></a>
<?php endwhile;?>
</div>
As far as index.php is concerned, column 3 is simple:
<div id=”column-2”>
<?php get_sidebar();?>
</div>
But this means your theme now needs two more files: sidebar.php and functions.php. Create a new file called sidebar.php and enter this:
<ul id=”sidebar”>
<?php if (!function_exists(‘dynamic_sidebar’) || !dynamic_sidebar()): ?>
<li>
This sentence will appear if you haven’t chosen any widgets.
</li>
<?php endif; ?>
</ul>
This makes your sidebar dynamic, and hence capable of holding widgets. The second part of this activity is registering the sidebar. Create a new file called functions.php, and enter this bit of code:
<?php
if ( function_exists(‘register_sidebar’) )
register_sidebar();
?>
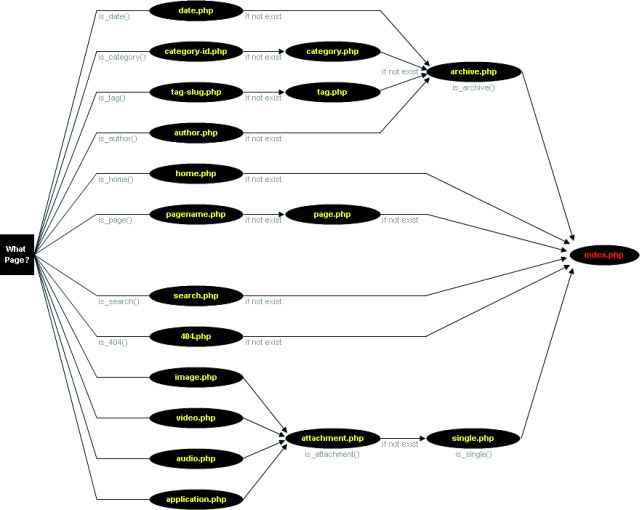
Template hierarchy shows which files it’s expecting in your theme (From: WordPress Codex)
That covers the most essential (and probably the most useful) aspects of writing a theme. Obviously, the job doesn’t end here. You should create templates for categories, single posts, pages, and any type of content that you want to make specific designs for.
Developing your own theme gives you much tighter control over the way your posts – and ads – are displayed, and even if you’re just modifying a theme you downloaded, it’s worth your time to see what the Loop is capable of. For more, visit the exceptionally well-documented WordPress Codex at codex.wordpress.org.


