
Promotional feature : In the third of our four-part series on NAS devices, we’ll provide you with guided instruction to get your NAS device up and running with the WD Red™ Advantage.
NAS devices were initially designed with business and enterprise users in mind, and back then, they were also more challenging to set up. Recent improvements in bandwidth and a subsequent increase in media consumption has been the catalyst for widespread market demand for more storage and security options, and furthermore, an easier set up process for our SOHO and even prosumer markets. People want access to their data remotely and in a secure manner, so choosing a personal vs. public cloud solution makes the most sense. There are plenty of NAS devices available in the market to suit your every need; you can opt for the more simple two-bay NAS or go for a higher end four-bay NAS .
Hardware you’ll need
1. 4 x WD Red hard drives (WD20EFRX)
The most important part of the setup is selecting the hard drive. For this configuration we will be using four WD Red 2 TB hard drives. Each drive is optimized for NAS devices and features NASware™ 2.0. These drives offer a wide range of capacities and consume less power and are cooler. Almost all NAS manufacturers support WD drives so you might as well give these drives your first preference.
.jpg)
2. A NAS Device
For this setup we are going to be using the QNAP TS-421, a four-bay device featuring the following hardware:
CPU – Marvell 2.0 GHz
RAM – 1 GB DDR3
Flash Memory – 16 MB
Ethernet – 2 x Gigabit ports
Ports – 2 x USB 2.0, 2 x USB 3.0, 2 x eSATA
Cooling – 1 x 90mm Fan
3. A Router
Since you do wish to share the data on the NAS device with everyone in your household / office you’ll need a router to connect it to. Ideally, it should be a model with Gigabit Ethernet. For this setup we are using a TP-Link TD-WDR4300 which is an 802.11n router with a capacity of 750 MBps over wireless radio and has 4 Gigabit ethernet ports. The model is great for a home as well as a small office since it is more than capable of streaming HD movies over Wi-Fi® which is one of the most bandwidth intensive operations you can perform. It has three external antennae and supports a WAN connection.
4. Clients
By clients, we mean anyone who wants to connect to the NAS device, so if you are interested in setting up your NAS, please have all your computers, tablets, smartphones and smart TVs ready to go.
Putting it all together
Step 1. Ensure you have everything ready
Make sure you have all the WD Red NAS hard drives ready. Certain NAS devices may require you to initialize each disk before it can be used in the device, (A FusionStor model we tested would not recognize a hard drive if it had any partitions on it so the partitions had to be removed before the NAS device could use it.) however, for the QNAP TS-421 we don’t need to go through that step. Hopefully, you have your router set up and have performed all bandwidth tests to ensure that your QoS(Quality of Service) configuration is optimal. Dual-band routers ensure that bandwidth heavy operations like media streaming, file copying etc., are channeled via the 5 GHz band while other operations are channeled via the 2.4 GHz band by default. Refer to your router manual for further details. If you have to download any extra software for your NAS device then do so and keep it at the ready. Make a bootable image of the software if the instructions call for it, for this setup we don’t have to any of that.
.jpg)
Step 2. Assemble everything
Pull out the drive bays and seat each hard drive in the bays one-by-one. If you are going in for a two drive setup with hardware that supports more drives, refer to the user manual for determining bay priority, i.e. which bays to populate first. If you need to initialize your drives first, then do so before mounting them in your NAS device.
.jpg)
Step 3. Hook up all the wires
This is where you need to pay attention to which wire goes where. Your NAS device may have more than one Ethernet port. Choose a gigabit port if your device has it. All you need to do is plug the other end of the Ethernet cable into a LAN port on your router. So to summarise, your Internet connection goes into the WAN port. Your NAS device, and computers go into the LAN port to ensure uninterrupted connectivity. There are NAS devices that allow for Wi-Fi connectivity, but very few have powerful antennae, so we’ll let the router handle the Wi-Fi connectivity.
.jpg)
Step 4. Power it up
Power up your router first and let it complete the initialization process. Access the router configuration and ensure that the NAS device is given high priority access. Each device has the MAC address mentioned on the back, ensure that they are entered into the table for allowed devices (This step is only for those who have MAC based client blocking enabled). Ensure that the computer with which you are going to be configuring the NAS device is on the same subnet as the NAS device, otherwise, there will be difficulty in connecting to the device. Finally, power up your NAS device.
Step 5. Setup the NAS
Your WD Red hard drives are now spinning up and coming to life. The initial boot up stage may last from anywhere between 3-15 minutes depending on your device. The instructional manual will mention which indicator means the device is online and, or standing by for the next step. Depending on the OS installed on your computer, you might have to download extra software to set up the NAS device. QNAP uses QFinder. Once you fire up QFinder, it will find your NAS device if you have done everything right up until this step. Go for the Quick Setup if you do not wish to fiddle with the settings.
.jpg)
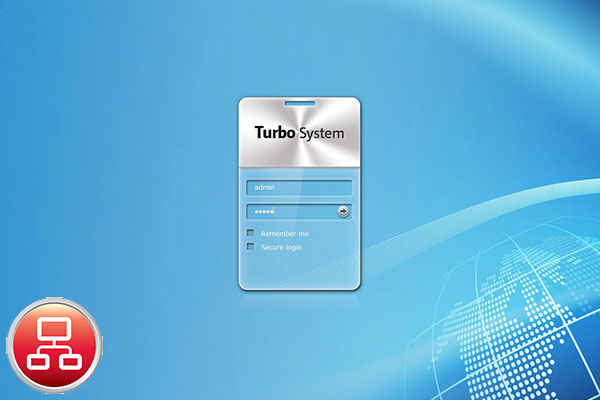
Once the setup finishes, it will automatically open your browser and bring you to the login page which looks somewhat like the one below, but if you are using a different NAS device, you’ll be met with its respective login screen. You should be given the choice to pick a RAID configuration for your drives during the initial stages of the setup process, so refer to our next article to pick the right configuration for your NAS.
Step 6 – Enjoy
You now have the WD Red hard drive advantage and can start transferring your data onto your NAS device and sharing it. Each device has its own OS which is why you’ll need to reference the user manual for any further steps. You can map the NAS to your Windows® Explorer / My Computer window for the sake of convenience. Anyone who connects to your router will now have access to your NAS until you explicitly block users.
Temperatures
As we can see in the image below, the WD Red hard drives have an average of 35.5 degrees Celsius, even after two hours of operation. This is below average desktop temperatures which range anywhere between 40-60 degrees Celsius depending on the cooling method employed.
.jpg)
You can relax now that your data is securely stored on WD Red hard drives. Millions around the globe have put their trust in WD and we’re happy to see that you’ve joined them . This was part three in our four part series on NAS hardware, so look forward to the next installment where we’ll be covering all pointers you need to keep in mind while shopping for these devices. The other articles in this series can be found here and here.
Team Digit
Team Digit is made up of some of the most experienced and geekiest technology editors in India! View Full Profile


