As with earlier versions of the operating system, one of Windows 8’s biggest benefits is how easy it makes setting up a network. A simple way for small or home businesses to take advantage of Windows’ networking capabilities it to set up a “homegroup.” This lets them easily connect Window 8 computers with devices such as smartphones, printers or media servers so that they can communicate with one another and share data.
In this article, I’ll take you through the steps required to connect two Windows 8 machines together in a homegroup. When a set of instructions such as File>New>Open are given, it means you click File and then will see the option New; click New and you will see Option, which you should then click.
Windows 8 Homegroups
Creating a Homegroup
Before getting started, your computer has to be connected to a network. The connection can be wired or wireless, but make sure you are connected to your home or office router first.
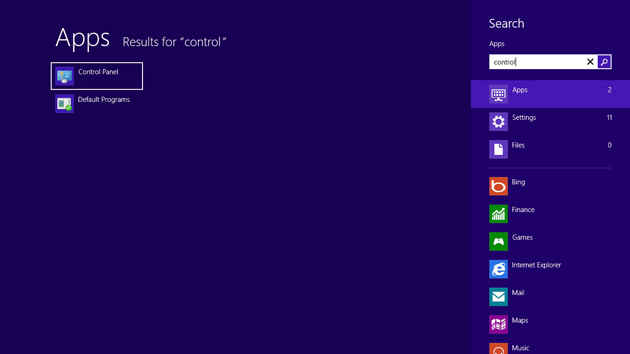
In the Windows 8 Start screen, begin typing “Control Panel” until the Control Panel icon is displayed:
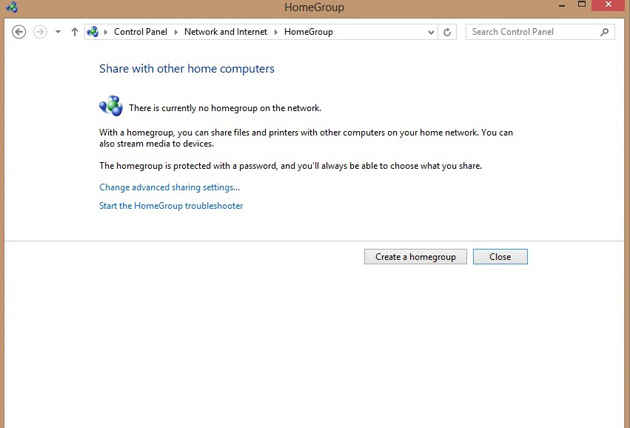
Click on the Control Panel icon and then on Network and Internet. Click on the HomeGroup option. Click the Create a HomeGroup button.
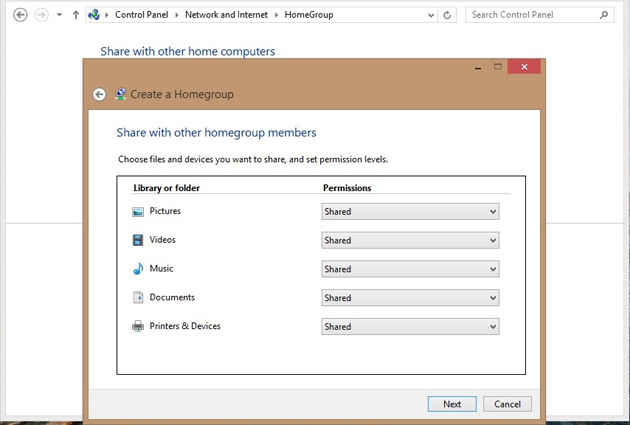
The Create a Homegroup wizard opens. Click Next. The wizard asks you select the files and devices you want to share within the homegroup and set the permission levels.
Click Next. Windows will establish the sharing and permissions you just set. The wizard will then display an auto-generated password that must be entered into any computers that you want to add to the homegroup. Don’t worry if you don’t like the password created; you can always change it, but copy it down for now.
Click Finish.
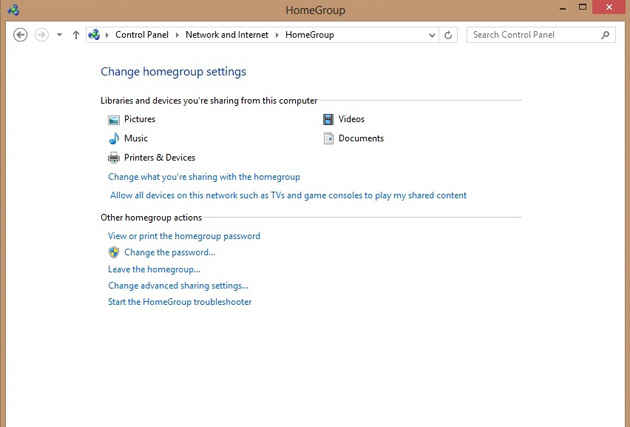
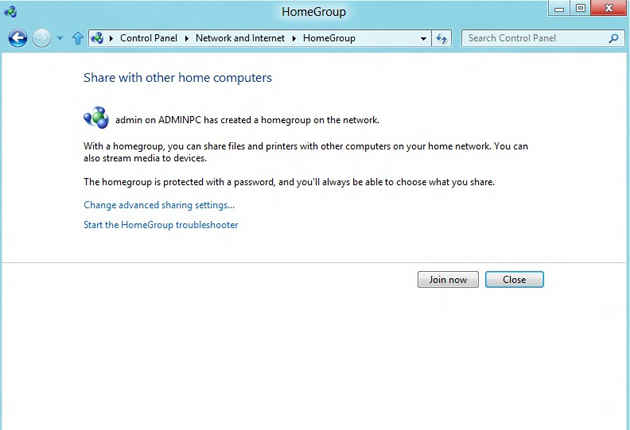
Once you go through these instructions, how do you verify that the homegroup has been set up? It’s easy: Go back into Control Panel>Network and Internet>HomeGroup. You will now see listed the libraries and devices being shared in the homegroup.
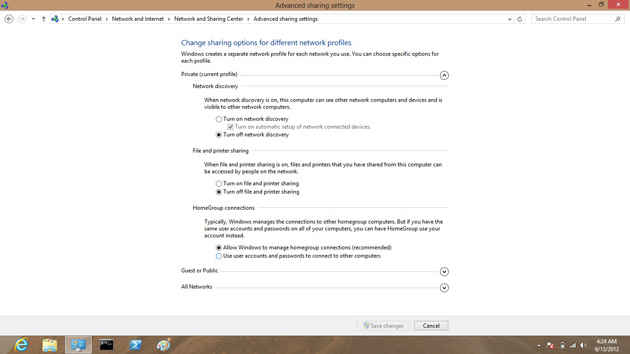
You can also tweak your homegroup settings from this screen. For example, change the password by simply clicking the Change the password link. I also recommend that you verify that network discovery is turned on; otherwise you will have problems sharing data among member devices in your homegroup. To turn on this feature, from Control Panel>Network and Internet>Homegroup, click Change advanced sharing settings.
Under Private (current profile), click the radio button to Turn on network discovery. Do the same for Turn on file and printer sharing if you want to share files and printers between homegroup members.
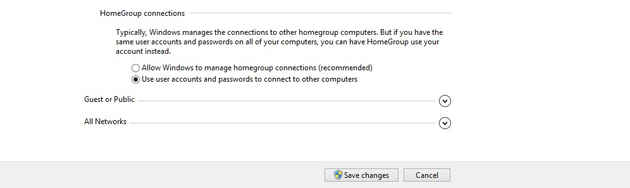
By default, Windows will manage your homegroup connections. For added security, you can create user accounts and password for any machine that connects to the homegroup and use those credentials instead. To do this, under HomeGroup connection, click the radio button next to Use user accounts and passwords to connect to other computers.
Connecting a Windows 8 Machine to a Homegroup
To connect another Windows 8 machine to your homegroup, ensure that machine is connected to the same network as the computer you used to create the homegroup. This means both machines are wirelessly connected to the same router or access point, or both are connected to the same router, switch, or hub via Ethernet cables.
From the machine to be connected to the homegroup, open Control Panel>Network and Internet>HomeGroup.
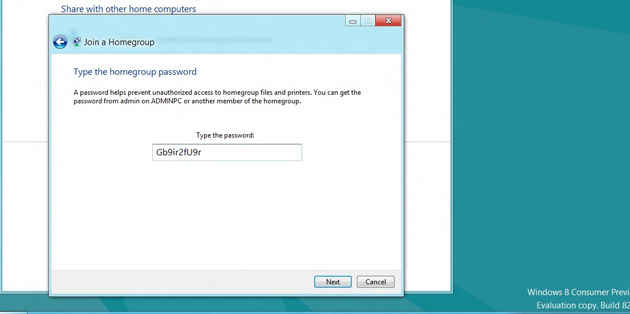
The HomeGroup window should show that an existing homegroup has been discovered.
Click Join now>Next. Select the folders you want this computer to share with other members of the homegroup. Click Next. Enter the password that was created automatically (or the one you set) when the homegroup was initially created.
Click Next again. Windows will confirm that you have joined the homegroup.
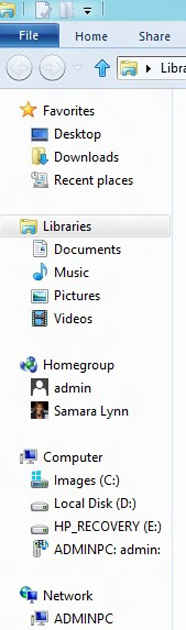
From a homegroup-joined Windows PC, you can go into the Libraries folder from the desktop and you’ll see a listing for “Homegroups.” Under this listing, all the machines in the homegroup and all the folders they are sharing will appear. From here, you can quickly access another machine’s files within the homegroup.
From one machine, you can open and access file from another. Homegroups are also useful if you don’t have central storage such as as a NAS (Network Attached Storage) device or a media server, because you can share pictures, videos and music between computers connected to the Homegroup, just by going into Explorer and clicking on another computer’s library. And new content added to a user’s library, is automatically discovered by other users’ computers in the homegroup.
Homegroups also provide security control over data. By default, any files kept in a user’s private folder (the “My Pictures” folder for instance) allows other users Read access only. If you want to give others Read and Write access you can place files in the Public Pictures folder, for example, on your machine.
Finally, homegroups gives users a way to connect devices such as printers, for sharing between members. With homegroups and Windows 8 (remember, you can connect Window 7 machines as well) you can create a fairly sophisticated, secure network without needing to know really anything about networking computers.
Copyright © 2010 Ziff Davis Publishing Holdings Inc