Are you a heavy VLC user? Well here are a bunch of tips to help you get more out of your favourite video player.
VLC is a free open source media player developed by VideoLAN. For quite some time now it has been the most popular media player across all platforms. Despite a minimalistic and frankly, dull GUI, VLC has held its ground due to the provision of large support for a variety of audio and video formats. Well, besides being a solid media player VLC has some amazing features that are not so obvious first hand. This section will introduce you to a few tips and tricks to harness the inbuilt power of VLC. Tests have been done on the latest version of VLC for Windows which can be downloaded from the official VideoLAN website: www.videoLAN.org
Convert audio and video
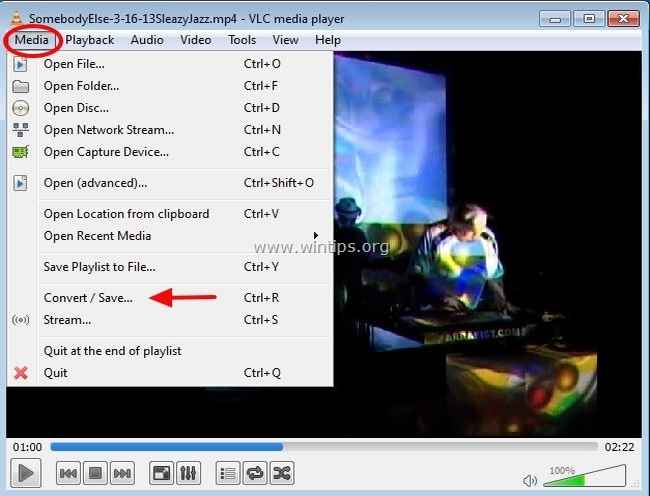
VLC is quite a handy native audio and video converter. Using VLC you convert an audio or video file to a variety of available formats. What’s more, you can also extract the audio from a video and save it as an MP3 file. Quite a handful for a media player, we should say. To convert a file, simply go to Media->Convert/Save. In the window that opens you can add the file you want to convert and click on Convert/Save. In the new window that opens select the destination folder for saving the converted file. Choose the output format in the Profile drop box and click on Start. Don’t forget to change the extension of the output filename!
Record Video
VLC gives you the option of recording videos you are watching from a DVD, etc. TO enable this feature you will have to enable advanced control option through View->Advanced Controls. Enabling this option will add a set of buttons above your regular buttons in the standard GUI. Click the left most button to start recording and click it again to stop recording. The recorded video is saved in My Videos folder inside your Home folder.
Rip Video
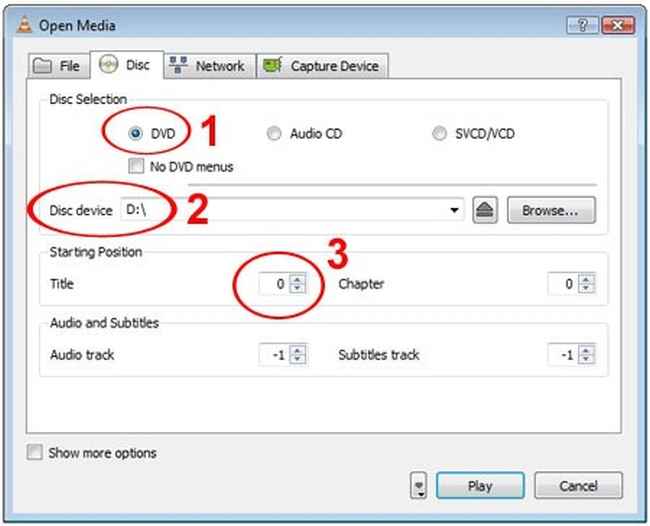
Yes, you heard it right. Your innocent media player apparently is a part-time ripper as well. It goes without saying that the rip facility of VLC will not be as powerful as commercial software like NERO. Copying DVD’s and general audio is fine but copying heavy formats with higher resolutions can become a test of patience. Well, since VLC is marketed as a video player, a rip ability add-on is quite a nifty value addition. To copy from the CD/DVD simply follow the file conversion instructions. Go to Media->Convert/Save. Instead of adding a file from your existing videos simply click on the Disk option between File and Network options. Clicking on Convert/Save will open the usual file conversion window where you can select destination folder and output type. If you want a simple copy of disk contents without conversion check the dump raw input box. Click on Start to enable the process.
Custom skins and interface
VLC is not the prettiest Media Player. The GUI design is minimalistic and and there is barley and dash of creativity . You can change that for the better by applying a custom skin on your VLC player. Skins can be downloaded for free from the VideoLan website. There are some really amazing skins available there. Download skins and save them in the VLC skins folder in C:Program FilesVLCskins. Go to Tools->Preferences->Interface and select the custom skin option. Select the skin you want to apply by clicking on the Choose button. If you want to customize the GUI layout and interface you can play around with the button positioning etc by simply going to Tools->Customize Interface.

Reduce CPU Usage
There are a lot of complaints about newer versions of VLC loading the CPU. VLC comes with an option of hardware acceleration in which some processing is given to the system GPU. to lighten the load on the CPU processor . This reduces the CPU processor consumption of VLC and allows you to run simulations, apps etc while running your media player smoothly. While this is a really helpful option it might sometimes lead to slower decoding. Anyways for laptops with GPU hardware this is quite a helpful option for escaping choppy play-back and heavy CPU usage. To enable this option go to Tools->Preferences->Input and Codecs and select the Enable GPU acceleration option.
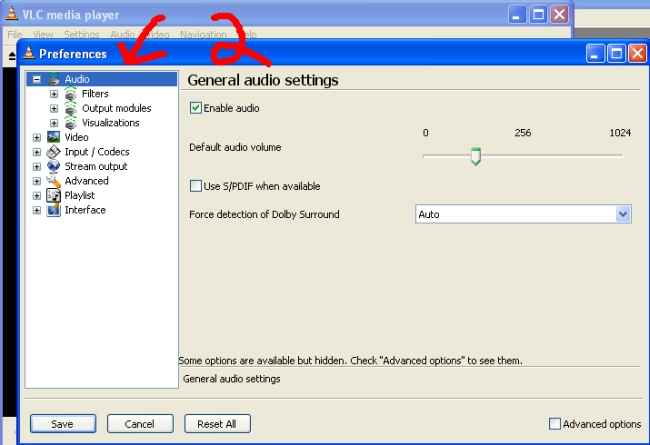
Audio Sync
Watching videos is a horrible experience when the audio is not synced. VLC has a neat option to sync audio with video. For increments of 50 milliseconds you can use the J and K keyboard shortcuts for backward and forward increment respectively. In case you have been precise enough to record exact amount of change required you can do the following. Go to Tools->Preferences->Audio. Select the all option in the lower left corner of the window. In the window that follows select audio from the host of options in the left side menu. Then simply enter the time in milliseconds in the box next to Audio De-synchronization compensation.
Reduce Video Lagging
Old computers seem to have a problem while playing high resolution videos and certain formats. This can be fixed by using a simple trick. Go to Tools->Preferences->Inputs and Codecs. In the Codec section change the settings of the ‘Skip H.264 in loop de-blocking filter’ from None to All and save the setting.
Reduce Pixellation
Low quality videos can be enhanced by reducing pixellation and blockiness effects. This can be done by enabling post processing option by going to Video->Post Processing. A higher number denotes a higher level of post processing. What this option effectively does is employ a filter on every frame that smoothens the image . Hence you end up losing on image detail, but block effects are smoothened out. As this is computationally intensive, it is best applied on laptops with high processing power.
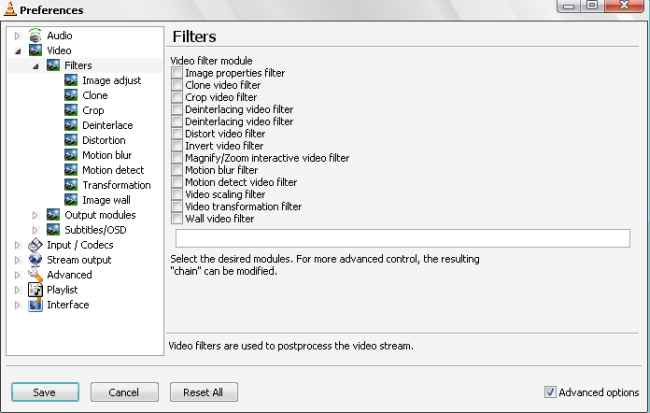
Video Effects
VLC has some really cool video effects options. You can tinker around with a variety of these by going to Tools->Effects and Filters->Video Effects. Ever wondered if Yuvraj’s flick six off Brett Lee would look as elegant if he were right handed? You can check that out by flipping the video horizontally using Geometric Filters. Motion blur effect can be added in real time using Advanced Filters. There are a load of options for changing colour, contrast, brightness, sharpness, etc.
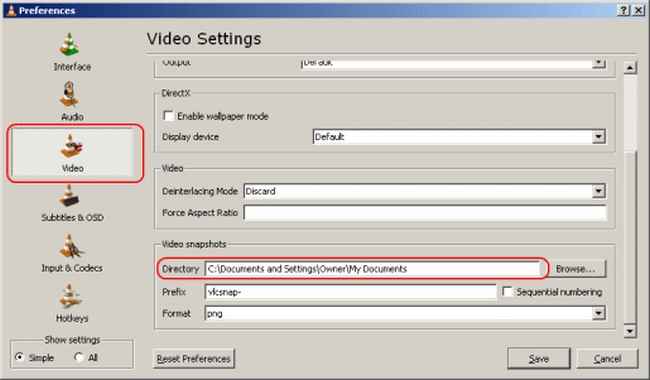
Snapshots
Want to tell a friend about a blooper that appeared in a movie? Well, take a snapshot. Pausing at the right moment for a snapshot is invariably difficult. In VLC, you can enable advanced controls by View->Advanced Controls. The right most button in the new row of buttons is the frame by frame playback button. Repeated pressing of the button will enable to play and pause your video playback frame by frame. That makes the task of taking a snapshot quite comfortable. You can take a snapshot of a frame by Video->Take snapshot. The picture is saved in the My Pictures folder of your home folder.