Deep Learning with TensorFlow and Intel – a hardware and software guide for beginners

Interested in deep learning but don’t know where to start? Allow us to help.
Deep learning is the next big thing in tech, with applications in image processing, speech processing and natural language processing taking off, all based on the simple idea of an artificial neural network. There’s no dearth of pre-existing frameworks with which to implement a range of pre-designed models, many of which even have pre-trained weights – so you can jump right into the inference stage. But in order to add even a little customizability to your deep learning application, it will probably be necessary to have the right training and inference hardware.
Deep learning is a computationally intensive process, particularly during training, but also for inference. It involves a huge number of linear algebra operations, and this means that a well-planned hardware setup can go a long way in making your application perform well at the scale you need it to. But this is easier said than done, especially when on a budget. A faster computer should have a CPU with more cores and higher clock speed, right? But wait, what about GPUs or Graphical Processing Units, aren’t they supposed to be better at linear algebra operations? And what are these new kids on the block – FPGAs and ASICs?
Here is a step-by-step guide to setting up a workstation to get started with Deep Learning without breaking the bank. While there are many libraries for implementing deep learning topologies, this article is geared towards one of the most popular deep learning frameworks in use today – TensorFlow.
What you will need
Typically, a fully functional deep learning rig for non-commercial purposes – including research, competitions and even most initial-stage startups – will require the following:
- A processing unit for desktop and development (a CPU with enough cores and frequency will suffice)
OR
- a high-powered scalable CPU that can really crunch the numbers
OR
- A processing unit for the deep learning computations (such as a CPU or GPU)
- CPU or GPU cooling systems
- Plenty of RAM (in which to load your potentially huge datasets)
- A hard drive (preferably a Solid State Drive or SSD)
- A power supply unit (PSU)
- A motherboard and perhaps a case (if you want things to look pretty)
- A monitor (or two, or even three!)
The choice of hardware
For deep learning at scale, the CPU is quickly becoming a more and more viable option. Intel’s latest range of CPUs is optimized for deep learning calculations using the Intel® Math Kernel Library for Deep Neural Networks (Intel® MKL-DNN), and it’s actually an excellent one-size-fits-all solution for a standard deep-learning-enabled processor.
However, it’s not so cut and dry when you mention CPUs because there are a vast number of choices when it comes to processors and it really comes down to what kind of application you wish to implement your deep learning project on. Building a deep learning model consists of two broad phases – training and inferencing. If you look at the entire lifecycle of a DL model then your hardware will spend most of its time on the inferencing part, so if you’re starting out and don’t want to invest in specialized hardware for every stage of the process, then the most prudent course of action is to invest in hardware that’s focused on inference but can also handle the training part of it. It might not appear the right choice but current gen CPUs such as the Intel® Xeon® Scalable Processor family are built specifically to run high-performance AI workloads.
Field Programmable Gate Arrays are typically used in deep learning only for very specific optimizations for very high speed and aren’t likely to be necessary for your applications. And ASICs (Application-Specific Integrated Circuits) are a kind of accelerated chip that can be customized for AI operations. So you really need to figure out what kind of deep learning model you wish to deploy if you want the best performance. In fact, Intel has a wide portfolio of specialised hardware such as the Intel® FPGAs, Intel® Movidius™ Myriad™ VPUs and Intel® NCS 2, which are suited for different AI workloads. Since we’re starting out, we’ll stick with CPUs for now.
How to pick a processor
Your desktop Intel Core Processors can run inference workloads. In fact, the Intel Xeon Scalable Processors (previously known as Skylake-SP) are designed with AI and HPC workloads in mind. With improved memory and I/O bandwidth, your DL models face fewer bottlenecks. One of the key advantages of going with the new processor family is the introduction of the Intel® Advanced Vector Extensions 512 (Intel® AVX 512) instruction set that increases parallelism and vectorization which are important for AI workloads.
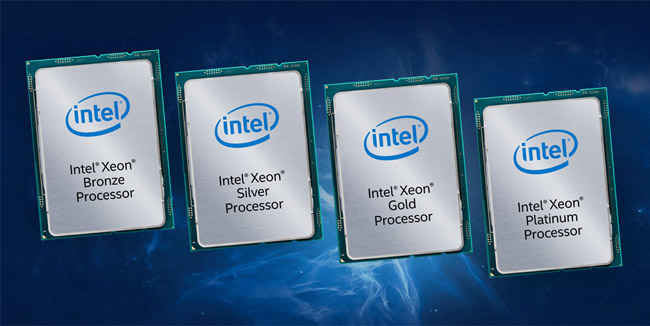
With four lineups – bronze, silver, gold and platinum – the Intel® Xeon® Scalable Processor lineup gives you a wide range of processors to suit your investment. The bronze lineup is extremely affordable with the 6-core Intel® Xeon® Bronze 3104 Processor being one of the most popular SKUs and as your requirements scale, you can simply upgrade to a Silver or Gold CPU since the sockets are the same.
Getting a GPU
In some cases, offloading compute workload to a GPU might execute a task quicker. There are a few simple points to keep in mind while getting a GPU, the first of which is compatible with your CPU and motherboard. However, before you do that, you should figure out what kind of workloads you will be running.
One thing to note is that most of the mainstream desktop CPUs in Intel’s portfolio come with Intel® HD Graphics and they’re quite useful if you wish to run inference workloads. You can make use of clDNN (Compute Library for Deep Neural Networks) which is a library of kernels to accelerate deep learning on Intel Processor Graphics. They’re based on OpenCL and are able to accelerate many of the common functions calls made to popular topologies such as AlexNet, VGG, GoogLeNet, ResNet, Faster-RCNN, SqueezeNet, and FCN. So based on the workload, might not even need a discrete accelerator.
RAM
The first important point to note is the RAM speed is one of the least useful things you can spend your money on. Speed is essential in moving data sets from the cold storage to your memory and capacity plays a role in how much of the dataset you can store closer to the CPU. Moving data frequently from the cold storage to the RAM isn’t ideal. It would be better if you got an SSD as a replacement for your hard drive, to begin with. Investing in SSDs such as the Intel® Optane™ SSD DC P4800X would help in this regard. Coming back to the RAM aspect, a good rule of thumb is to populate all memory channels first and have as much capacity as your dataset requires.
CPU Cooling Systems
The importance of this component of your rig cannot be overstated. An overheating CPU is not only going to be throttled but will also have a shorter lifetime of usage – and worst of all, might cause a fire!
We’ve mentioned how you can even run inference workloads on the integrated graphics present on CPUs. It’s natural to question whether this would require additional cooling. Since this inference workload is performed on the IGP (Integrated Graphics Processor) which is present on the CPU die, you don’t have to make separate arrangements for cooling. You can simply refer to the datasheet for the said processor and buy a cooler that can handle the TDP that the CPU is rated for. As long as you are not overclocking your CPU, you do not need a custom cooling solution.
Hard Drive (preferably a Solid State Drive)
Good data-feeding practices are key to making the most of a hard drive. Reading data from disk at run-time is a universally slow option and should be avoided at all costs. An asynchronous call to the same will be orders of magnitude faster. Your hard drive can really be as basic as it gets, and these simple principles will hold true.
A solid-state drive, however, is a nice high-performance addition that does give you a useful speed boost. Most systems combine an SSD with a traditional hard drive, using the larger and slower hard drive for storing data, and the SSD for high-productivity tasks and frequently accessed data that one would prefer not to always have in RAM.
The Intel® Optane™ family offers a nice set NVMe solid state drives. These make use of 3D XPoint™ memory and are great to replace your existing hard drives. Intel® Optane™ SSD 900P Series offers low latency coupled with high IOPS.
Power Supply Unit
There’s not much to say here. Investing in a PSU with a high rating for efficiency is always a good idea. This will also prolong the life and efficiency of your hardware. Do make sure that your PSU has enough connectors for all the components you are using. Also, the PSU should have enough wattage on the 12V rails to handle the requirements of the CPU. There are processors with C-states that might be incompatible with older PSUs so you should always check your CPU datasheet to know its wattage requirements and also check the PSU datasheet for compatibility with the processor family.
Motherboard
There are two major factors to take care of while selecting a motherboard. Firstly, make sure there are enough PCIe slots to connect all your devices and that it can support the devices you intend to use. Whether you are using GPUs or FPGAs such as the Intel® Stratix® 10, you need to ensure that there are enough PCIe lanes to satisfy the requirements of each add-in card.
Computer case
Ensure that your case can contain the full-length add-in cards that have been inserted. It may be helpful to assemble the setup on trial, take some measurements and only then order a case. If you have a cooling rig, especially with water-cooling, you may need extra space for this as well. Nothing is worse than ordering the perfect case only to find that your parts simply won’t fit. If you’re getting a workstation motherboard then there are specialised cases which fit dual-socket motherboards and have plenty of mounting options to install water cooling components.
Another note of caution – water-cooling rigs will not work well if any of the tubes are bent at awkward angles! This is extremely important and can be a major safety hazard. Ensure that your case is large enough to have clearance on these tubes.
Getting started with Deep Learning
Now that your hands are literally dirty from assembling your rig, it’s time to get your hands metaphorically dirty with the stuff you came here for – deep learning.
We’ll be discussing TensorFlow, one of the most popular deep learning packages available, most commonly used in Python, though written in C++ and in possession of a growing C API. We will, in this tutorial, be working with Python 3.4.
With TensorFlow, you can work on pretty much any application in deep learning, from image recognition and processing to speech processing to natural language processing. There is also no dearth of ready-made models for you to play with and explore. TensorFlow has rapidly become the industry standard, and it’s a great place to get started.
One point to note is that TensorFlow has a slightly unusual computation scheme which might be particularly intimidating to novice programmers. The computations are built into a ‘computation graph’ which is then run all at once. So to add two variables, a and b, TensorFlow would first encode the ‘computation’ a+b into a computation graph. Before running this graph, trying to access this graph will not give a result – the result hasn’t been processed yet! Instead, it will give you the graph. Only after running the graph will you have access to the actual answer. Bear this in mind, as it will help clear confusions in your later explorations with TensorFlow.
One of the best things about using TensorFlow with Intel hardware is the excellent hardware optimization available. Intel has worked to make the TensorFlow framework optimized using the Intel® MKL-DNN implemented on Intel processors. The Intel® MKL-DNN primitives make use of efficient algorithms and data-structure in conjunction with Intel’s hardware-specific upgrades, for significantly faster computations in deep learning.
The best part is that there is nothing new that you have to do to get access to these optimizations. The standard installation of TensorFlow that we will detail below will get you set with everything you need.
Installing TensorFlow (and Python before it)
Let’s start off by installing all the pre-requisites for our Linux system. If you don’t yet have Python, the best course of action would be to install Anaconda’s version of it. You can do this here. We’ll be working with Python 3.4. If you only have Python 2, you may need to create a virtual environment and install Python 3. If you have Python but not Anaconda, that’s alright – we’ll use pip.
Here’s how you install the Intel-optimized build of TensorFlow.
Open the Terminal and type:
● For Anaconda users on Windows:conda install tensorflow
● For Anaconda users on macOS or Linux:conda install tensorflow-mkl
● For non-Anaconda users on any operating system:pip install intel-tensorflow
You can also download the tarball and install from source, or simply use a Docker image. More details on these methods can be found here.
Building your first model
One of the most popular first examples with deep learning is the MNIST digit classification application. This is a dataset of hand-written digits, the numbers from 0 to 9. The benchmark model is a convolutional neural network, a well-crafted system that helps detect the most useful edges and combinations of edges – thus identifying the digit in the picture.
We get started by importing the TensorFlow library:
import tensorflow as tf
We then import our dataset, which is thankfully included under TensorFlow’s in-built datasets.
mnist = tf.keras.datasets.mnist
We split our data into test and train sets:
(x_train, y_train),(x_test, y_test) = mnist.load_data()
x_train, x_test = x_train / 255.0, x_test / 255.0
We build our neural network by stacking layers one after the other. First, a ‘Flatten’ layer reduces the matrix of pixel values to a flat array, then a Dense network connect fully to all nodes. A Dropout layer helps to reduce overfitting, and another Dense layer will give us our output probabilities.
model = tf.keras.models.Sequential([
  tf.keras.layers.Flatten(),
  tf.keras.layers.Dense(512, activation=tf.nn.relu),
  tf.keras.layers.Dropout(0.2),
  tf.keras.layers.Dense(10, activation=tf.nn.softmax)
])
Compiling the model gets us ready to run the computation graph:
model.compile(optimizer='adam',
              loss='sparse_categorical_crossentropy',
              metrics=['accuracy'])
And finally, we actually train and then evaluate the model:
model.fit(x_train, y_train, epochs=5)
model.evaluate(x_test, y_test)
Of course, there are plenty of ways to play around with these models. You can play with the deep learning architecture, the optimization algorithm, the type of loss function used, and much more. In terms of evaluating performance, you can keep track of the loss per epoch, or select different metrics of accuracy.
Be sure to look over the tutorials on the TensorFlow website for much more. The learning curve is pretty easy to scale, and you can be working on custom models on your slick custom deep learning rig in very little time
In conclusion
Getting started with deep learning is really not so hard, even for cool new research or for working on a pet project or startup. If you wish to just test out a fancy new DL library then your existing desktop PC is more than enough but if you are seriously considering on implementing a Deep Learning model then a workstation offers you the flexibility of hardware while keeping it on premises. Additionally, there are options wherein you can rent cloud instances for DL workloads. So you should always perform a cost-benefit analysis before investing. The cloud option is easier because there’s no significant upfront investment but depending on how fast your internet connection is, you may end up spending a lot of time moving dataset from a local on-prem storage to the cloud storage before you can use it in your training model.
There’s a whole world of interesting deep learning applications to explore. Cutting edge technology like recurrent neural networks (RNNs) and Long Short-Term Memory (LSTM) are potential game-changers in this space. Here’s to the next disruptive technology potentially coming from your improvised, self-built workstation.
Source links:
https://software.intel.com/en-us/articles/intel-optimization-for-tensorflow-installation-guide
https://www.intel.in/content/www/in/en/processors/xeon/scalable/xeon-scalable-platform.html
https://github.com/IntelAI/modelshttps://en.wikichip.org/wiki/intel/uhd_graphics/630
https://www.tensorflow.org/install
https://www.tensorflow.org/install/source_windows
http://timdettmers.com/2018/12/16/deep-learning-hardware-guide/
https://www.tensorflow.org/tutorials/
https://software.intel.com/en-us/articles/accelerate-deep-learning-inference-with-integrated-intel-processor-graphics-rev-2-0
[Sponsored Post]


