Build Your Own PC: How to assemble a PC
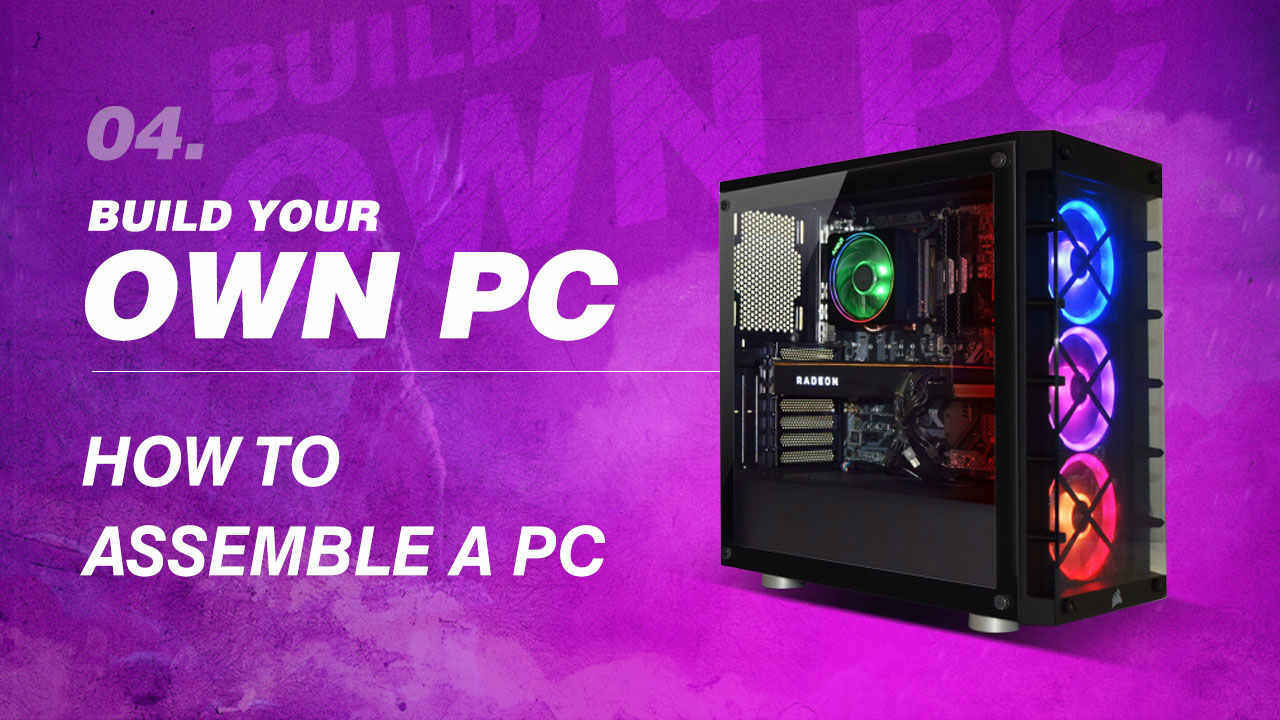
Welcome to the fourth article in the “Build Your Own PC” series, powered by AMD Ryzen and Radeon. In this article, we’re going to be assembling a PC. Before we get down to assembling, we’ll go through all the tools that you’ll typically need for the assembly process and then we can get started. This will be a rather long article as we go through the entire build process step-by-step. Without further ado, let’s start with the tools.
Tools
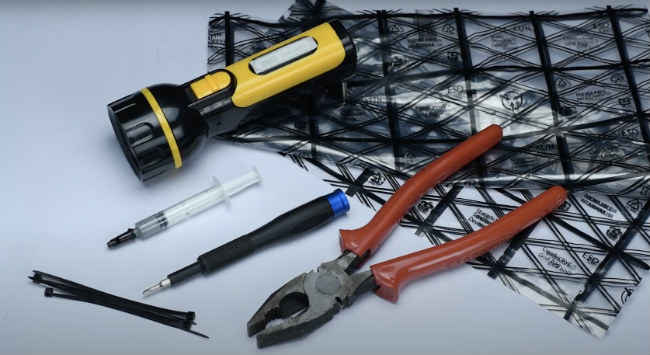
With the advent of computer cabinets featuring toolless design, it has become easier to install your components and peripherals within the cabinet. However, the cabinet is just one of many components that need installing and not everyone follows the same toolless philosophy. The cabinets and components that we’ve put together for this build will help you get a good idea of all the different mounting mechanisms that are currently used by different manufacturers. For everything else, the following tools should help get you through the build.
#1 Screwdriver
Get a good screwdriver kit with Phillips and Slot drive bits. These are commonly known as Plus and Minus bits. Ensure that you have plenty of different sized Plus and Minus bits so that you can use the correct bit for the screws. Using the wrong bits can grind the screws and make them unusable or worse… unserviceable.
#2 Zip Ties
Cable management is an important aspect of PC building. Having all the cabling within the cabinet neatly tied up ensures that the airflow within the case is not impeded in any way. On the plus side, a PC with good cable management is always aesthetically pleasing.
#3 Anti-Static Bags and Wrist-straps
Electrostatic discharge can fry your PC components and you could end up building electrostatic charge simply by walking around in a pair of woolen clothes, combing your hair with plastic or by walking on carpeted flooring with woolen socks. These are just some of the ways in which you can build up an electrostatic charge. You should always discharge yourself before handling components. You can do this by touching a grounded object before handling components or by wearing a wrist strap that is connected to ground via means of your chassis. You can even buy an anti-static mat to stand on while building a PC but that’s not essential.
#4 Bright lighting / Torch
If your room is well-lit then you should be able to see all the nooks and crannies within your PC chassis. If not, keep a torch at hand. A head lamp is also great.
#5 Pliers
A good pair of pliers can come in handy for certain situations. We’ve often found that PC cabinets can ship with a few loose stand-off screws or sometimes you’ll come across that one nasty screw that’s completely stripped. A plier can make your life much easier in such cases.
#6 Thermal Paste
Let’s face it, you are bound to make mistakes while applying the thermal paste, so having a little extra on hand is always good. Remember to not mix thermal paste, so if some of your components come with thermal paste pre-applied, don’t add more. Or if you want to use just the one thermal paste, then keep some rubbing alcohol on hand to clean up the older thermal paste.
That’s about all the tools that you’d need to build a PC. Let’s figure out the sequence of installing components within your chassis.
Sequence and testing
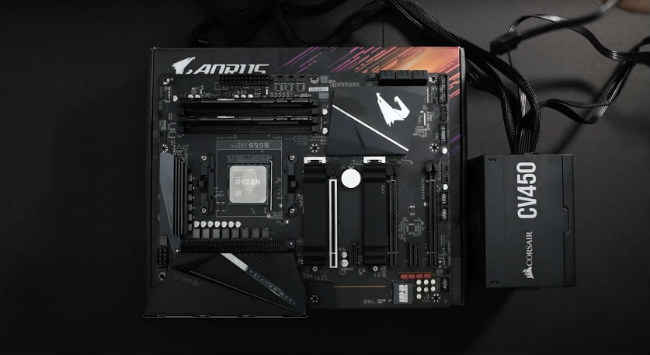
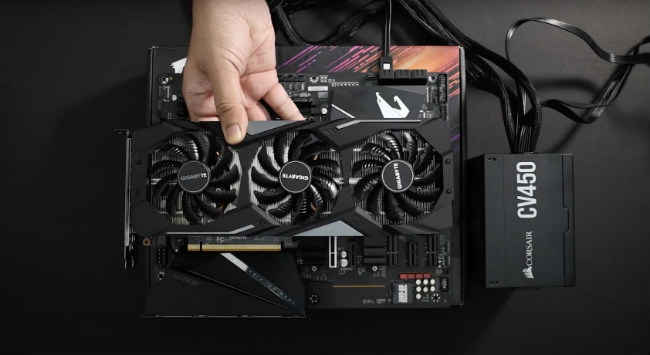
Before you install your components, it is always a good practice to set up your PC and perform a test run to see if everything is working. We use the motherboard box as the base upon which we build our test rigs. This way, it’s much easier to test run your machine and you won’t lose any hair over troubleshooting later on. We like to install Windows and all drivers while the PC is out in the open before we run a few benchmarks to check if everything is okay.
The sequence isn’t exactly important and need not be followed in the exact order. It’s just something that we, like many other PC builders, have figured out for ourselves to make the entire process easier. Here’s what we prefer to do.
We’ll start off by removing the motherboard from the packaging and placing it on the box. We then take the power supply unit and place it close to the motherboard. Then start off my installing the CPU into the socket. AMD AM4 sockets have a lever on the side which needs to be unlatched first. We then take the CPU out of the packaging by the edges. Please do not touch or bend the golden pins underneath it. Check the little arrow on the CPU and align it with the arrow on the socket and carefully place it on the socket. If you’ve aligned it properly, the CPU should simply fall into place without need for any force. Please ensure that the latch is open before you do this. Once the processor is seated, place one finger on the top to apply a little bit of pressure and close the latch using your other hand.
Then install the RAM modules into their sockets. Please refer to the motherboard manual to understand which sockets are to be used for. This is usually indicated on the motherboard itself. Then plug in your boot hard drive into the first SATA slot. These are usually marked as SATA_0 or SATA_1. If you have an NVMe SSD instead of a hard drive as your primary storage and you have more than one M.2 slot on your motherboard, refer to your motherboard manual to figure out which slot your SSD should be installed in. Once you’ve got that figured out, install the SSD in the M.2 slot by carefully inserting it at an angle before securing it with a screwdriver. Certain motherboards come with a heatsink for the SSD, you should remove the heatsink before you can install the SSD. Read the manual to know how the heatsink is removed. Usually, there’s just one or two screws but a lot of motherboards tend to have fancy designs which are a little unorthodox so the manual is your best friend. Now, get your CPU cooler out and install it. Depending on what kind of cooler you have, you might have to either change the mounting mechanism on the motherboard or use it as is. Refer to your cooler’s manual for this. We’re using the AMD Wraith cooler and we have to unscrew the plastic mount before installing the cooler. These two mounts are secured by means of two screws each. Remove them and we can simply place the AMD Wraith cooler on top and screw them in. These coolers have one side longer than the other, align that first and then install. Usually, the little AMD logo ends up pointing towards the top-left corner or towards the left if everything is properly aligned. Secure the cooler by tightening the screws one-by-one in a diagonal fashion. Once the cooler is installed, plug it into the motherboard using one of the 4-pin Fan connectors. These will be usually labelled CPU_FAN_0 or CPU_FAN_1 or simply CPU_FAN. Plugging into another connector should be fine but be prepared for your BIOS to throw an alert stating that you’ve not plugged the cooler in the right connector.
Next, we’ll connect the graphics card. If your graphics card needs additional power, then use one of the 6+2 pin PCIe power connectors. These connectors can be used for 6 or 8 pin power connectors. Simply hold the two pieces together while plugging it in if you need an 8-pin connector, if you need the 6-pin connector, hold the detached part separate while plugging it in. Remember to not mix up the PCIe connector with the CPU power connector. The two have different notches and should not be installed in the wrong connectors. Every connector on your PC is meant to be plugged and unplugged gently. If you’re applying force, then you’re probably doing something wrong.
Attach the remaining power connectors from the power supply unit. The CPU power connector, motherboard power connector, graphics card power connector and storage power connectors should all be plugged in. If you’ve missed out on something, then don’t worry, your motherboard will point it out when you attempt to boot.
Now connect the display, keyboard and mouse to your motherboard and graphics card and power your system on. If there’s no button to switch on the power, check the motherboard manual to see which are the POWER SWITCH pins in the front panel header. Use your screwdriver to bridge these pins for a second to power your system on. Please be careful with the screwdriver around a powered system, we don’t want to cause any short circuits. You may now proceed with the OS installation if everything is proper. We have two articles for the OS installation and for troubleshooting common problems. You should read those articles before coming back here. Links to all of the articles are right at the bottom.
If everything worked fine, simply shutdown your PC and disconnect all the cables. Remove your graphics card as well. We’ll now begin with the installation of the components into your chassis.
Build
Start off by clearing everything within your chassis. Open your chassis by removing the front and back panel. Remove all the packaging material and any additional accessory boxes that might have come within the chassis box. You’ll find all the screws needed for your build within these accessory boxes. Remember to use the right screws so that you don’t end up grinding the screw holes. Again, the manual for your cabinet will list all the screws and the purpose for which they are to be used.
Start off by installing the Rear I/O shield. This is often forgotten by a lot of first time builders. Take the I/O shield, align it against the rear and press it into place.
Install the power supply next and ensure that the cooling fan of the PSU is not blocked. Follow this up by routing the cables through the rear panel.
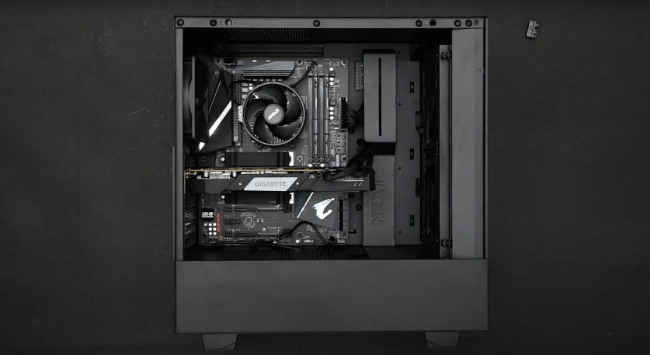
Now place the motherboard onto the stand offs and screw them in. We already have the CPU, RAM and SSD installed. All we have to do is plug all the power connectors and the SATA SSDs or hard drives. We plug the storage options because they tend to get blocked by the graphics card.
Next up is the graphics card. Remove the two expansion plates in front of the graphics card from the rear of the cabinet. Place the graphics card in the first x16 PCIe slot and secure it in place using one or two screws. Connect the PCIe power connectors.
Use your Zip ties to tie up all the cables along the off side of the cabinet. A little cable management goes a long way towards ensuring good air-flow and making the cabinet appear pretty.
The last thing left is to connect the cables for the front-panel I/O connectors onto the motherboard. Refer to the cabinet manual and the motherboard manual to understand the mating of the connectors.
That’s it, you’ve built your first PC. Plug in your keyboard, mouse and monitor, plug in the PSU and switch your PC on. If all goes well, you can switch off the PC and proceed with installing the cooling fans.
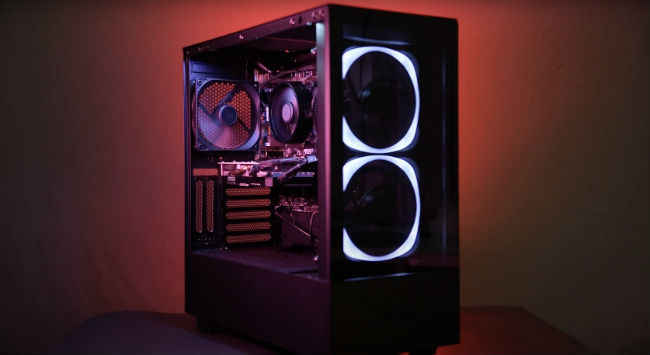
Your PC will generate a bit of heat and hot air rises upwards. So the easiest way to expel heat from your chassis is to have inlet fans at the bottom and have some exhaust fans at the top and rear. Your cabinet will usually come with a fan or two installed. We prefer to have 3-4 cooling fans in a PC. Once that’s done, plug your fans into the 4-pin fan headers on your motherboard.
Close up your PC cabinet and you’re done with your build.
This would be the right time to take a few selfies with your new PC and send it over to use. Use the hashtag #DigitModSquad and tag us, we’d love to see your PC builds.
Conclusion
This concludes the fourth article in a 7-part series on how you can build your own desktop PC. In this video, we looked at all the tools required for building a PC and we finally built your PC after taking it through a dry run. In the next article, we’ll be looking at installing Windows 10 on the PC along with all the drivers. Remember to tag us in your PC build posts on Instagram and Twitter. Check out the links below to view the rest of the articles in our ‘Built Your Own PC’ series.
1. Build Your Own PC: The PC built for your needs
2. Build Your Own PC: Which CPU, GPU, Motherboard, etc should you buy
3. Build Your Own PC: How to get the best deals on computer parts
4. Build Your Own PC: How to assemble a PC (You are here)
5. Build Your Own PC: How to install Windows 10 and setup your PC
6. Build Your Own PC: Testing for cooling and performance
7. Build Your Own PC: Common mistakes while building a PC
[Sponsored Post]

