
If you’ve kept up with our series of Canva-focused articles so far, here we delve into advanced Canva skills, including understanding licensing for images and templates, exploring video and audio assets, customising Canva’s templates for unique designs, using frames and grids for creative compositions, and managing your uploaded assets.
Also read: What is Canva and how does it work?
These advanced techniques will help you take your Canva designs to the next level, ensuring that your work is not only visually appealing but also legally compliant and efficiently managed.
Understanding Canva’s licensing for images and templates
Navigate the intricacies of licensing in Canva, ensuring that your use of images, templates, and elements adheres to legal and ethical standards. Note: This isn’t legal advice.
What are different licence types
- Free vs. Pro Licences: Understand the distinction between assets available for free and those exclusive to Canva Pro subscribers. Free assets are accessible to all users, while Pro assets require a subscription and offer a wider range of options.
- One Design Use Licence: Some assets in Canva come with a One Design Use License, meaning they can be used for a single design but not multiple projects. Be mindful of these restrictions when planning a series of designs.
How to use Canva assets correctly
- Commercial vs. Personal Use: Determine the purpose of your design. If you’re creating something for commercial purposes, ensure the assets you’re using are cleared for such use. Canva’s licensing terms provide guidance on what constitutes commercial use.
- Attribution Requirements: Some assets may require attribution. Check the asset details for any attribution requirements and follow them accordingly to give proper credit to the creators.
How to navigate Canva’s licensing agreements
- Reading the Fine Print: Take time to read through Canva’s licensing agreements. This helps avoid potential legal issues, especially if your designs are for public or commercial use.
- Staying Updated on Licence Changes: Canva occasionally updates its licensing terms. Stay informed about these changes to ensure ongoing compliance with your existing and future designs.
Tips for safe asset usage
- Bookmarking Licence Details: Keep a record of the licence details for assets used in significant projects, especially if they’re for commercial use.
- Seeking Clarity: If uncertain about the usage rights of an asset, contact Canva’s support for clarification before finalising your design.
Also read: How to use Canva: Complete guide for beginners
How to explore Canva video and audio assets
Enhance your multimedia projects with Canva’s selection of video and audio assets, perfect for creating dynamic content for social media, presentations, and more.
Adding videos to your Canva design
- Accessing Video Assets: Click on the ‘Videos’ tab in Canva. Use keywords to find videos that suit your project’s theme.
- Incorporating Videos: Drag your chosen video onto the canvas. You can trim it, adjust its size, and even apply filters to match your design’s aesthetic. For example, add a background video to a promotional social media post to make it more engaging.
Utilising audio in your Canva projects
- Finding the Right Track: Navigate to the ‘Music’ tab. Browse through genres or moods to find a track that enhances your design’s message.
- Adding and Editing Audio: Once you’ve selected a track, add it to your design and trim it to fit your video or presentation length. Adjust the volume so it complements, rather than overpowers, your visual content.
Also read: Explained: Design principles in Canva for Beginners
How to customise Canva’s templates for unique designs
Transform Canva’s templates into unique creations by blending various design elements, ensuring your work stands out and aligns with your specific vision.
Selecting a base template in Canva
- Choosing a Template: Start by selecting a template that closely aligns with your design needs. For instance, pick a business presentation template for a corporate pitch.
- Analysing Layouts: Look at the template’s layout. Identify elements like text boxes, images, and shapes that you can customise.
How to mix elements from different templates
- Combining Templates: Don’t limit yourself to one template. Browse through other templates for different elements that might suit your design better. For example, if you’re working on a newsletter, you might find a more appealing header in another template.
- Integrating Elements: Carefully integrate elements from various templates. Ensure they harmonise in terms of colour, style, and typography.
Also read: Canva 101: How to master digital content creation on Canva
Advanced customisation techniques in Canva
- Alter Layouts: Rearrange the layout of the chosen template. This could involve moving text boxes, resizing images, or even changing the orientation of the entire design.
- Colour Customisation: Adapt the colour scheme to fit your brand or project theme. Use Canva’s colour wheel tool to find complementary colours if you’re introducing new elements.
- Typography Tweaks: Replace the template’s default fonts with choices that better reflect the tone of your message.
Adding personal or branded touches
- Incorporating Brand Elements: For business designs, add your brand logo, use brand colours, and include any other distinctive brand elements.
- Personal Flair: For personal projects, add unique touches like personal photos, custom illustrations, or handwritten-style fonts to give your design a personal feel.
Refining and finalising your Canva design
- Review and Iterate: Take a step back and review your design as a whole. Ensure that all the elements come together cohesively and serve the intended purpose.
- Feedback and Adjustments: Don’t hesitate to seek feedback from others. Fresh eyes can offer valuable insights. Make adjustments based on this feedback to refine your design.
How to use frames and grids in Canva for compositions
Frames and grids in Canva are powerful tools for creating structured, visually appealing layouts. They are especially useful for photo collages, mood boards, or any design requiring a neat arrangement of multiple images.
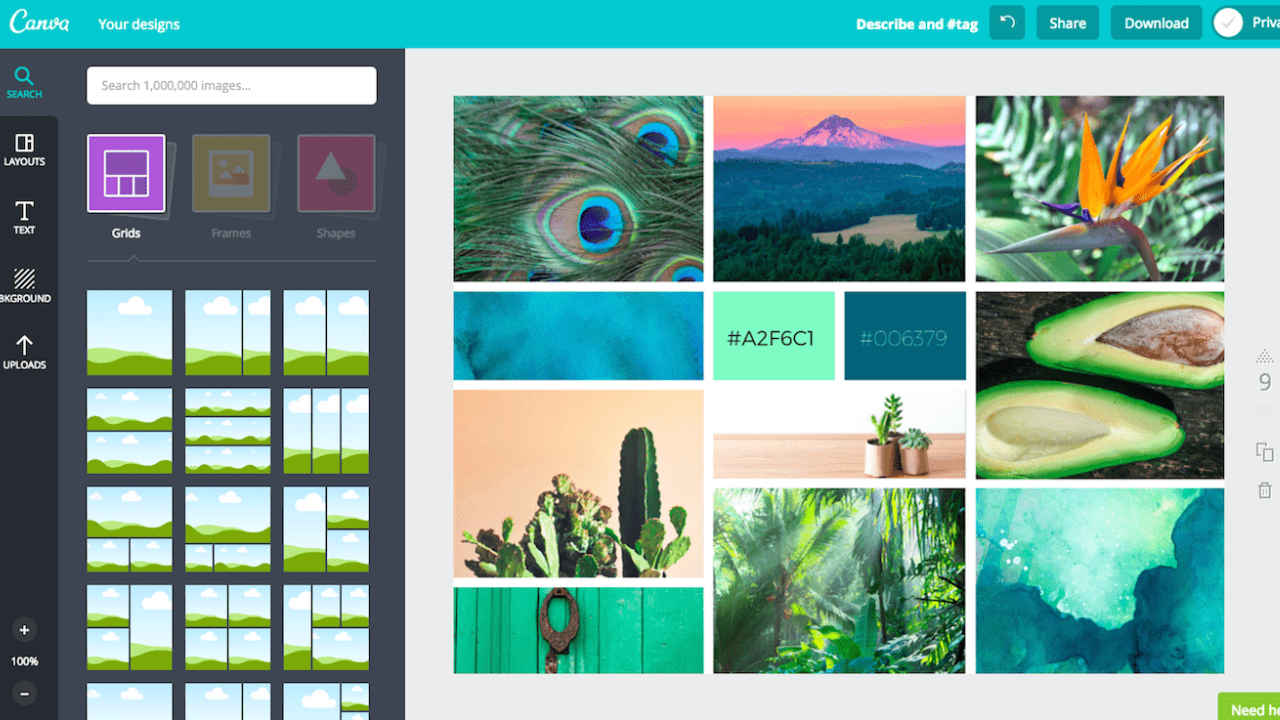
Utilising grids for organised layouts
- Selecting Grids: Start by clicking the ‘Elements’ tab and typing ‘grids’ in the search bar. Canva offers a variety of grid layouts, from simple rows and columns to more complex arrangements.
- Adding Images to Grids: Once you’ve chosen a grid, drag and drop your images into each section. The images will automatically resize to fit the grid, ensuring a clean, uniform look.
- Customising Grids: Adjust the size and proportion of the grids by dragging their borders. You can also change the colour of the grid lines to match your design’s colour scheme.
Creating dynamic photo collages
- Mixing Grid Styles: For a more dynamic collage, mix different grid styles within the same design.
- Layering Elements: Add depth to your collage by layering other design elements, like text or icons, over your grid.
Also read: How to create interactive and video content in Canva?
How to manage your uploaded assets in Canva
A well-organised asset library in Canva not only saves time but also streamlines the design process, allowing for quick access to frequently used images, logos, and custom elements.
Uploading personal assets
- Uploading Images and Logos: Click on the ‘Uploads’ tab in Canva and select ‘Upload an image or video’. You can upload files from your computer, or import them from platforms like Facebook or Google Drive.
- Organising Uploaded Assets: Create folders in the ‘Uploads’ section to categorise your assets. For instance, have separate folders for different projects or types of assets.
Ensuring optimal image quality
- Image Formats and Resolution: When uploading images, ensure they are in a compatible format (like JPEG, PNG, or SVG) and high resolution.
- Editing Uploaded Images: After uploading, you can use Canva’s photo editing tools to adjust the brightness, contrast, or apply filters to your images.
Streamlining designs with custom assets
- Reusing Assets: Once you’ve uploaded and organised your assets, you can easily reuse them in future designs.
- Sharing Assets with Teams: If you work in a team, Canva Pro allows you to share assets with team members.
Tips for asset management
- Regular Updates: Periodically review and update your uploaded assets.
- Naming Conventions: Use clear, descriptive names for your folders and files.
- Leveraging Canva’s Features: Utilise features like the ‘favourite’ option to quickly access frequently used assets.
As we conclude this article, we hope to have expanded your Canva expertise by learning advanced techniques such as managing licensing agreements, incorporating multimedia assets, customising templates, utilising frames and grids, and effectively managing your uploaded assets. By mastering these advanced skills, you’ll be able to create unique, professional, and legally compliant designs, while streamlining your workflow and maintaining consistency across your projects.
Also read: How to collaborate in Canva and streamline workflow
Team Digit
Team Digit is made up of some of the most experienced and geekiest technology editors in India! View Full Profile