
The most recent SDK for the Intel® RealSense™ F200 camera now includes 3D scanning. This is an amazing feature and will allow developers and digital artists to scan in real world objects to use in their projects. One use case is to scan in a real world object and use in Unity. This blog post will take a look at how to convert the Vertex colors from the original scan, creating a UV Texture map so you can import the object to Unity. The post is mostly pictures, so don't get too worried about the length. Once you do it, it's a simple process.
There are 4 key steps involved end to end. This post will focus on step 3. Follow links to posts on the other steps.
1. Scanning using the Intel RealSense SDK 3D scanning code sample
2. Converting the OBJ file format to PLY for editing in Blender
3. Converting Vertex colors to UV Map and editing your 3D Mesh for lower vertex/poly count in Blender
4. Importing for use in Unity
What you need to complete:
1. Intel RealSense camera running on Intel Core 4th gen processor or better using SDK (SDK is free)
2. Object scanned via Intel RealSense technology and converted to PLY file (via MeshLab – free)
3. Blender (free)
Overview of process:
The idea here is to import the 3D file, and make a copy of it. Clean up the copy, then map the vertex colors as a UV Map for the new duplicate version.
Step 3 of 4
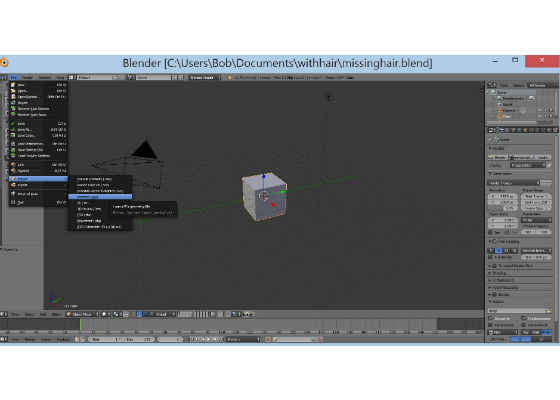
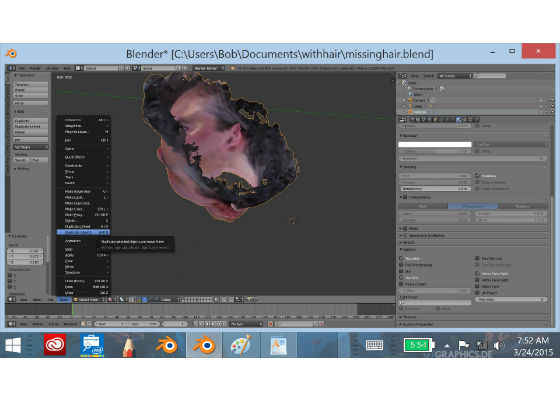
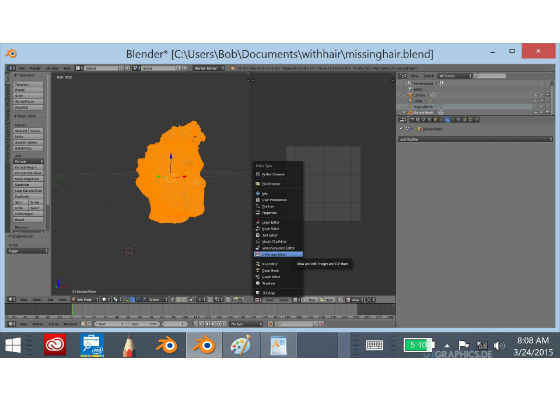
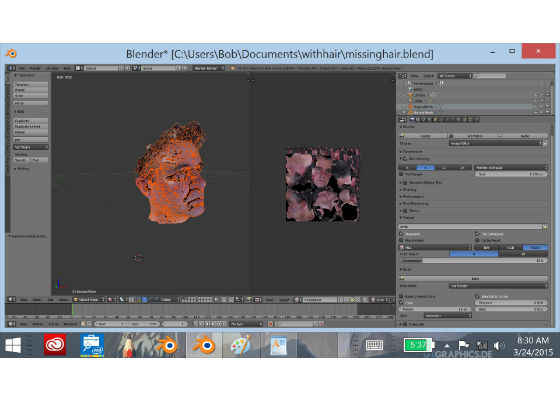
Create a new Project in Blender, select "Import PLY" file format, then select that PLY file you exported from MeshLab.
After importing you will see the textures are not there.
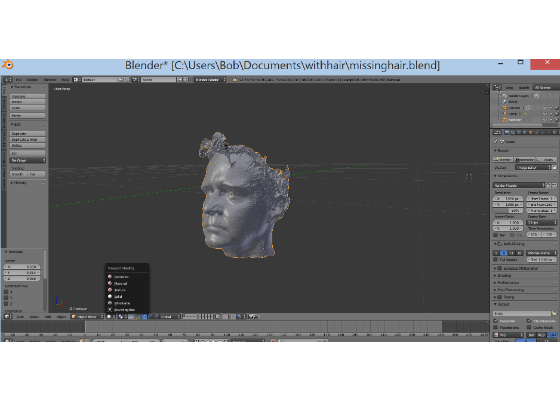
However, if you switch to Texture view, you will see the RGB colors from the scan are now mapped to the Texture mode.

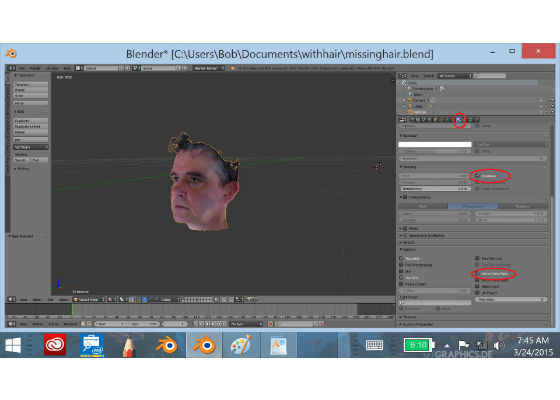
To see the colors properly switch view mode to Materials. On the right panel, select the Materials icon. Create a new Material. In the panel editor, set Shading to Shadeless, and in Options turn on Vertex Color Paint. This successfully sets the Vertex colors to the material of the object.
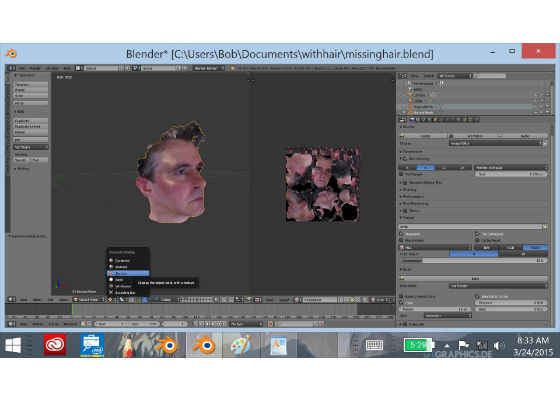
Now this isn't a workable Mesh for us. It's full of holes, it's rough and the poly count is much higher than we need. We will want to create a version of this mesh that we can clean up but map this vertex-colored texture as a UV Map. That version is the version we will bring into Unity.
Create a duplicate of the Mesh:
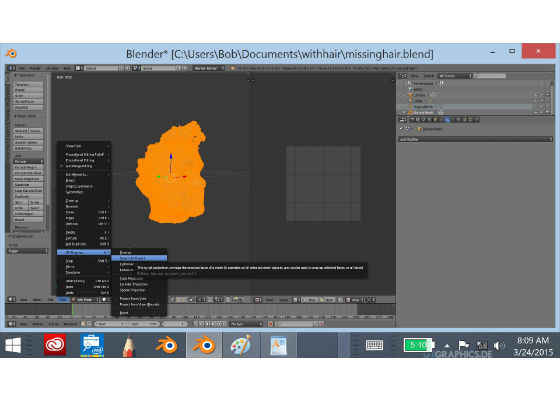
Go to the Object Menu. Select Duplicate Mesh and hit enter. Do not move your mouse.
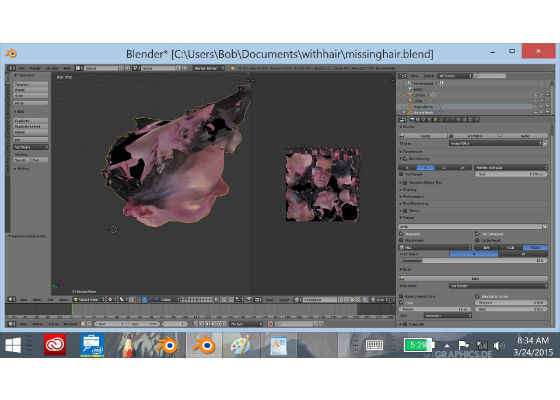
Go to the Object Menu then select Move To Layer and select the square to the right.

Go to the asset browser and rename your meshes. Name one Original Mesh and the other one Second Mesh. This will help you keep them straight.
Select the Second Mesh, select the Layer to View and change the mode to Solid rendering.
Then select the Tool Wrench Icon to add a modifier. We are going to change the poly count and get a cleaner Mesh to work with on this second mesh.
Select Remesh from the Tools. In the Remesh tool set the Oct Tree between 7 and 8. Set the Mode to Smooth, and turn on Smooth Shading. This will cause you to lose the material mapping.
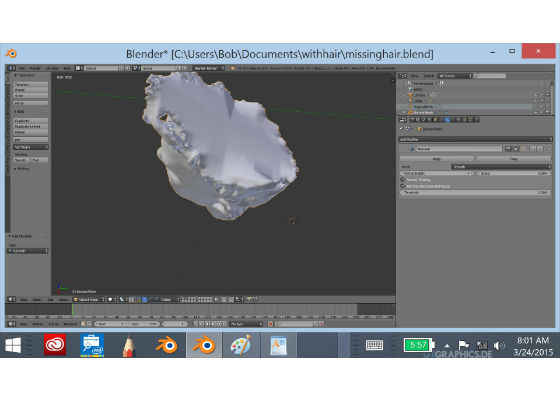
Click Apply. You now have a cleaner Mesh where you can apply the Vertex and UVMap
Go Into Edit Mode on this Second Mesh. Under the Select Menu, Select All.
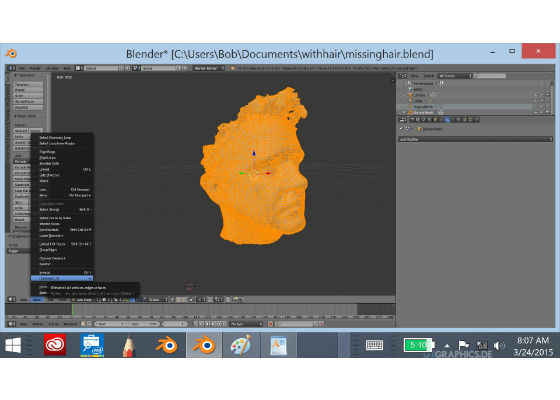
Create a new Window and set that to UV Map Mode to see the UVMap.
Under the 3D window go to the Mesh menu and select UV.
On the UV Map Window, select NEW to create a texture. Turn off Alpha. Name the texture the name of your model you will export.
Switch to Object Mode. You will see a Black Model and Black UV Map. That is ok.
Now turn on both layers using Shift key.
In the Asset Browser, select the Original Mesh.
Go to the Camera Icon.
Under Bake area Turn on Select to Active. Make sure that Bake to Vertex is off.

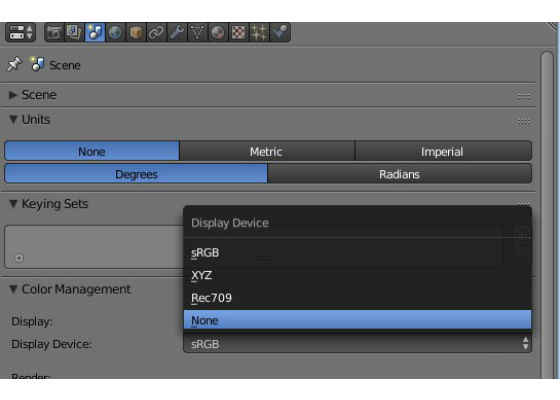
Under Scene set Color Management to None.
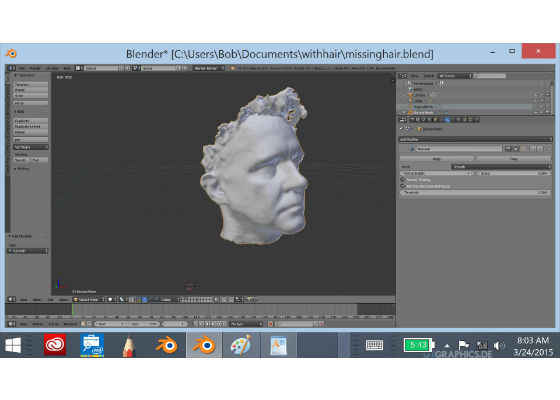
In the Asset Menu you need to first select the Original Mesh. Hold down SHIFT KEY then Select the Second Mesh. (You must do it in this order). Note be sure that both layers are visible with the eye and camera icons on
Go to the camera Icon. Under Bake, click Bake.
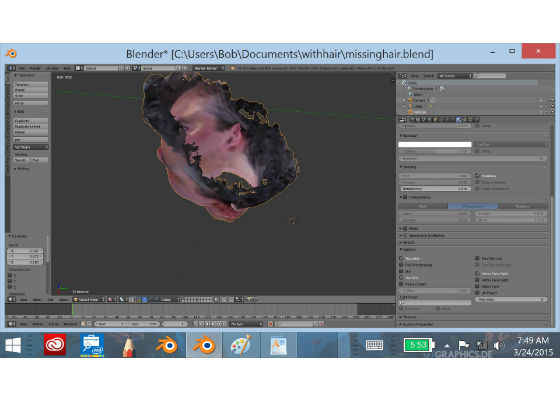
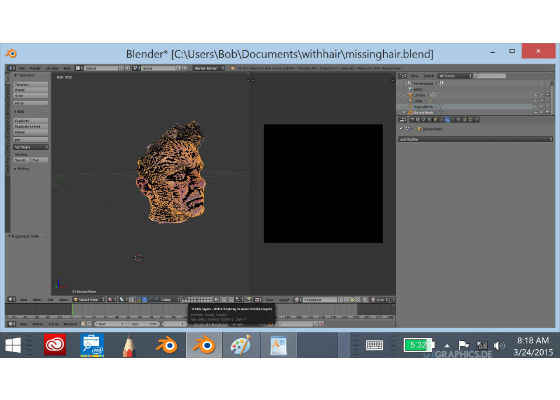
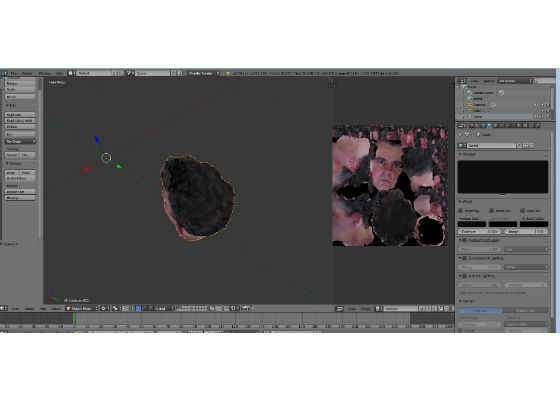
You should now have a texture mapped. To see this, turn off the first layer, so you are only seeing the layer with the second mesh. Select the Texture view and you will see your mesh textured with your UV Map.
You will notice some funkiness where the image filled in missing areas of your mesh.
You can go into Texture Paint mode and clean those up. You can also now go into Sculpt mode and fill in missing areas, and clean up or add features to your mesh. With that done I now have a finished Mesh I can get ready to export. Last things to remember:
- Make sure the UVMap is named the same and in the directory the Mesh is
- Go to UVMap Window, Image menu, select Save As, put in a directory you will save the Mesh.
- Then Go to File Menu, Export to .FBX file using the same name as the UV Map
For more such intel resources and tools from Intel on Game, please visit the Intel® Game Developer Zone
Source: https://software.intel.com/en-us/blogs/2015/03/24/realsense-3d-scan-vertex-color-to-uv-map-blender/


