
The most recent SDK for the Intel® RealSense™ F200 camera now includes 3D scanning. This is an amazing feature and will allow developers and digital artists to scan in real world objects to use in their projects. One use case is to scan in a real world object and use in Unity. This is a 3 part blog series that will walk you through the process.
In this first step I will show you how to scan an object and convert it to PLY format using MeshLab. This is a step to get the color information from the scan in a useable for other programs like Unity
Below are the follow steps in this series. This post will cover the first 2. For Steps 3 and 4 follow the links once you finish steps in this post
- Scanning using the Intel RealSense SDK 3D scanning code sample
- Converting the OBJ file format to PLY for editing in Blender
- Converting Vertex colors to UV Map and editing your 3D Mesh for lower vertex/poly count in Blender
- Importing for use in Unity
What you need to complete:
- Intel® RealSense camera running on Intel Core 4th gen processor or better using SDK (SDK is free)
- Object scanned via Intel RealSense technology and converted to PLY file (via MeshLab – free)
- Blender (free)
Step 1 of 4:
Using the Intel® RealSense SDK to Scan.
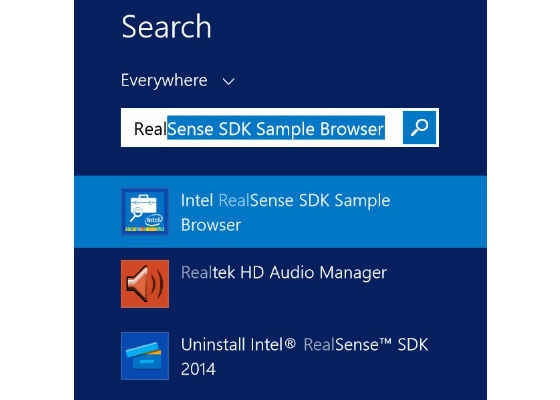
After installing the Intel® RealSense SDK. Go to the Charm Bar in Windows and Search for "RealSense". In the list you will find RealSense SDK Sample Browser. Right click and select Run as Administrator
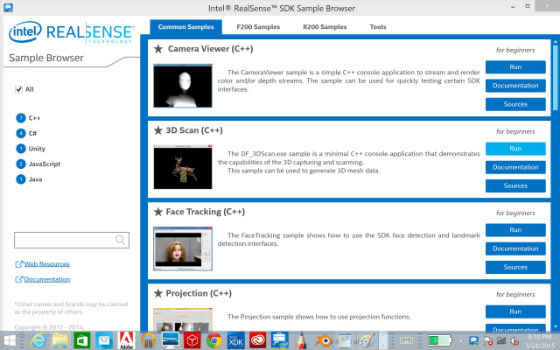
In the Sample Browser you will see there a Section for Common Samples. These are samples that will work on both the F200 and R200 cameras. Find the Sample called 3D Scan (C++) .
Things to know when 3D Scanning
- The sample is designed to track a rigid 3D object in space thus allowing the object to rotate in front of the camera and tracking it thus allowing it to scan it from multiple sides
- If part of the object is rotating and another part is still, it will confuse the tracking algorithm causing a bad scan. ie If you are scanning a human head, do not turn the neck to scan as that will create a bad scan. Instead rotate the entire torso visible to the scan as a solid object.
- You can tip forward, tip back, rotate left, rotate right and around. With practice It is possible to scan an object 360 degrees around
- Scan in an area with even lighting. Avoid shadows as those shadows or specular reflections as they will get baked into your 3D texture
Scanning Steps
- Select Run from the Sample Browser
- Put the object in front of the camera and you will see it in view of the scanner. Hold it still until the second window pops up.
- Once the second Window pops up, start to rotate the object in one direction, slow then reverse direction and then try to go all the way around. One around, then tip back and tip forward, then hold still. If you are scanning a face, At the last few seconds key your eyes looking forward just over the camera, to get your eyes set in a static position
- When the scan is complete it will open a browser allow you to drag and rotate the image around. The image is saved to your Documents folder as 3Dscan.obj
- Rerun the sample as many times as you like to get a good scan you want to use and clean up for your application or game
Step 2 of 4: Converting to PLY format
The OBJ Format is the default format you get from the scan. You can convert to a PLY using a free tool call MeshLab.
- Download and Install MeshLab (free)
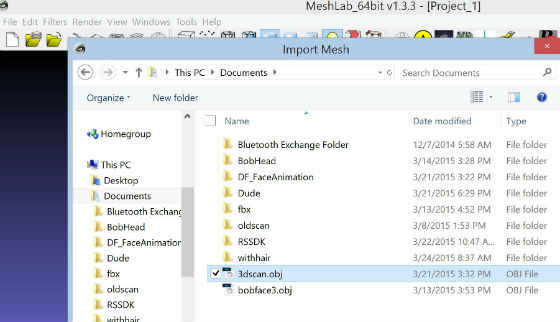
- From the File Menu select Import. Select the 3Dscan.obj file located at the root of your Documents folder
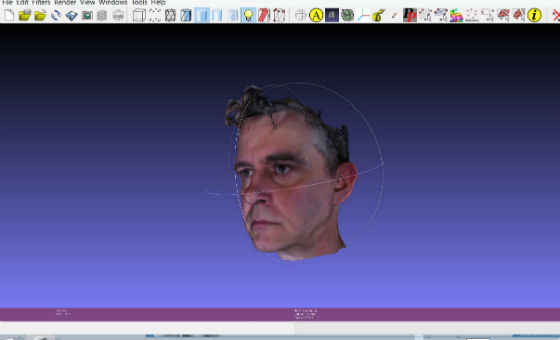
- After importing your object may be on its side. You can left click at the bottom of the object and drag up to rotate the object and examine it. You should see the mesh textured with color. The color information is stored as Vertex Colors, meaning each vertex is colored with the pixels from the RGB camera when the object was scanned.
- From the File Menu select Export Mesh As
- In the dialogue box select Stanford Polygon File Format (*.ply)
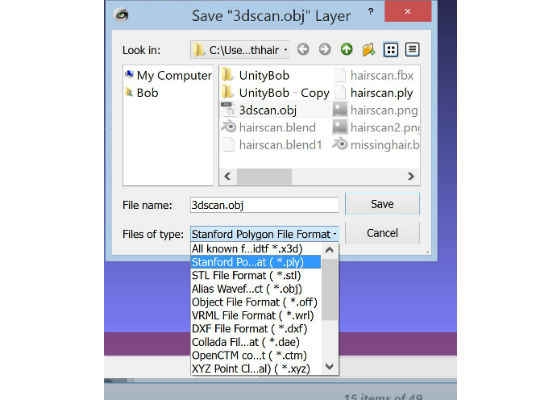
- Be sure to save in a directory you can find.
You are now ready to move on to Blender to clean up the mesh and convert the vertex colors to a UV Map
Continue with this post: converting vertex colors to UV Map and edit your 3D Mesh for lower vertex/poly count in Blender
For more such intel resources and tools from Intel on Game, please visit the Intel® Game Developer Zone
Source: https://software.intel.com/en-us/blogs/2015/03/24/intel-realsense-3d-scanning-scan-then-convert-obj-to-ply-for-blender-unity


