
This article describes how to get started with the Intel® Galileo board and the Arduino* IDE.
If you prefer developing with Java*, JavaScript, C++, or Python, see “Programming Options,” below.
Hardware requirements
- An Intel® Galileo Gen 1 or Gen 2 board.
- One power supply for the Galileo board, either 5V DC (for Gen 1) or 7–15V DC (for Gen 2). Your power supply should be included in the packaging along with your board.
- One micro-USB cable (Micro B to Type A).
- A Windows*, Mac* OS X*, or Linux* computer.
Set up the board
1. If you have a micro-SD card inserted into your board, remove it.
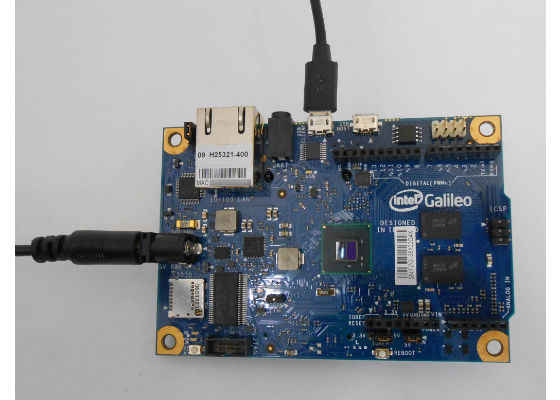
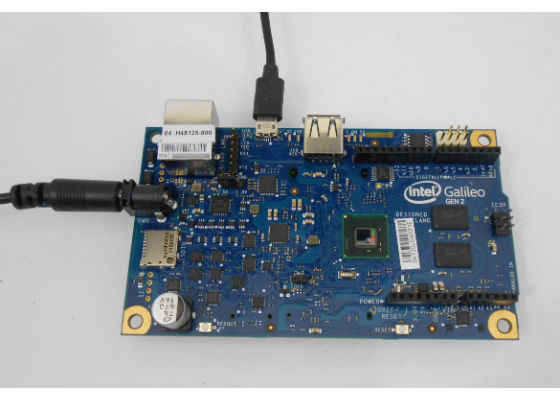
2. Plug in the power supply to your board. Always plug in the power supply before the USB cable.
3. Plug in the micro-USB cable to your board's USB client port. Plug the other end in to your computer.
On the Intel® Galileo Gen 1 board, your setup should look like this:
On the Intel® Galileo Gen 2 board, your setup should look like this:
Next Steps
Your next steps depend on the OS you are using: 64-bit Windows*, 32-bit Windows*, OS X*, or Linux*.
For Mac* OS X* or Linux*
You can skip to the next section; there’s no further setup required.
For 64-bit Windows*
To install the drivers required by the Arduino* IDE, run the Galileo Windows 64-bit Arduino installer, which is here: https://software.intel.com/en-us/iot/hardware/galileo/downloads, listed under Installer.
The installer includes a step to create a micro SD card. This step is optional; create a micro SD card only if you want to set up Wi-Fi driver support and sketch persistence on the board.
When finished, continue to the next section.
For 32-bit Windows*
To install the drivers required by the Arduino IDE, follow the instructions to install and run the Firmware Updater tool, listed here: https://software.intel.com/en-us/installing-drivers-and-updating-firmware-for-arduino-windows.
When finished, continue to the next section.
Installing the Arduino* IDE
Install the Arduino IDE for your OS from the appropriate section on this page: https://software.intel.com/en-us/get-started-arduino-install.
When finished, continue to the next section.
Blinking the board’s LED with the Arduino* IDE
To blink the LED on your Galileo board, run the Blink example sketch in in the Arduino IDE as described in the Running Arduino section on this page: https://software.intel.com/en-us/get-started-arduino-blink)
When the LED blinks, you’re done, and have successfully set up your Galileo board.
Programming options
You can program your Galileo board using C++ or Java* with the Intel® System Studio IoT Edition, or using JavaScript with the Intel® XDK IoT Edition. You can also program in Python directly on the board.
The Intel® System Studio IoT Edition is a plugin for Eclipse* that supports Java and C/C++ projects. It allows you to connect to, update, and program IoT projects on the Galileo board, as well as add sensors to a project, take advantage of the example code provided with the Intel System Studio IoT Edition, and more.
The Intel System Studio IoT Edition provides two libraries, specially designed for the Intel IoT Developer Kit:
- MRAA is a low-level library that offers a translation from the input/output interfaces to the pins available on your Galileo board.
- UPM is a sensor library that utilizes MRAA and provides multiple-language support. UPM allows you to conveniently use or create sensor representations for your projects.
The Intel® XDK IoT Edition supports embedded JavaScript projects with node.JS, and provides a comprehensive, cross-platform development environment for developing and building hybrid HTML5 mobile and web apps.
Make a bootable micro SD card
A bootable micro SD card is required for using the Galileo board with the Intel® System Studio IoT Edition or the Intel® XDK IoT Edition.
For more such intel IoT resources and tools from Intel, please visit the Intel® Developer Zone
Source: https://software.intel.com/en-us/articles/getting-started-galileo-arduino


