
This guide is very similar to the guide on how to assemble your Edison, but is specific to those who want to use Brillo for their OS.
In this guide, you’ll connect the Intel® Edison module to an Arduino expansion board.
Requirements
- VERY IMPORTANT: Make sure you have requested an invite on the main Brillo page (https://developers.google.com/brillo/?hl=en) and have been granted access.
- Intel Edison module
- Arduino expansion board
- 2 Micro B to Type A USB cables
- A direct current (DC) power supply. Your power supply should be rated as follows:
- 7-15V DC
- At least 1500mA
- The center/inner pin should be the positive pole of the power supply
Note: An external power supply is the preferred way of powering the Intel Edison board. However, you can power your board over USB if you do not have an external power supply. For details, seePowering your board over USB.
We suggest an EMSA120150 or similar supply:
- digikey.com
- futureelectronics.com
Assemble your board
See this procedure in a video https://software.intel.com/en-us/videos/intel-edison-kit-for-arduino-unboxing-and-assembly or follow the steps below.
1. Place the Intel Edison module within the white outline on your expansion board, lining up the holes on the module with the screws on the expansion board.

2. Press down on the module just below the words What will you make? until you feel a snap.

Caution: Unless you make sure your board is seated properly, it may not work or turn on at all.
When you turn the attached module and expansion board on their side, both pieces should fit evenly and sit in parallel with each other.
3. Use the two hex nuts (included in the package) to secure the module to the expansion board.

4. Insert a screw in the corner hole and attach the plastic spacer.

5. Repeat for the other three corner spacers.

Connect the board to your system
See this procedure in a video here: https://software.intel.com/en-us/videos/intel-edison-kit-for-arduino.
1. Plug in the power supply.
Note: If you do not have a DC power supply, you can still power the board through a USB port. See the Powering your board over USB section for details.

2. A green LED should light up on the expansion board. If it doesn't, check your connection.

3. Find the microswitch in between the USB ports on the expansion board. Switch the microswitch down towards the micro-USB ports, if it isn't already.
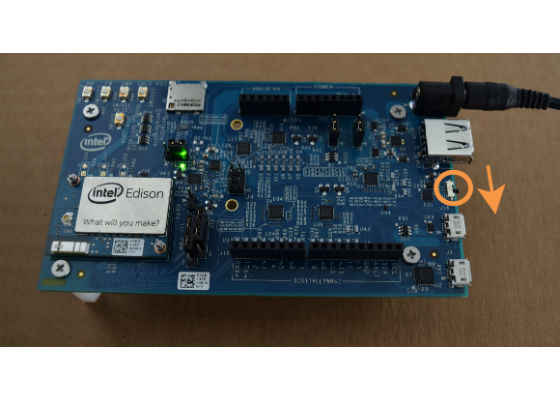
4. Plug in one of the micro-USB cables to the middle USB connector on the expansion board.

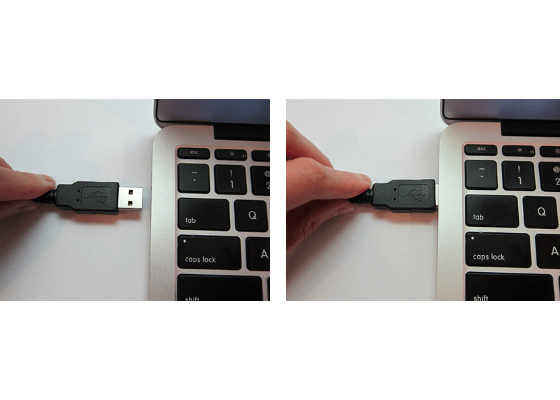
5. Plug in the other end of the USB cable to your computer.
How do you know when the board is ready?
You will know that your board is fully initialized when your computer mounts a new drive (much like inserting a SD card into your computer). If you do not see a new drive, or the LED light (DS1 on the Arduino expansion board) is occasionally turning on and off, check the connection of your power supply.

1. Plug the other end of the USB cable in to your computer.
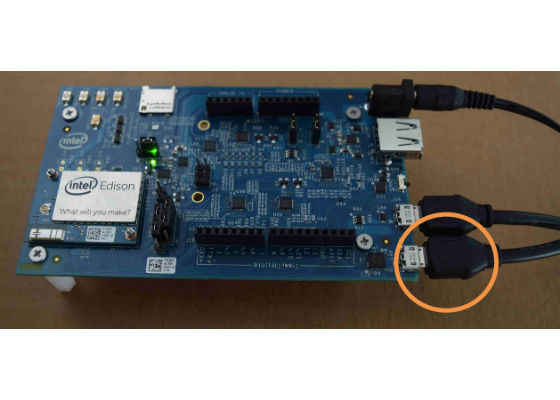
2. Your Intel Edison board is now assembled!
The URL to setup your board with Brillo is http://www.code-labs.io/codelabs/brillo-hello-leds-edison/ . Make sure you have requested an invite on the main Brillo page (https://developers.google.com/brillo/?hl=en ) , and have been granted access. If it still isn't working for you make sure you are signed into the right Google account. You could also try incognito mode on your browser.
For more such intel IoT resources and tools from Intel, please visit the Intel® Developer Zone
Source: https://software.intel.com/en-us/articles/getting-started-with-brillo-on-the-intel-edison-board/


