
LIDAR Report
In this post we are going to talk about Sweap (Figure 1), a scanning laser range finder product made by Scanse. Another name for scanning range finder is LIDAR (LIght Detection And Ranging) that we are going to use throughout this post. As it is apparent from the name, LIDAR is being used for measuring the distance between itself and objects around it. This feature makes LIDAR perfect for our application of drone navigation.
In autonomous navigation we would like to know the distance between the drone and objects surrounding it. This way we can give specific commands to the drone in order to avoid collision. LIDAR sweeps the surrounding environment with some frequency and calculates the distance between the LIDAR and any object in its vicinity. It should be noted that the object should be in a range that the drone is capable of scanning. For our case, Sweap is able to detect objects within the range of 40 meters. Another feature of the LIDAR that is important for us is the sample rate. It is the rate at which LIDAR updates its scanning data. Sweap is able to do this with an adjustable rate that goes up to 1000 samples per second. Because the LIDAR’s scanner rotates and scans the surrounding environment, Sweap has 360 degrees of scanning.
Sweap LIDAR can be easily connected to a laptop or any hardware with a USB port. After connection, it starts rotating and scanning the objects surrounding it. There are multiple ways to read the data that is being captured by the LIDAR. Here I talk about two ways that I explored this, the first one is Sweep Visualizer which is a graphical user interface software provided by Scanse, the second one is the python library called sweeppy[1]. Here we will provide a short description of each one of these approaches.
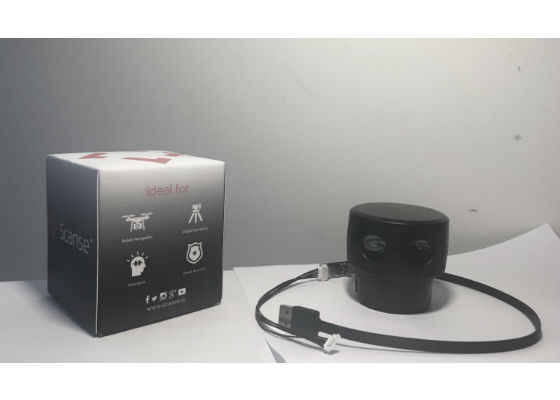
Figure 1. Sweap LIDAR and USB connection cable
Scanse Sweep Visualizer
Sweep Visualizer is graphical user interface provided by Scanse. The usage is straightforward and easy to follow. Once you open the software on your operating system (Mac OS in my case), it automatically starts to scan the USB ports in order to find the LIDAR and automatically gets connected to the LIDAR. It also gives you flexibility for choosing your own desired scanning frequency. The user can start recording the scan data by pressing the record button.
The user can either visualize the scanned environment on the software or record the data in the form of .csv file and use the recorded file for later computations. Figure 2 shows a scene that Sweep Visualize is visualizing on the software and it provides pretty useful information about the scene. You can see a more detailed description about each part of the scanned environment in Figure 2. As it is shown the LIDAR is pretty good at recognizing the details of the surrounding objects. The red dots are showing the room that LIDAR is enclosed by, however there are some other details in the room that block the LIDAR from scanning the room in a perfect rectangle shape. The room is 11.5 feet by 14.7 feet. If you consider the room as a cube, the drone is hung in the middle of the cube and is located in the point that is marked by the blue pin in Figure 2.
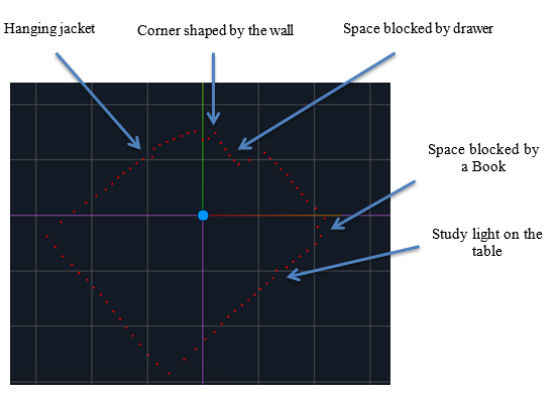
Figure 2. Room scanned by LIDAR
There is also another visualization of objects around LIDAR in which I intentionally surrounded the LIDAR by 7 books. Each book is 12 inches away from LIDAR. Figure 3 shows a visualization of the new scanned environment. In order to provide more details, Figure 4 shows the zoomed-in version of Figure 3. As can be seen in Figures 3 and 4, there are 7 different clusters of red points that correspond to 7 books that are around the LIDAR. There are also some other red dots around the book which correspond to the cluttered space behind the books. Since there is space between the books, LIDAR is able to scan those as well, which is not our interest at the current stage.
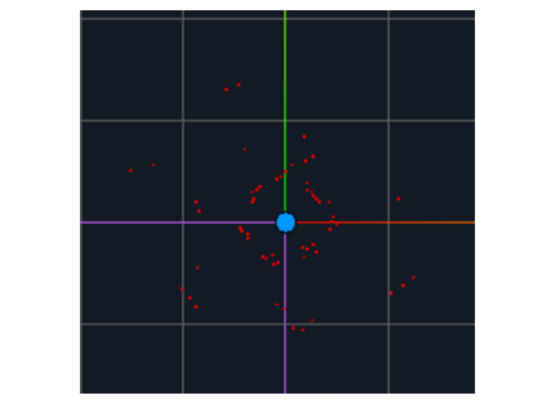
Figure 3. LIDAR surrounded by 7 books
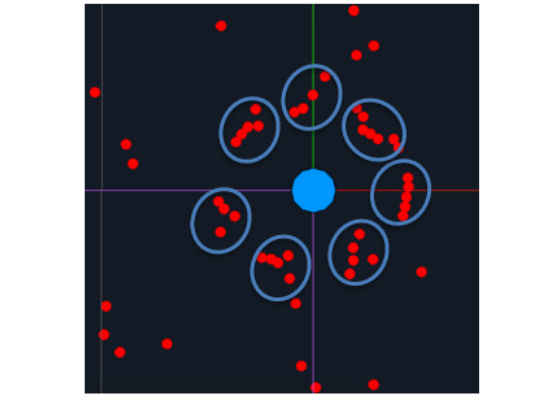
Figure 4. Zoomed version of Figure 3
Sweep Visualizer also provides numerical data points. It outputs a .csv file that corresponds to the points around the LIDAR. The output data is in both polar and Cartesian coordinates.
Sweeppy
In our application, we want to be able to directly use the LIDAR’s measured data for navigating the drone. As a result, Sweep Visualizer is not the best option because it cannot be integrated in our drone software system. Ideally we want to be able to have access to LIDAR data in our drone navigation software pipeline.
Using sweeppy is pretty straightforward; all we have to do is to install the Python package. Once the package is installed, we can call LIDAR and read the measured data from it. The data format that sweepy returns is pretty simple. It returns a list of measurements and each of them is in the following format.
Single Measurement = (Angle, Distance, Signal Strength)
The returned angle, distance, and signal strength are measured in milli-degrees, centimeter, and range (0,255) respectively. Signal strength is the strength or confidence of the range of measurement.
More details about how to use sweeppy can be found here.
Once the data is read from the LIDAR, we can use it for navigating our drone. Since we have the distance between the LIDAR and the objects surrounding it, we can provide commands to the drone in order to avoid collision with the objects around it. It should be noted that the LIDAR is attached to the drone.
Conclusion
In this post we talked about utilizing LIDAR for scanning objects around it. Our main interest is to attach this LIDAR to a drone. This is a very powerful tool that enables us to navigate the drone in a cluttered environment and be aware of the obstacles within the range of 40 meters.
It should be noted that, there will be more uncertainties in the real world when the LIDAR is connected to the drone. Drone movement, vibrations, and our calculations cause this uncertainty.
Next Steps
Right now I’m waiting for my “Intel aero ready to fly” drone. After that, I would like to connect the LIDAR to the drone and test it while attached to the drone and see how can we use LIDAR data to navigate the drone. In order to do so, we need to use a Kalman filter so that we can track the objects around the drone and take into account their possible position at each time step so that the drone can avoid colliding with them. It might also be helpful to know the movement speed of the objects around the drone, as a result I will explore using radars alongside LIDARs.
For more such intel IoT resources and tools from Intel, please visit the Intel® Developer Zone
https://software.intel.com/en-us/blogs/2017/12/19/live-video-stream-object-classification-with-intel-movidius-ncs-update-2