
verview
This guide will teach you how to run a sample sketch on your Intel® IoT board using the Arduino IDE. These instructions are geared toward the Intel® Edison module with the Arduino* Expansion Board, but can also be applied to the Intel® Galileo board.
Requirements
- Installed the Arduino* IDE
- Assembled and powered on your Intel® IoT board. For the Intel® Edison board, see Assemble your Intel® Edison board. For the Intel® Galileo board, see Intel® Galileo Board Assembly.
- Installed necessary drivers (Windows Only) For the Intel® Edison board, see Install Intel Edison Windows Drivers. For the Intel® Galileo board, see Install Intel Galileo Windows Drivers.
Setup
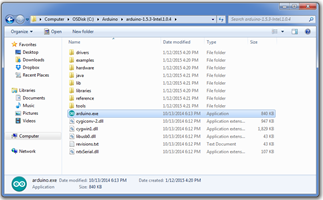
1. Run Arduino.
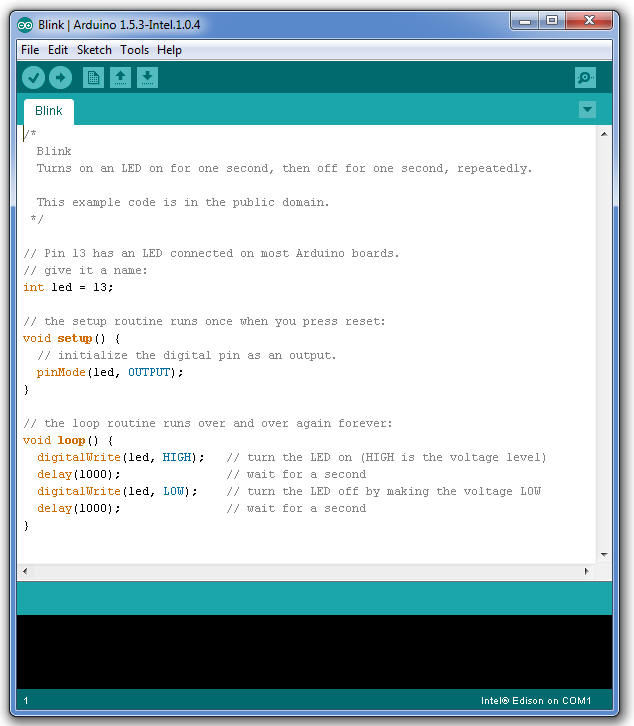
2. Open the LED blink example sketch: File > Examples > 1.Basics > Blink. You should see a window like in Figure 2.
3. Choose Tools > Board, then select your board, like in Figure 3.

4. Select the serial device of the board from the Tools > Serial Port menu. See the instructions below for your specific OS.
Note: The easiest way to find what port the board is using is by disconnecting your board, restarting the IDE, and re-opening the menu. The entry that disappears should be the Intel Edison board. Reconnect the board, restart the IDE, and select that serial port.
- Windows
- Mac OS X
- Linux
On Windows*
One easy way to find what port the board is using is by disconnecting your board, restarting the IDE, and re-opening the menu; the entry that disappears should be the Intel® Edison board. Reconnect the board, restart the IDE, and select that serial port.
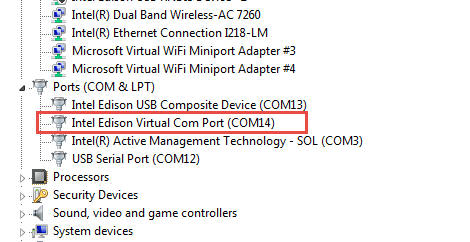
The port is likely to be COM3 or higher and is called "Intel Edison Virtual Com Port" in the Device Manager, like in Figure 4. It is NOT "USB Serial Port". COM1 and COM2 are usually reserved for hardware serial ports. Select your COM port, as shown in Figure 5.

Now the bottom right should match the COM port number of the 'Intel Edison Virtual Com Port (COM#)" from the Device Manager, like in Figure 6.

Once you have selected your port, continue to upload the sketch to your board.
On Linux*
The port is likely to be /dev/ttyACM0, like in Figure 7.

Note: If the /ttyACM* port is not available, here are several reasons why
- Modem manager is using the port. When the port becomes active, modem manager can claim the port, blocking the IDE's access to the port. The exact command to remove it will depend on your Linux distribution. For example, the command
1 sudo apt-get remove modemmanager
may work.
- The /ttyACM port was not created automatically when you plugged in your board. To add the port do the following:
a. Create a file etc/udev/rules.d/50-arduino.rules
b. Add the following to the file
1 KERNEL=="ttyACM[0-9]*", MODE="0666"
c. Restart the udev with the following command
1 sudo service udev restart
If you are using a virtual machine (VM), you may need to reboot Linux within the VM.
- If you still are not able to see the port in the IDE, it may be because your user hasn't been added to the dialout group. Add yourself to the dialout group by
1 sudo adduser your_user_name dialout
Then restart the IDE and try again.
Once you have selected your port, continue to upload the sketch to your board.
On Mac OS X*
The port is likely to be /dev/cu.usbmodemxxxx, like in Figure 8.

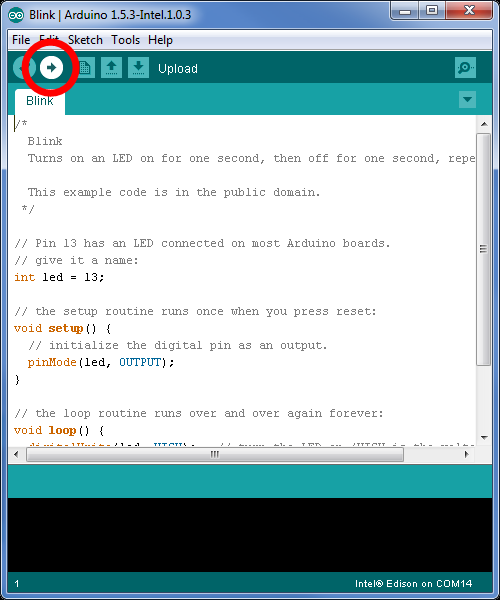
5. Click the Upload button in the upper left to load and run the sketch on your board, like in Figure 9.
Once you have selected your port, continue to upload the sketch to your board.
Uploading the sketch to your board
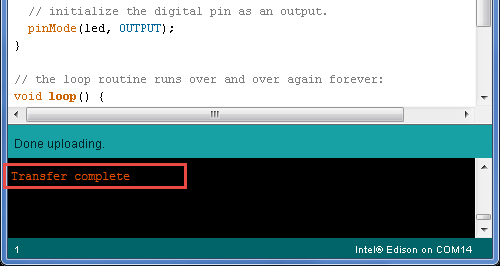
1. Click the Upload icon in the upper left to load and run the sketch on your board.
2. You should see Done Uploading and Transfer complete messages when your sketch has uploaded.
3. The DS2 LED on your board should now blink on or off every second.

Next Steps
If you have the Grove Starter Kit Plus Intel IoT Edition, here's how you add sensors:
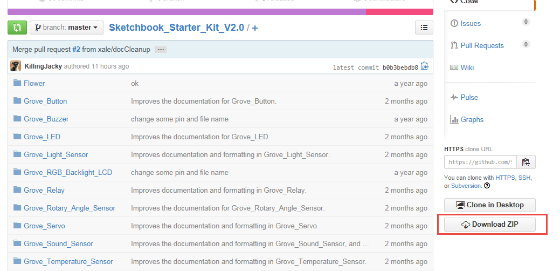
1. Navigate to the Seeed-Studio github repo, https://github.com/Seeed-Studio/Sketchbook_Starter_Kit_V2.0.
2. Click Download ZIP (see Figure 12).
3. Unzip, and copy to /libraries folder in your Arduino* folder.
4. remove the period "." in the folder name to make it: "Sketchbook_Starter_Kit_V20"
5. Restart the Arduino* IDE.
6. Connect your desired sensor and run the code.
Troubleshooting
Check the FAQs on the Arduino* IDE Troubleshooting and FAQ guide.
Try searching the forums for Arduino* related topics. Here's a predefined Arduino* search.
For more such intel IoT resources and tools from Intel, please visit the Intel® Developer Zone
Source: https://software.intel.com/en-us/articles/intel-iot-platforms-blink-led-arduino-ide/


