
Microsoft PowerToys is a set of free system utilities designed for power users to tune and streamline their Windows experience for greater productivity. Originating from the Windows 95 era, these tools have been modernized for Windows 10 and Windows 11, providing functionalities that are not available by default. From enhancing window management to offering quick access to system settings, PowerToys can significantly improve your efficiency. Whether you’re a seasoned professional or a casual user, these tools are designed to make your life easier. Let’s dive in!
How to Install PowerToys
Before we explore the features, let’s get PowerToys installed on your system:
- Visit the Official GitHub Page: Go to the Microsoft PowerToys GitHub releases page at https://github.com/microsoft/PowerToys/releases/latest.
- Download the Installer: Scroll down to the “Assets” section and download the PowerToysSetup-<version>.exe file.
- Run the Installer: Open the downloaded file and follow the on-screen instructions to install PowerToys.
- Launch PowerToys: After installation, open PowerToys from the Start menu or system tray.
1. Color Picker
What It Does
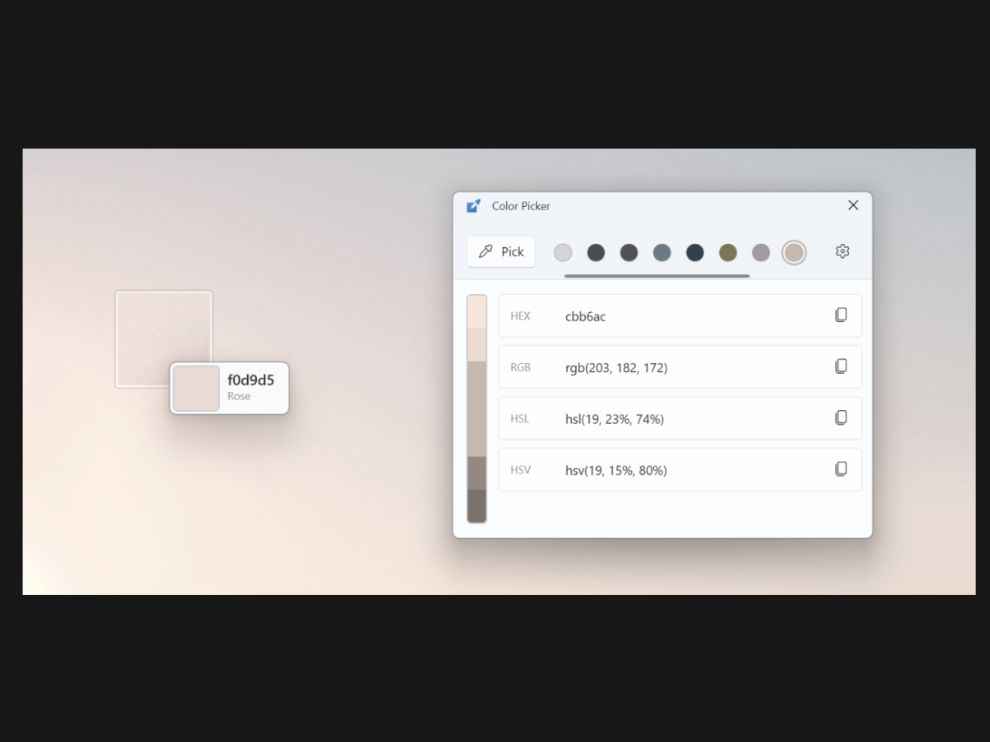
Color Picker is an efficient tool that allows you to identify and use any color visible on your screen. It captures the color code of any pixel, which is invaluable for graphic designers, web developers, and digital artists who need to match colors precisely. Instead of using external software or taking screenshots to identify colors, Color Picker provides instant access to color values in multiple formats.
How to Use It
- Enable Color Picker:
- Open PowerToys and select Color Picker from the sidebar.
- Toggle the switch to On.
- Use the Shortcut:
- Press Windows + Shift + C to activate the Color Picker.
- Pick a Color:
- Hover over any part of your screen to see the color code.
- Click to select the color.
- Copy Color Codes:
- After selecting, a window will display various color formats (HEX, RGB, HSL).
- Click the copy icon next to the format you need.
Example
Imagine you’re working on a design project and you come across a website with a color scheme you love. You want to replicate one of the colors for your own work:
- Activate Color Picker by pressing Windows + Shift + C.
- Hover over the desired color on the website.
- Click to select it, revealing its exact color codes.
- Copy the HEX or RGB value and paste it into your design software to ensure an exact match.
This eliminates guesswork and ensures color consistency across your projects.
2. Always on Top
What It Does
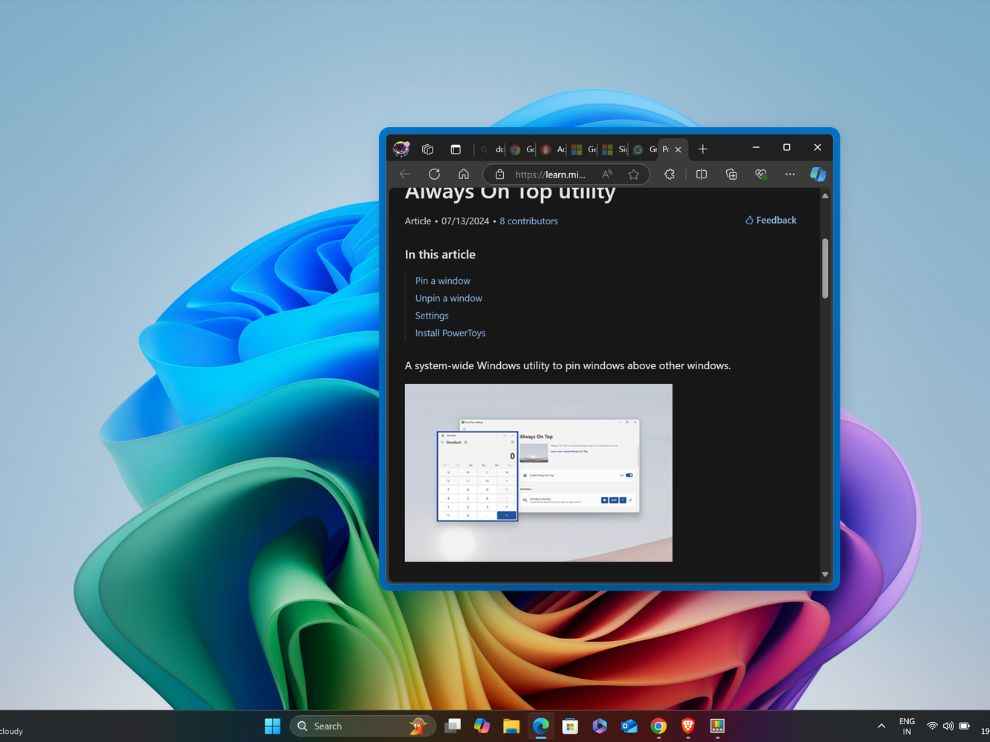
Always on Top is a feature that enhances multitasking by allowing you to pin any window so it stays above all others. This is particularly useful when you need constant access to a specific application, such as a calculator, chat window, or document, while working on other tasks. It helps prevent important windows from getting buried under a stack of other open applications.
How to Use It
- Enable Always on Top:
- Open PowerToys and select Always on Top.
- Toggle the switch to On.
- Use the Shortcut:
- Click on the window you want to pin.
- Press Ctrl + Windows + T.
- Identify Pinned Windows:
- A colored border will appear around the pinned window.
- Unpin the Window:
- Press Ctrl + Windows + T again while the window is active.
Example
Suppose you’re attending an online meeting and taking notes simultaneously. You can pin your note-taking app:
- Open your notes application (e.g., Notepad or Microsoft Word).
- Click on the notes window.
- Press Ctrl + Windows + T to keep it on top.
- Now, as you navigate through the meeting agenda or shared screens, your notes remain visible, ensuring you don’t miss any important details.
This feature simplifies multitasking by keeping essential tools within immediate reach.
3. Workspaces

What It Does
Workspaces in PowerToys allows you to create and manage groups of applications that you frequently use together. Instead of opening each application individually every time you start working, Workspaces launches all your selected apps simultaneously and arranges them as you prefer. This is ideal for users who have routine tasks involving multiple programs.
How to Use It
- Enable Workspaces:
- Open PowerToys and select Workspaces.
- Toggle the switch to On.
- Set Up Your Workspace:
- Open all the applications you typically use.
- Create a Workspace:
- Press Windows + Ctrl + Backtick (\)`.
- Click on Create Workspace.
- Name your workspace and click Capture.
- Launch the Workspace:
- Press Windows + Ctrl + Backtick (\)`.
- Select your workspace and click Launch.
Example
Imagine you’re a content creator who regularly uses a text editor, web browser, and image editor:
- Open Microsoft Word, Google Chrome, and Adobe Photoshop.
- Arrange them on your screen as desired.
- Create a workspace named “Content Creation.”
- Next time, launch all three applications and their layouts instantly by selecting this workspace.
Workspaces streamline your startup routine, saving you valuable time and ensuring a consistent working environment.
4. Find My Mouse

What It Does
Find My Mouse is a utility that helps you quickly locate your mouse cursor, a feature particularly useful for users with large monitors or multiple display setups. When activated, it dims the screen and highlights the cursor’s position with a spotlight effect, allowing you to find it instantly. This reduces frustration and enhances efficiency, especially during presentations or intensive tasks.
How to Use It
- Enable Find My Mouse:
- Open PowerToys and select Mouse Utilities.
- Toggle Find My Mouse to On.
- Use the Shortcut:
- Double-tap the Ctrl key.
- Locate Your Cursor:
- A spotlight effect will highlight your cursor location.
Example
During a presentation, you might lose track of the cursor while navigating slides or demonstrating software:
- Double-tap Ctrl whenever you need to find the cursor.
- The screen will highlight the cursor’s position, allowing you to proceed without delay.
This feature ensures smooth presentations and reduces interruptions caused by misplaced cursors.
5. Shortcut Guide

What It Does
The Shortcut Guide is an on-screen overlay that displays all the Windows key shortcuts available in your current context. It’s an excellent learning tool for users who want to become more proficient with keyboard shortcuts but find it challenging to remember them all. By providing a quick reference, it encourages the use of shortcuts, which can significantly speed up your workflow.
How to Use It
- Enable Shortcut Guide:
- Open PowerToys and select Shortcut Guide.
- Toggle the switch to On.
- Use the Shortcut:
- Press Windows + Shift + / (forward slash).
- View Shortcuts:
- An overlay will display a list of useful shortcuts.
- Execute Shortcuts:
- Hold the Windows key and press any key shown in the guide.
Example
Suppose you’re editing a document and want to quickly switch to the desktop:
- Activate the Shortcut Guide by pressing Windows + Shift + /.
- See that Windows + D shows “Show Desktop.”
- Press Windows + D to minimize all windows and view the desktop.
Over time, using the Shortcut Guide helps you memorize shortcuts, making navigation and task execution faster and more efficient.
6. Image Resizer
What It Does
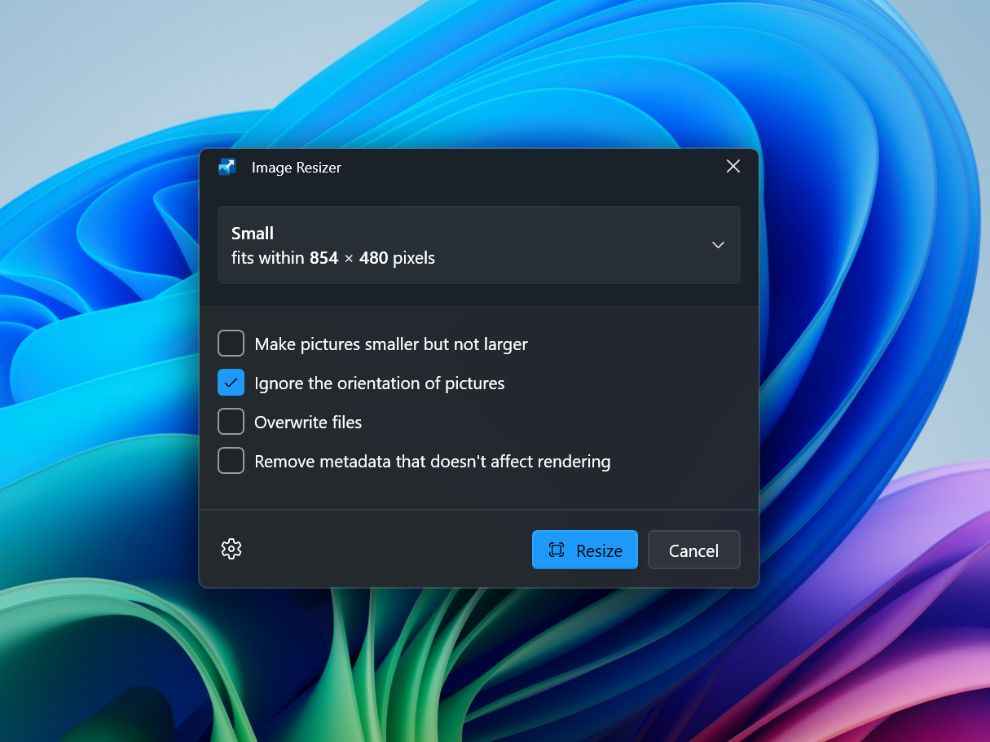
Image Resizer is a convenient tool that integrates into Windows File Explorer, allowing you to resize images directly from the context menu. Whether you need to adjust images for emails, websites, or documents, this utility makes the process quick and straightforward without the need for specialized software.
How to Use It
- Enable Image Resizer:
- Open PowerToys and select Image Resizer.
- Toggle the switch to On.
- Resize Images:
- Right-click on any image file.
- Select Resize pictures.
- Choose Dimensions:
- Select from predefined sizes (Small, Medium, Large) or enter custom dimensions.
- Click Resize.
Example
You’re required to upload a profile picture to a website that specifies exact dimensions:
- Right-click your photo.
- Choose Resize pictures.
- Enter the required width and height.
- Click Resize, and the tool creates a new image with the specified dimensions.
This eliminates the need for complex image editing software and simplifies the resizing process.
7. PowerToys Run
What It Does
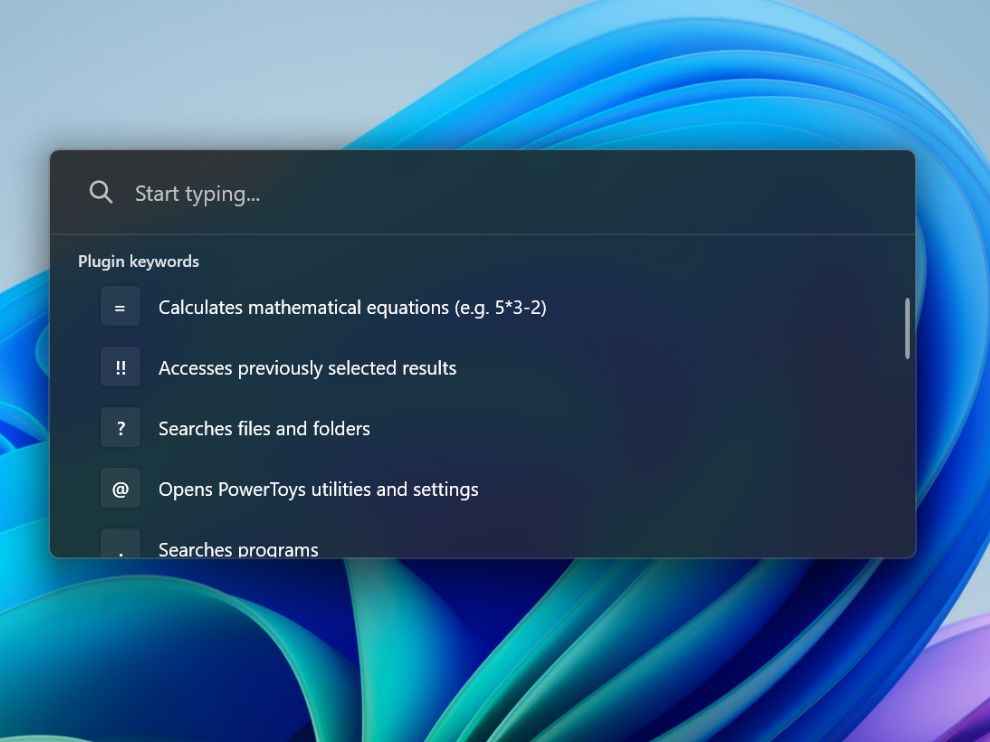
PowerToys Run is a powerful quick-launch utility that replaces the standard Windows Run dialog. It allows you to search and launch applications, files, and folders swiftly. Additionally, it can perform simple calculations, run shell commands, and even search the web, all from a single interface, enhancing your productivity.
How to Use It
- Enable PowerToys Run:
- Open PowerToys and select PowerToys Run.
- Toggle the switch to On.
- Use the Shortcut:
- Press Alt + Space.
- Perform Actions:
- Type the name of an app to launch it.
- Enter a math expression to calculate.
- Type a URL to open it in your default browser.
Example
If you need to quickly open Excel and calculate a value:
- Press Alt + Space.
- Type Excel and press Enter to open the application.
- Alternatively, type 25*4 directly into PowerToys Run.
- The result 100 appears instantly, saving you the time of opening a calculator app.
PowerToys Run centralizes tasks, reducing the need to navigate through menus or open multiple applications.
8. Text Extractor
What It Does
Text Extractor utilizes Optical Character Recognition (OCR) to copy text from any part of your screen, including images, scanned documents, or applications where text copying is not supported. This is incredibly useful for digitizing printed text, extracting quotes from images, or copying error messages from system dialogs.
How to Use It
- Enable Text Extractor:
- Open PowerToys and select Text Extractor.
- Toggle the switch to On.
- Use the Shortcut:
- Press Windows + Shift + T.
- Extract Text:
- Click and drag to select the area containing the text.
- The text is automatically copied to your clipboard.
- Paste the Text:
- Paste it into Notepad, Word, or any text editor.
Example
Suppose you’re reading a PDF document that doesn’t allow text selection, and you need to quote a paragraph:
- Open the PDF and navigate to the desired page.
- Press Windows + Shift + T.
- Draw a rectangle around the paragraph.
- Paste the copied text into your document.
This feature saves time and effort, especially when dealing with non-editable text sources.
Microsoft PowerToys is a treasure trove of productivity tools that can significantly enhance your Windows experience. From precise color selection to efficient window management and quick access to utilities, these features are designed to simplify tasks and save you time. By incorporating PowerToys into your daily workflow, you can perform tasks more efficiently and focus on what truly matters.
Yetnesh Dubey
Yetnesh works as a reviewer with Digit and likes to write about stuff related to hardware. He is also an auto nut and in an alternate reality works as a trucker delivering large boiling equipment across Europe. View Full Profile


